 iPhoneの写真・ビデオ編集機能とマークアップ機能の使い方
iPhoneの
もくじ
写真・ビデオの簡易編集画面を開く
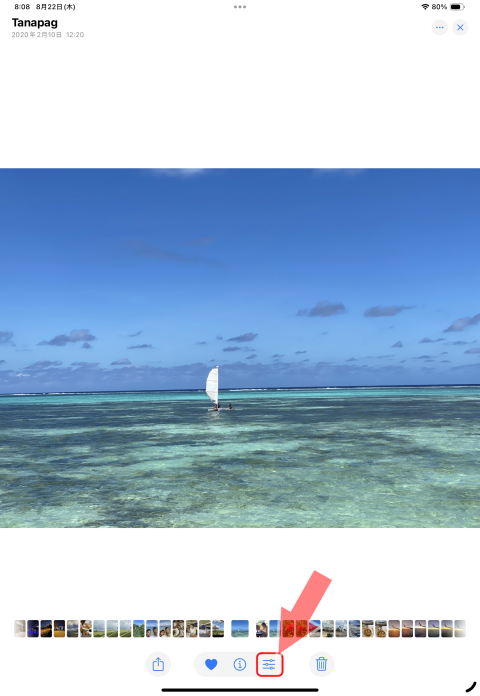

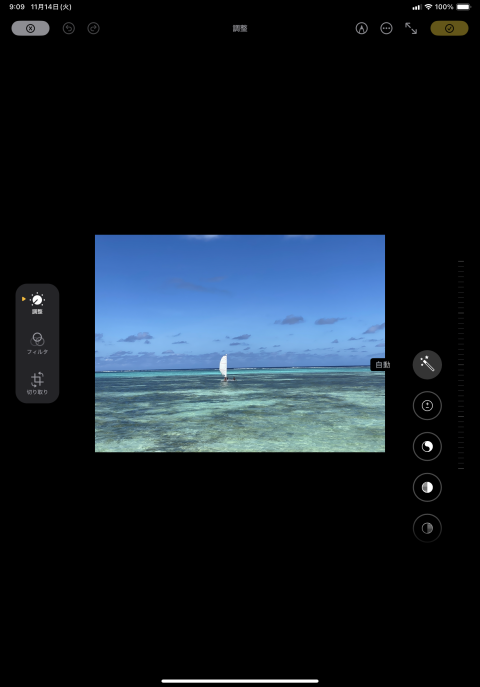
 これが「編集」画面です。
一番下にならぶアイコンで機能を選択すると、その上に詳細機能のメニューがアイコンで表示されます。
これが「編集」画面です。
一番下にならぶアイコンで機能を選択すると、その上に詳細機能のメニューがアイコンで表示されます。
編集した後に、画面の右上に表示される
画面の左上に表示される
なお、iOS7以前にあった「赤目補正」は、iOS8以降はなくなりました(自動的に適用されます)。
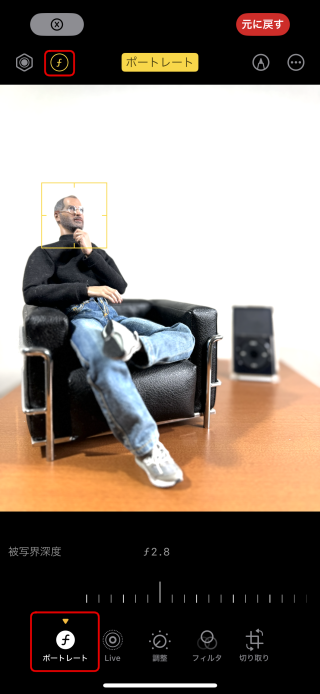 ポートレートモード
で撮影した写真の場合は、このような画面になります。
ポートレートモード
で撮影した写真の場合は、このような画面になります。
iPhoneで背景のボケた写真を撮影する「ポートレートモード」の使い方
 ビデオのフレームレートの変更
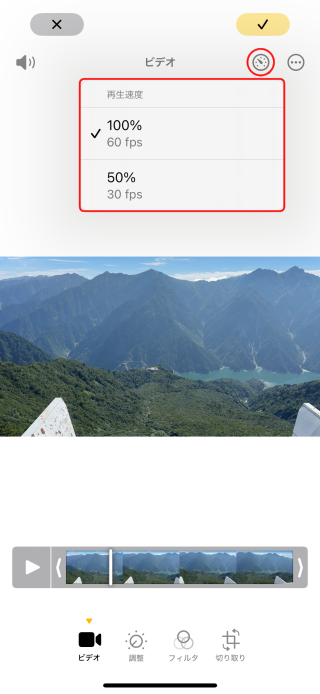 60fps以上の高フレームレートで撮影したビデオを選んで編集画面を開くと、
 パラメーターの調整
逆光や暗いところで撮影したなど、いまいちの撮影条件で撮影した写真の場合に試してみると良いと思います。
あるいはまず最初に自動修正をかけて、そのあと個別のパラメーターを微調整していくのもよいと思います。
なお、各パラメーターの調整効果については iPhoneで写真を編集・加工する方法/写真の「編集」パラメーターの調整方法 をご覧ください。

 フィルタ
フィルタ
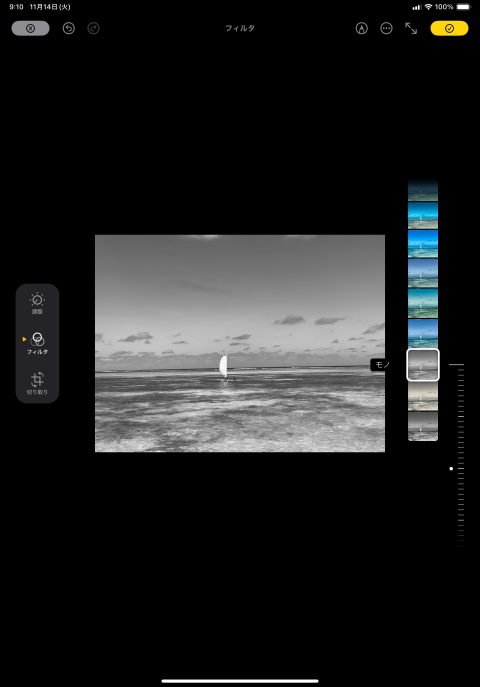
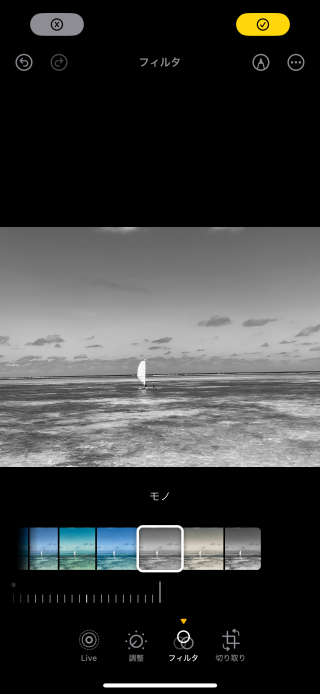
画面下部に各フィルタのサンプル写真が並びます。 いろいろなテーマに従って、色調などが変更されます。 左右(iPhone)または上下(iPad)にフリックして、任意のサンプル写真をタップすると、そのフィルタが適用されます。
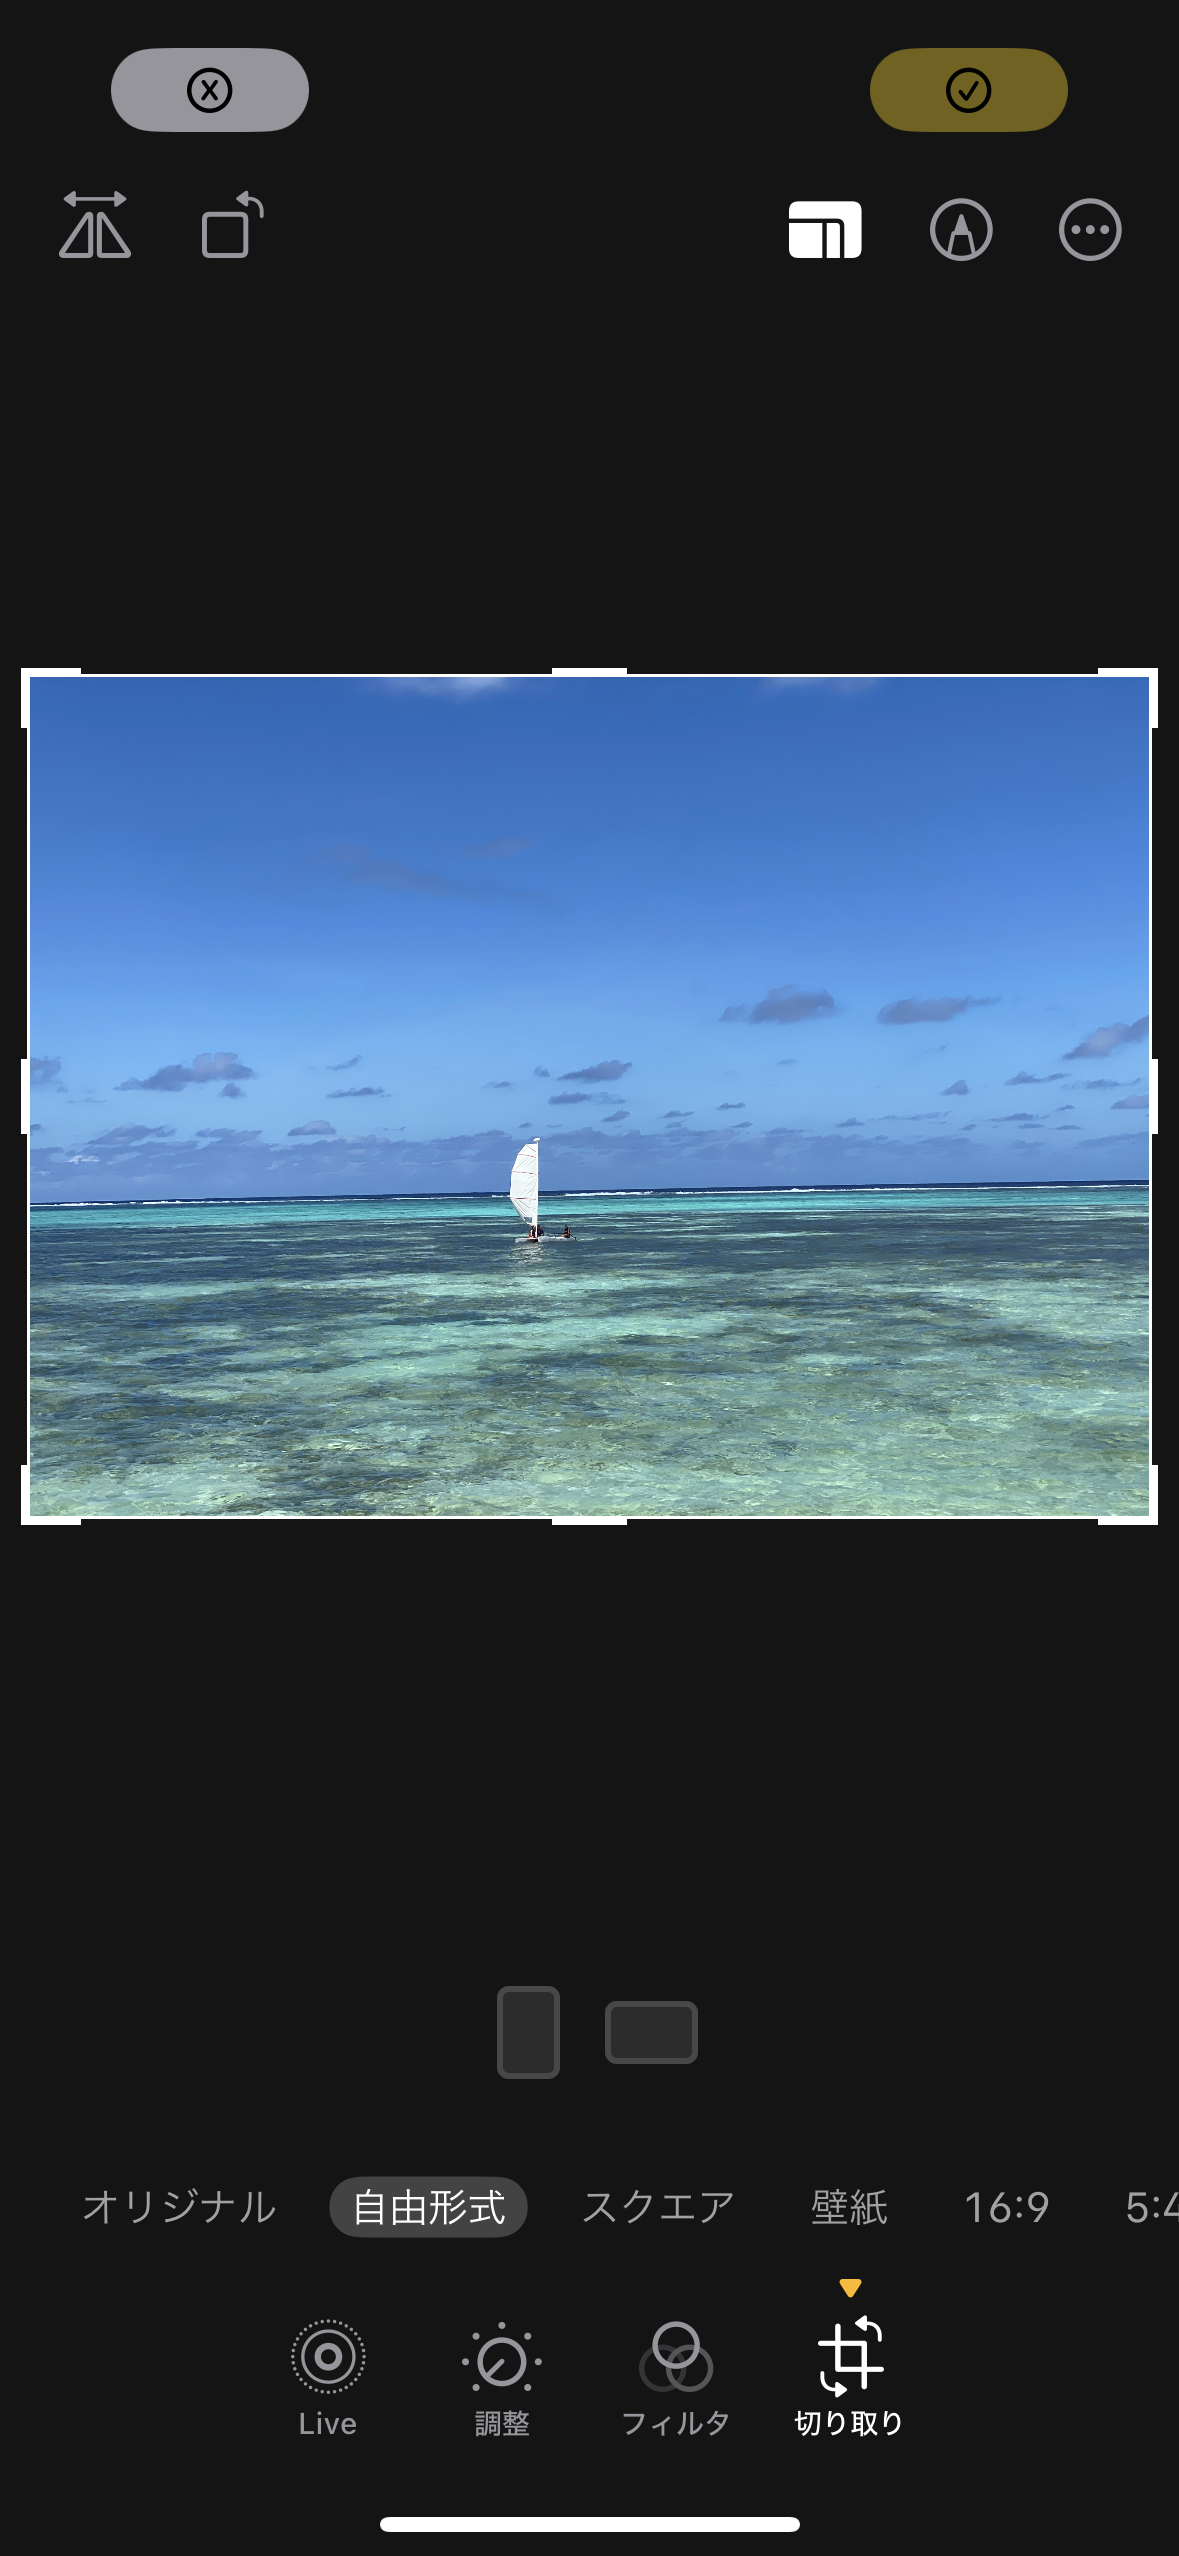
 トリミングと回転
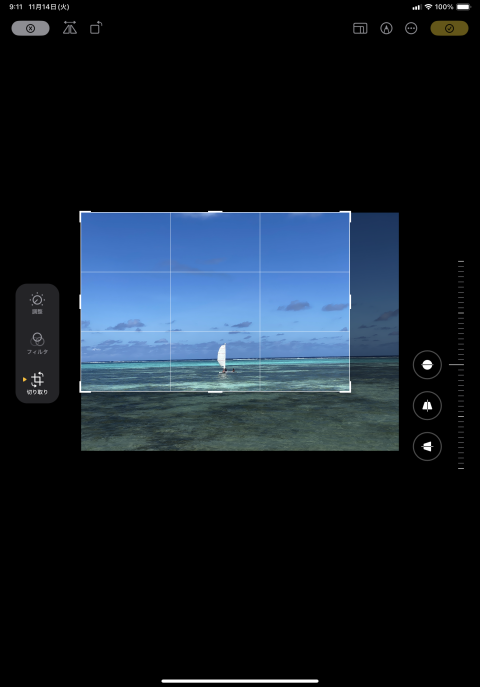
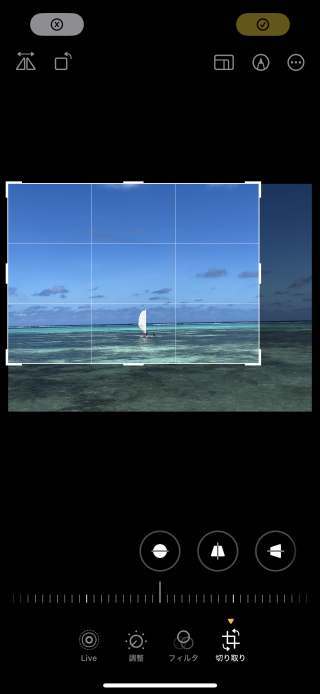
写真の四隅の「カギかっこ」マークをドラックすると、画面に格子状の線が表示され、トリミングする選択範囲が変更できます。
写真を1本指でドラックすると、写真の位置を移動できます。
写真を2本指でピンチオープン/ピンチクローズすると、拡大・縮小できます。
これらのアイコンをタップしたうえで、アイコンの下にある目盛りを左右にドラッグすると、画像が回転/変形します。
なお、iPhoneが画像の傾きを検出した時は、画面上部中央に「自動」ボタンが現れます。これをタップすると、iPhoneの判断した傾きが、自動的に補正されます。
 画面右上にある
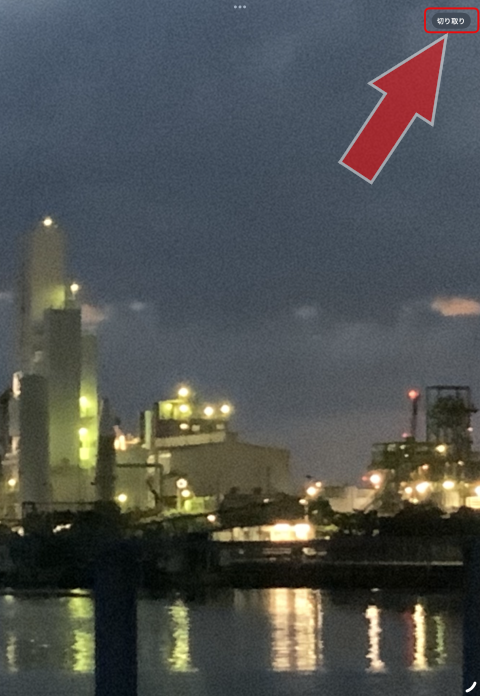
 上で示したトリミング編集画面が開きます。
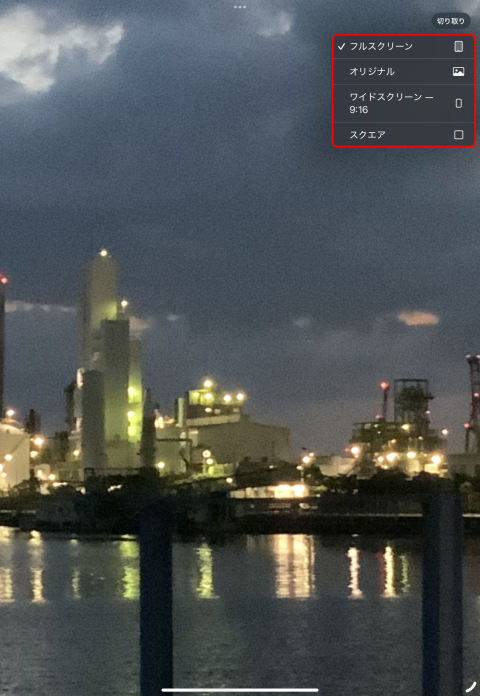
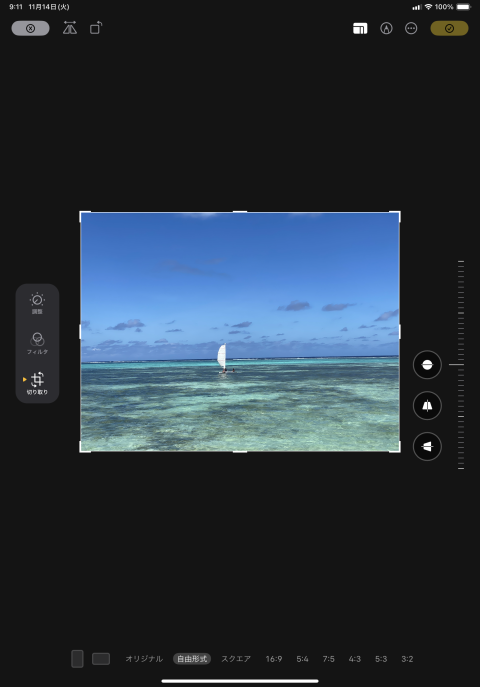
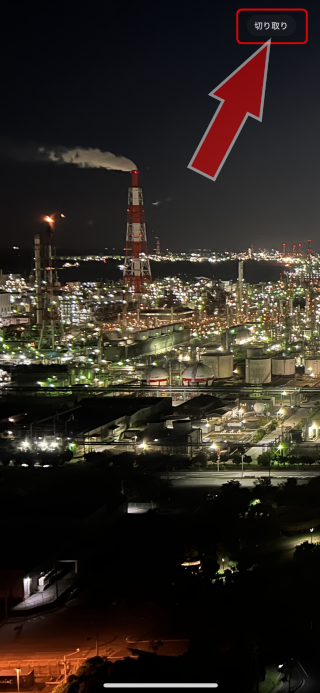
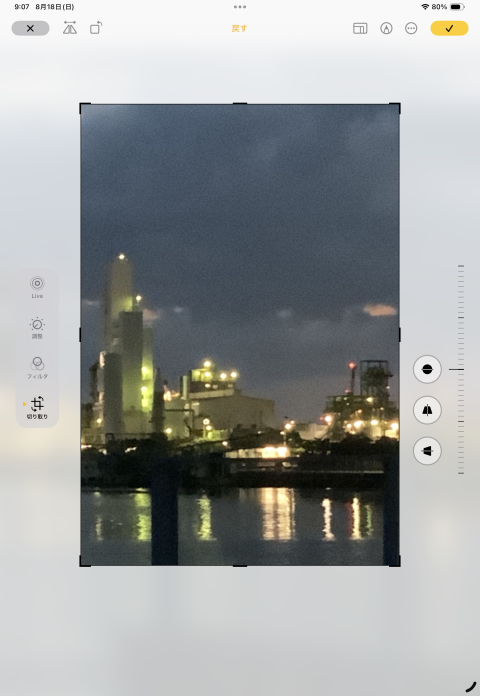
 また「切り取り」を長押しすると、このようなメニューが表示されます。
ワンタッチでアスペクト比(縦横比)を変更できます。
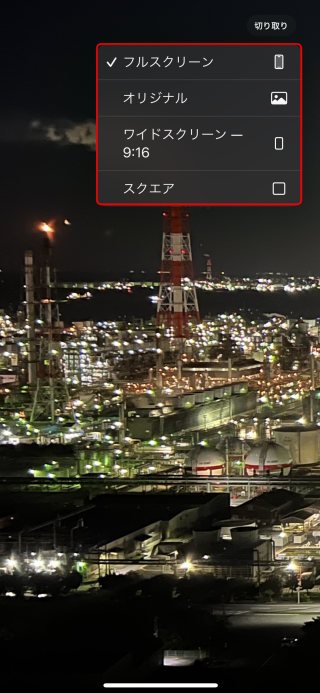
また「切り取り」を長押しすると、このようなメニューが表示されます。
ワンタッチでアスペクト比(縦横比)を変更できます。
 邪魔なオブジェクトを削除するクリーンアップツール
詳しくは下記のページをご参照ください。
AIで写真の不要な部分を消す「クリーンアップツール」の使い方
編集手順を別の写真にも適用する
ひとつの写真に対して行った編集の手順を「コピー」して別の写真に「ペースト(適用)」すると、ワンタッチで複数の写真に対して同じ編集を行うことができます(iOS16以降)。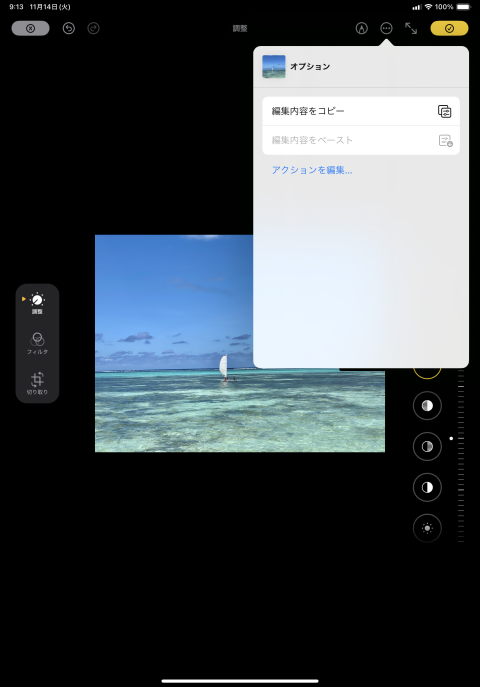
 写真の編集中に、画面右上にある
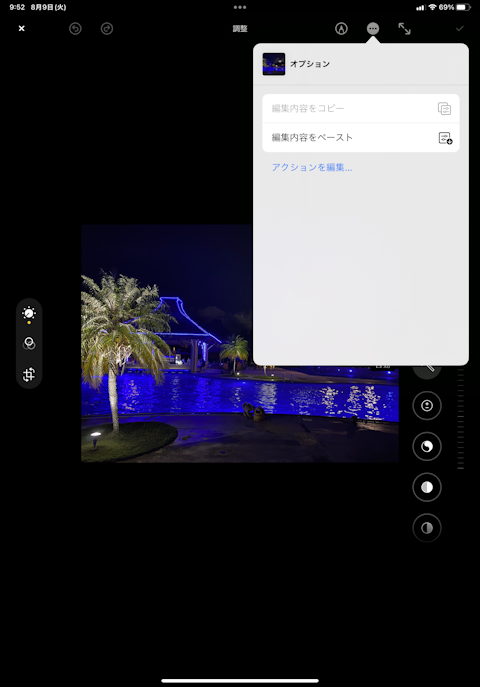
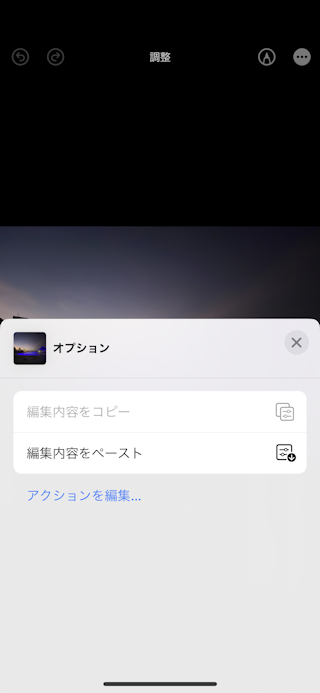 すると、このような画面になります。
編集した内容に関するオプションが表示されます。
必要に応じてオプションを選択したうえで、右上の「コピー」をタップします。
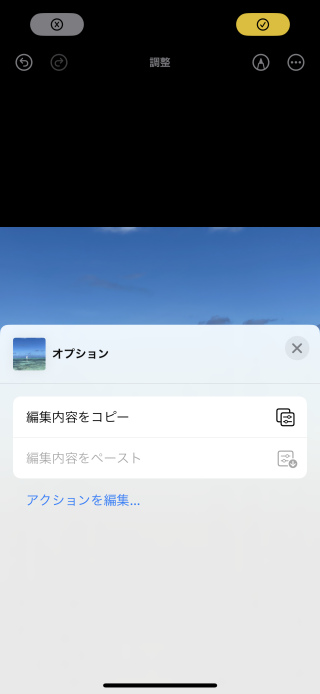
すると、このような画面になります。
編集した内容に関するオプションが表示されます。
必要に応じてオプションを選択したうえで、右上の「コピー」をタップします。
つづいて別の写真を開いて「編集」画面に入り、
なお、「編集内容をコピー」するときに、その編集を行った写真を保存しておく必要はありません。 ある写真で「ためしに」行った編集をコピーしたあと、編集をキャンセルすると、その写真は元のままになります。
写っているものを切り抜く・背景を削除する
 Visual Look Up (ビジュアル・ルックアップ)という機能を使うと、写っている被写体を切り抜き、背景を削除することができます(iOS16以降)。
Visual Look Upの操作方法については 写っているものを判別する・切り抜く・背景を削除する Visual Look Upの使い方 をご覧ください。
写っているものを判別する・切り抜く・背景を削除する Visual Look Upの使い方

マークアップ機能の使い方:写真やドキュメントに文字や絵を書き込む
上に示した簡易編集とは別に、「マークアップ」という、写真やドキュメントに文字や絵を書き込めるツールが搭載されています(iOS10以降)。 このツールは
 アプリの画面右上にある
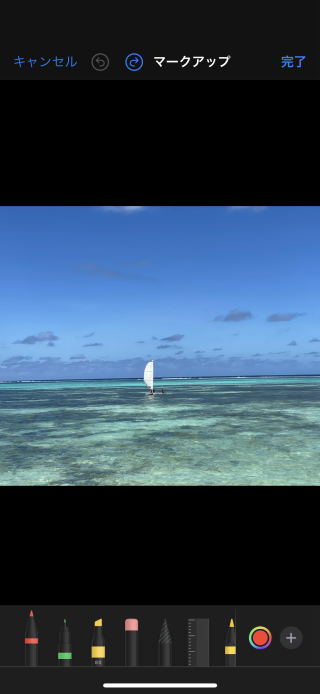
画面下のペンなどが並ぶ部分を左右にドラッグすると、別のツールが現れます。 使いたいツールをタップして選択し、画面を指でなぞると、手書きイラストが描けます。
画面右上の「完了」をタップすると、変更結果が保存されます。 なお、オリジナル画像も保存されており、次に簡易編集画面を起動したときに表示される「元に戻す」をタップすると元に戻ります。
マークアップ画面の下に並ぶツールの種類や順序は、アプリによって変わる場合があります(iOS18以降)。
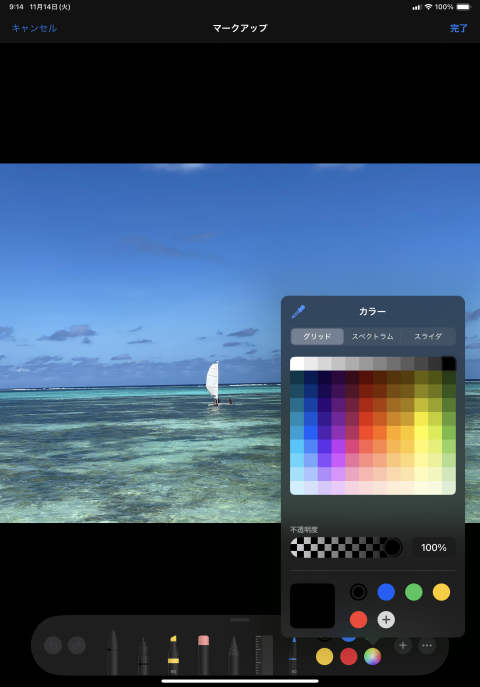
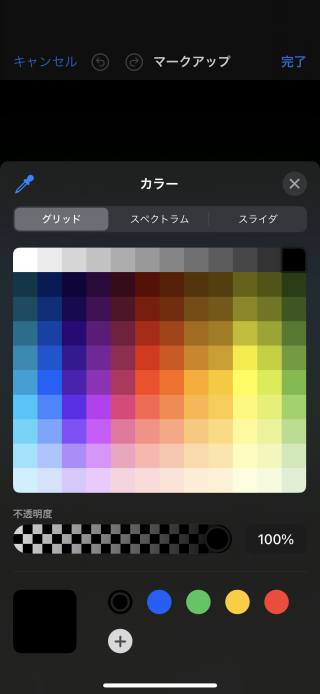 画面右下に並ぶ丸いマークをタップすると、現在選択している描画ツールで使う、ペンの色が選択できます。
基本色の青、緑、黄色、赤のほかに、いろいろな色をいろいろな方法で選択することができます。
スポイトアイコンをタップすると、編集中の写真から、色をピックアップすることもできます。
画面右下に並ぶ丸いマークをタップすると、現在選択している描画ツールで使う、ペンの色が選択できます。
基本色の青、緑、黄色、赤のほかに、いろいろな色をいろいろな方法で選択することができます。
スポイトアイコンをタップすると、編集中の写真から、色をピックアップすることもできます。
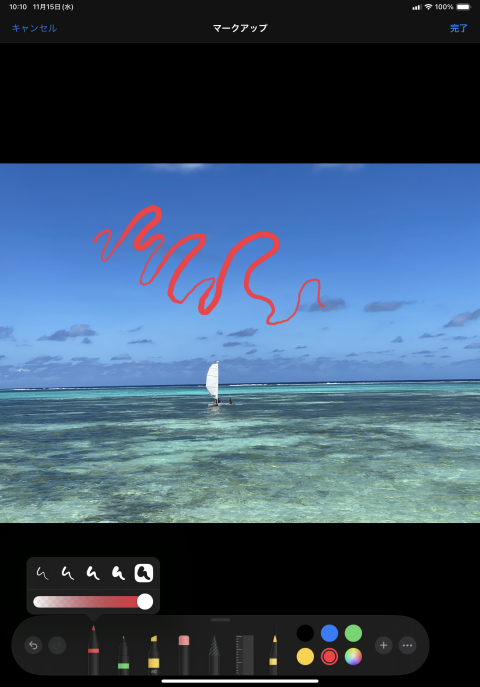
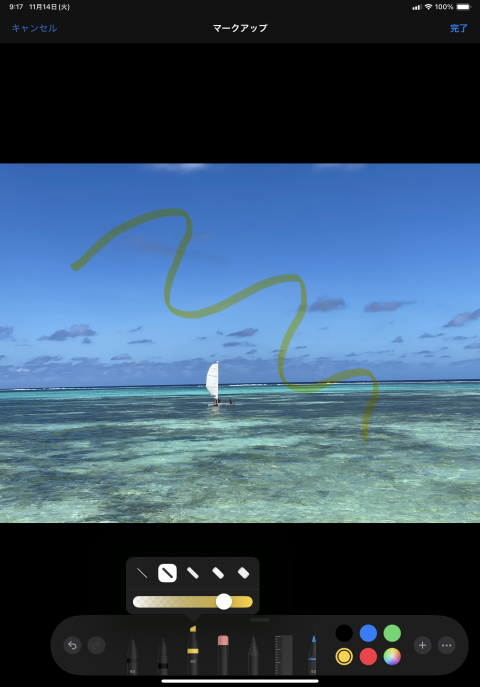
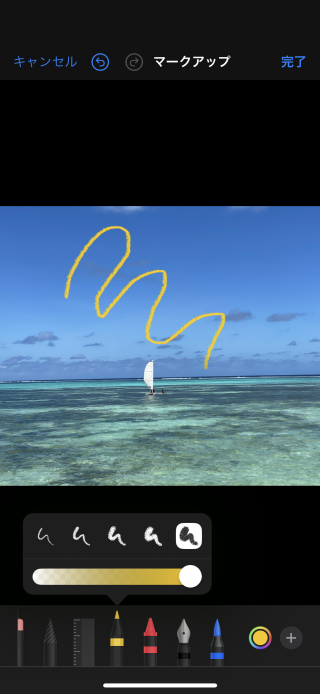
 一番左の描画ツールは「筆圧感知ペン」です。iPadで
Apple Pencil
などの、筆圧を感知できるタッチペンで描画すると、筆圧に応じて太さが変化します。
「筆圧感知ペン」ツールをタップすると、太さと透明度が変更できます。
一番左の描画ツールは「筆圧感知ペン」です。iPadで
Apple Pencil
などの、筆圧を感知できるタッチペンで描画すると、筆圧に応じて太さが変化します。
「筆圧感知ペン」ツールをタップすると、太さと透明度が変更できます。
アップル純正タッチペン Apple Pencil(アップルペンシル)の使い方
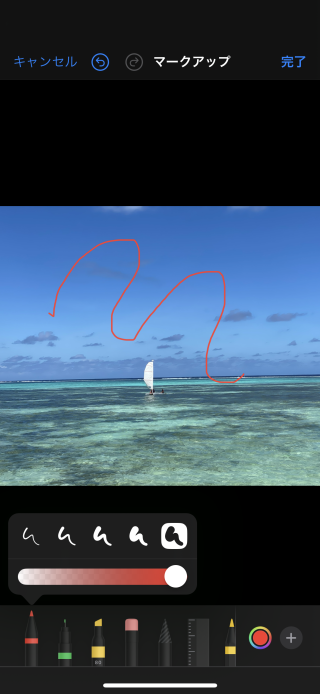
 左から2番目の描画ツールは「ペン」です。
常に同じ太さのラインが描けます。
境界のはっきりしたラインを描くのに適しています。
「ペン」ツールをタップすると、太さと透明度が変更できます。
左から2番目の描画ツールは「ペン」です。
常に同じ太さのラインが描けます。
境界のはっきりしたラインを描くのに適しています。
「ペン」ツールをタップすると、太さと透明度が変更できます。
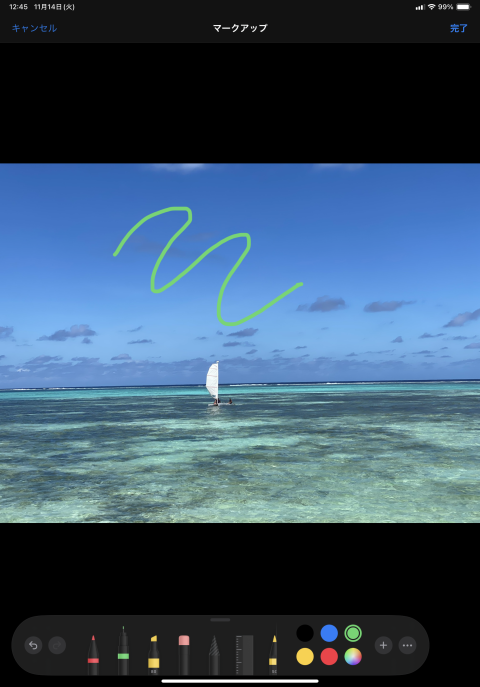
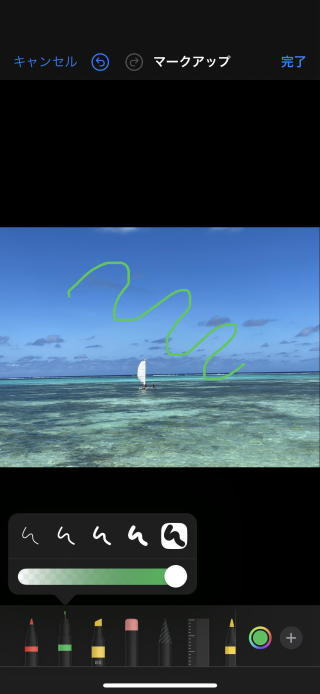
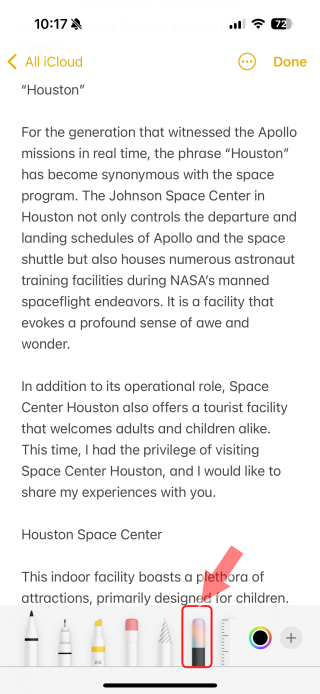
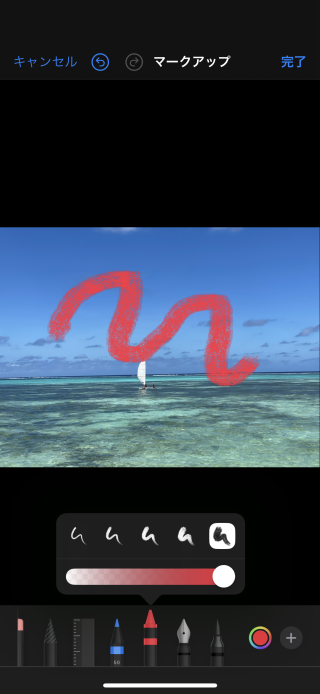
 左から3番目の描画ツールは「マーカー」です。
幅の広いラインを引いたり、塗りつぶしを行うのに適しています。
「マーカー」ツールをタップすると、太さと透明度が変更できます。
左から3番目の描画ツールは「マーカー」です。
幅の広いラインを引いたり、塗りつぶしを行うのに適しています。
「マーカー」ツールをタップすると、太さと透明度が変更できます。
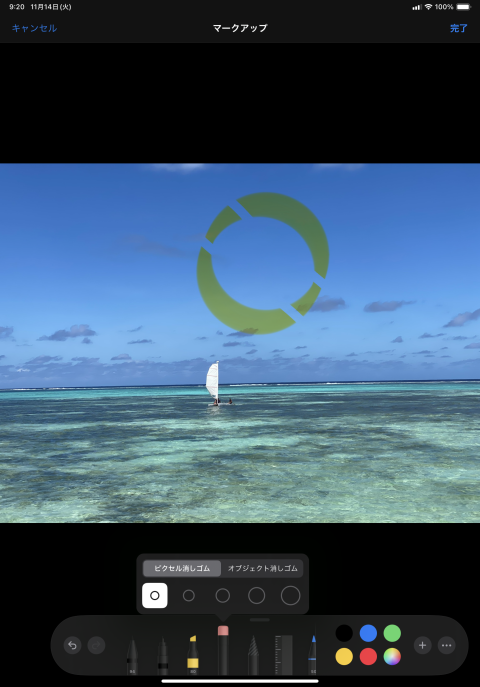
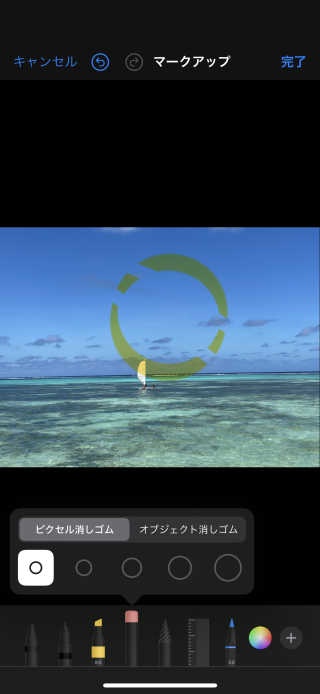 左から4番目の描画ツールは「消しゴム」です。すでに描画したラインなどを指でなぞると、そこだけ消えます。
「消しゴム」ツールをタップすると、消し方と消す幅を選択できます。
「ピクセル消しゴム」は、ドット単位で、なぞった部分だけが消えます。
「オブジェクト消しゴムは」描画したオブジェクト単位で削除できます。
左から4番目の描画ツールは「消しゴム」です。すでに描画したラインなどを指でなぞると、そこだけ消えます。
「消しゴム」ツールをタップすると、消し方と消す幅を選択できます。
「ピクセル消しゴム」は、ドット単位で、なぞった部分だけが消えます。
「オブジェクト消しゴムは」描画したオブジェクト単位で削除できます。
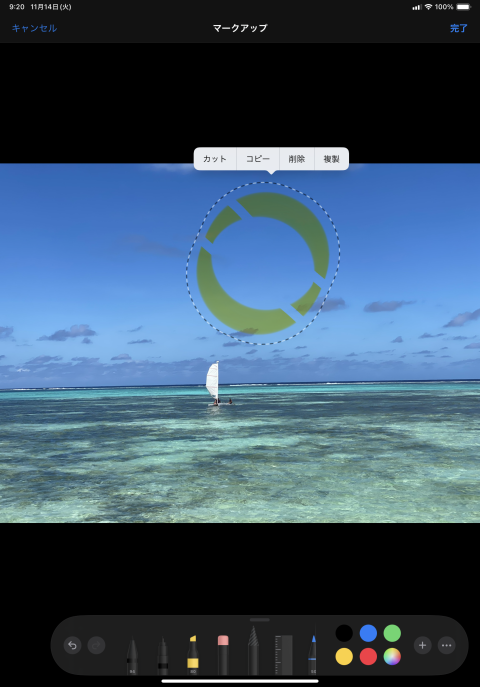
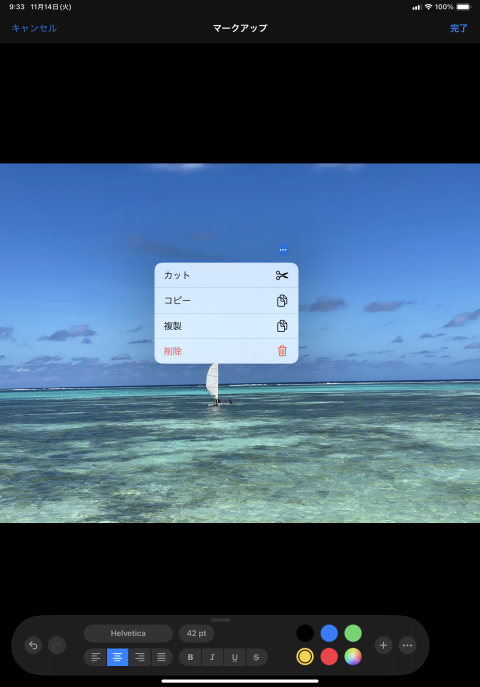
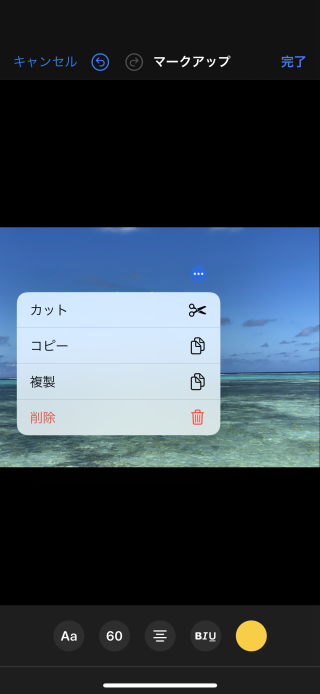
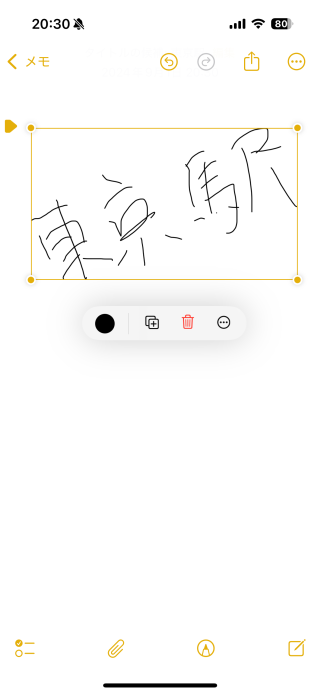
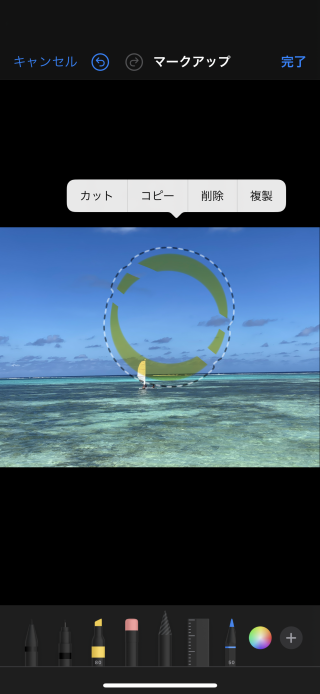 左から5番目の、ペン先が縞模様の描画ツールは「選択」です。
描画したオブジェクトをタップしたり囲むと、それが点線で囲まれます。
そしてこのような画面になります。
左から5番目の、ペン先が縞模様の描画ツールは「選択」です。
描画したオブジェクトをタップしたり囲むと、それが点線で囲まれます。
そしてこのような画面になります。
描画したオブジェクトドラッグすると、移動することができます。 また、色を変更したり、コピー/削除ができます。
 上の画面で
上の画面で
AIで文章に沿った画像を生成・修正する「画像マジックワンド(Image Wand)」の使い方
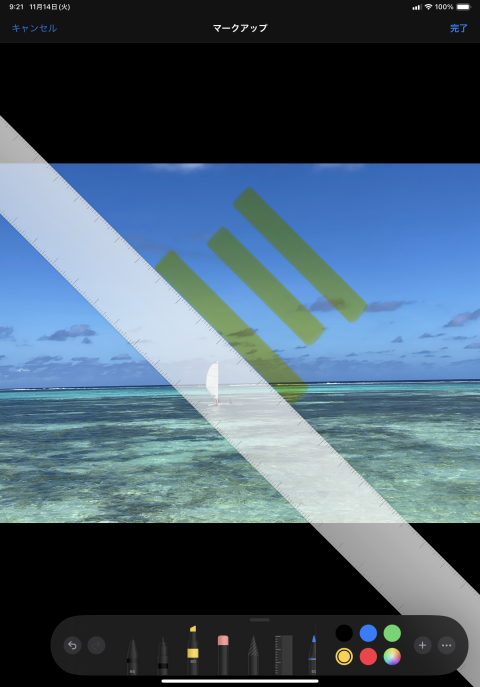
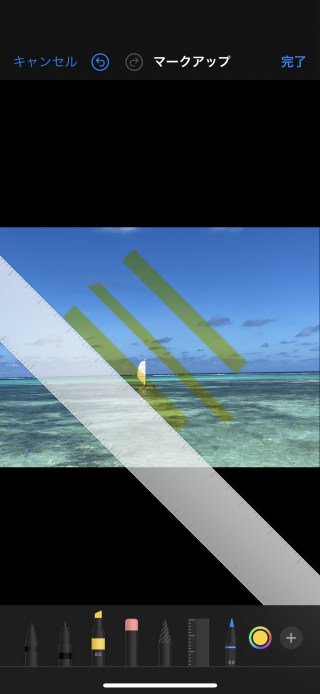 左から6番目の描画ツールは「ものさし」です。
ツールをタップすると画面にものさしが現れます。
左から6番目の描画ツールは「ものさし」です。
ツールをタップすると画面にものさしが現れます。
ドラッグするとものさしの位置が、二本指でねじるようにすると角度が変更できます。 つづいてペンなどの描画ツールを選び、ものさしの端をなぞると、直線が描画できます。
再度画面下部で「ものさし」ツールをタップすると、画面からものさしが消えます。
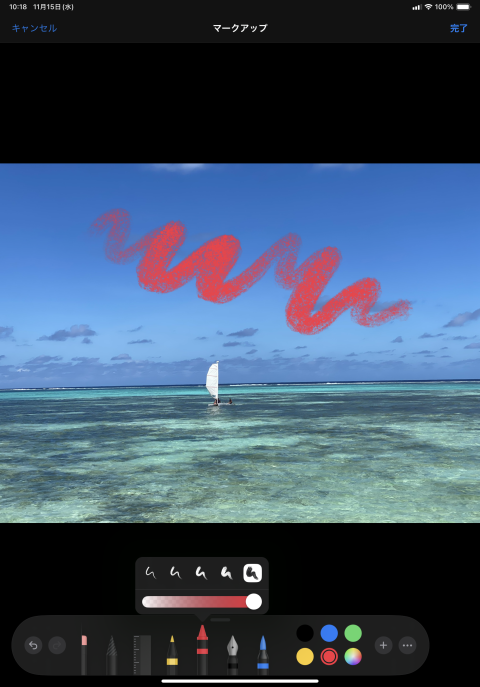
 左から7番目の描画ツールは「細いクレヨン」です。独特のざらざらした質感のラインが引けます。
「細いクレヨン」ツールをタップすると、透明度が変更できます。
筆圧を感知できるタッチペンで描画すると、筆圧に応じて濃さが変化します。
左から7番目の描画ツールは「細いクレヨン」です。独特のざらざらした質感のラインが引けます。
「細いクレヨン」ツールをタップすると、透明度が変更できます。
筆圧を感知できるタッチペンで描画すると、筆圧に応じて濃さが変化します。
 左から8番目の描画ツールは「太いクレヨン」です。独特のざらざらした質感のラインが引けます。
「太いクレヨン」ツールをタップすると、太さと透明度が変更できます。
筆圧を感知できるタッチペンで描画すると、筆圧に応じて太さと濃さが変化します。
左から8番目の描画ツールは「太いクレヨン」です。独特のざらざらした質感のラインが引けます。
「太いクレヨン」ツールをタップすると、太さと透明度が変更できます。
筆圧を感知できるタッチペンで描画すると、筆圧に応じて太さと濃さが変化します。
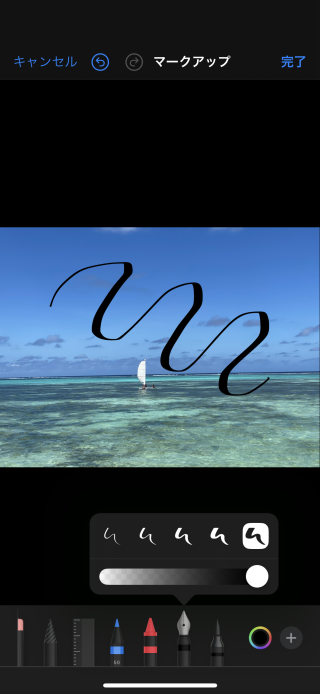 左から9番目の描画ツールは「万年筆」です。
「万年筆」ツールをタップすると、太さと透明度が変更できます。
指またはタッチペンで筆圧を変えて書くと、筆圧に応じて太さが変化します。
左から9番目の描画ツールは「万年筆」です。
「万年筆」ツールをタップすると、太さと透明度が変更できます。
指またはタッチペンで筆圧を変えて書くと、筆圧に応じて太さが変化します。
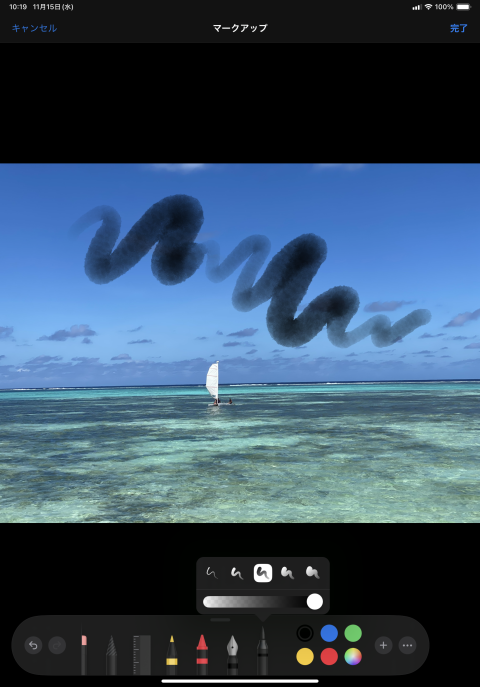
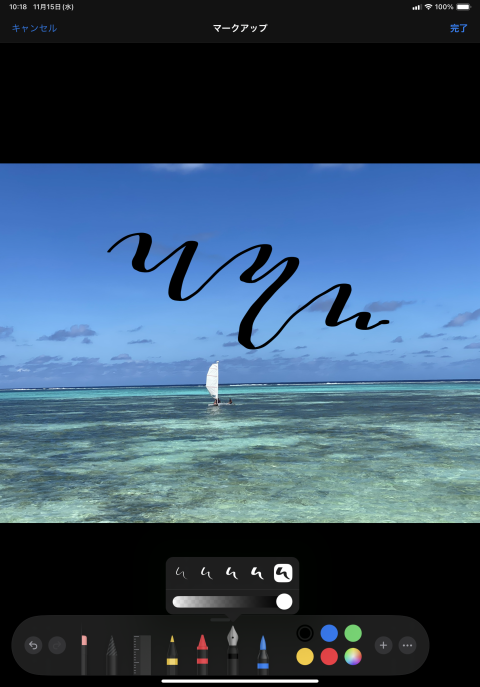
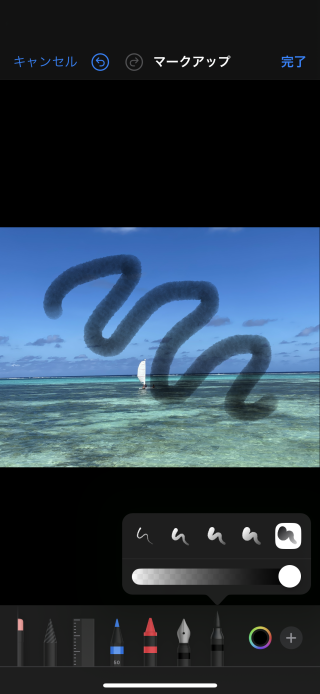 左から10番目の描画ツールは「毛筆」です。
「毛筆」ツールをタップすると、太さと透明度が変更できます。
筆圧を感知できるタッチペンで描画すると、筆圧に応じて太さと濃さが変化します。
左から10番目の描画ツールは「毛筆」です。
「毛筆」ツールをタップすると、太さと透明度が変更できます。
筆圧を感知できるタッチペンで描画すると、筆圧に応じて太さと濃さが変化します。
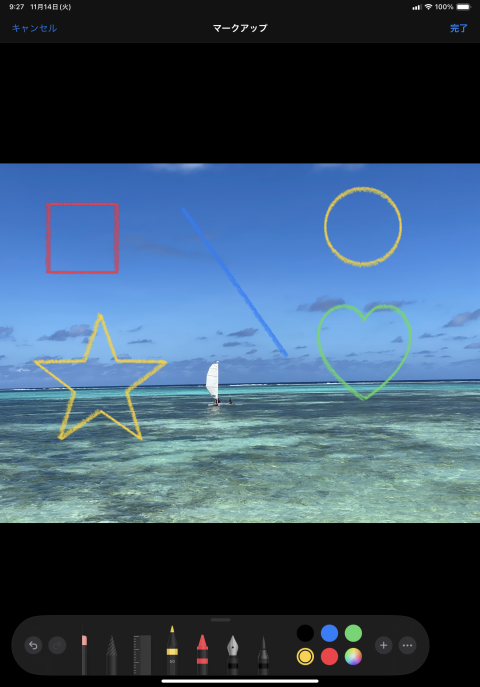
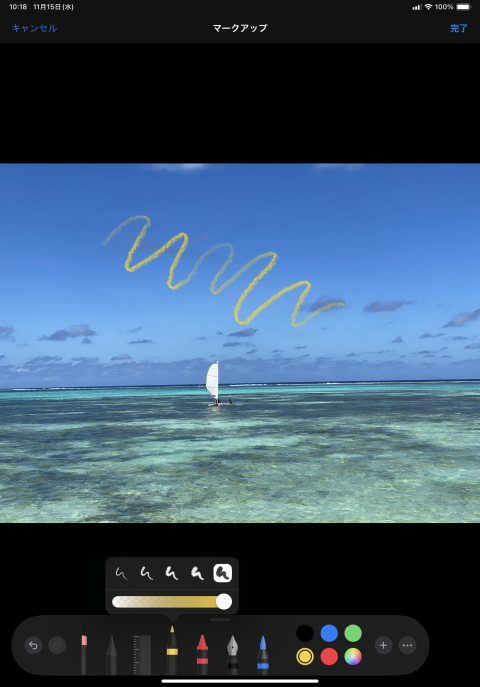
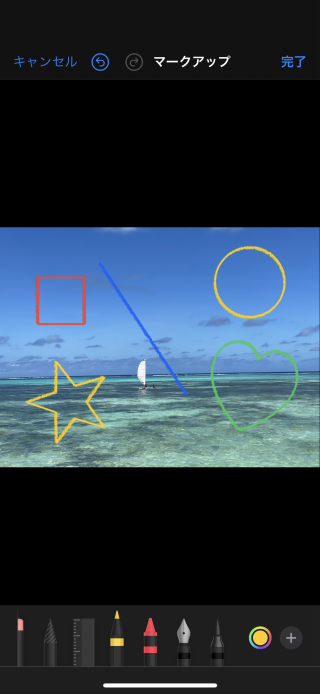 手書きで不完全に描画された図形を、整った図形に清書することができます。
指やタッチペンで図形を描き、描き終わったらそのまま指やタッチペンを画面に当て続けると、清書されます。
直線、曲線、正方形、長方形、円、楕円、ハート、三角、星、雲、六角形、吹き出し、輪郭付き矢印、90度の曲がり角でつながれた直線、矢印付き直線、矢印付き曲線、などが清書されます(iOS14以降)。
この機能は
Apple Pencil
でも使用できます。
手書きで不完全に描画された図形を、整った図形に清書することができます。
指やタッチペンで図形を描き、描き終わったらそのまま指やタッチペンを画面に当て続けると、清書されます。
直線、曲線、正方形、長方形、円、楕円、ハート、三角、星、雲、六角形、吹き出し、輪郭付き矢印、90度の曲がり角でつながれた直線、矢印付き直線、矢印付き曲線、などが清書されます(iOS14以降)。
この機能は
Apple Pencil
でも使用できます。
アップル純正タッチペン Apple Pencil(アップルペンシル)の使い方

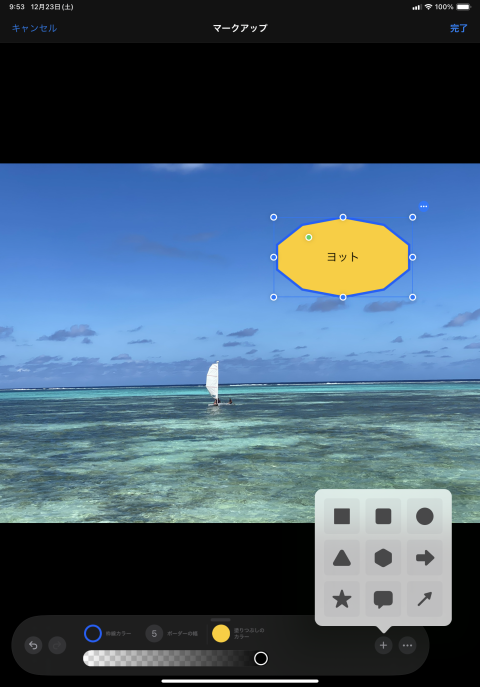
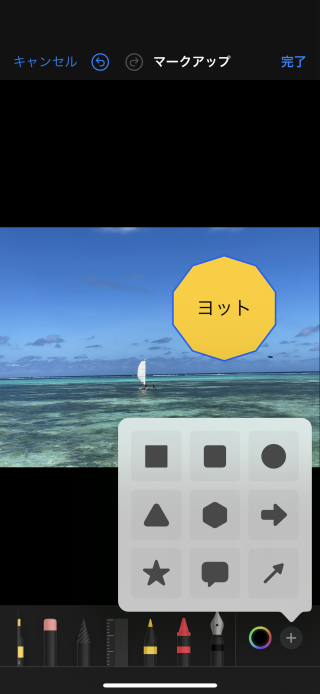
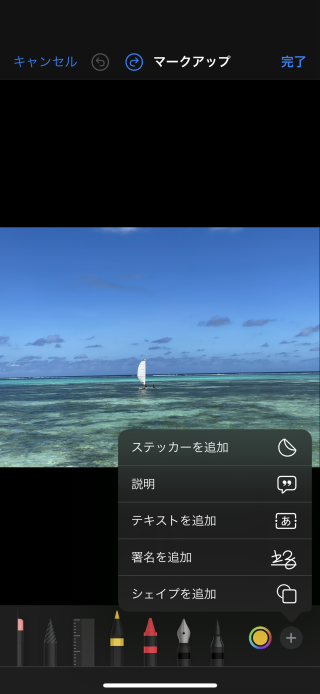 画面右下の「+」マークをタップすると、このようなメニューが表示されます。
「ステッカー」「説明」「テキスト」「署名」といったツールを使ったり、図形(シェイプ)の描画ができます。
画面右下の「+」マークをタップすると、このようなメニューが表示されます。
「ステッカー」「説明」「テキスト」「署名」といったツールを使ったり、図形(シェイプ)の描画ができます。
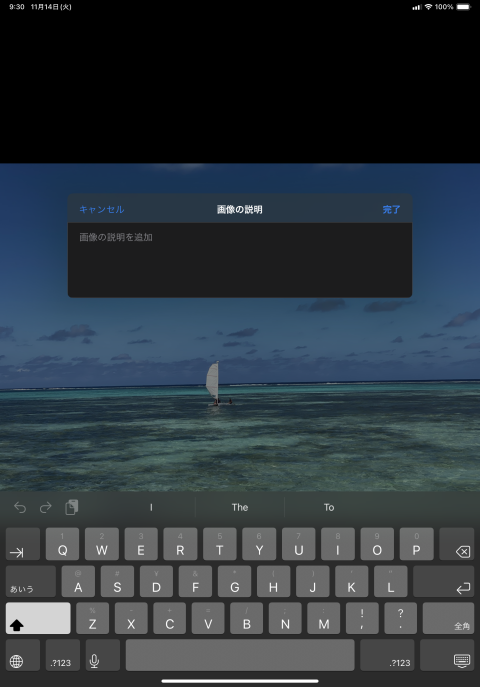
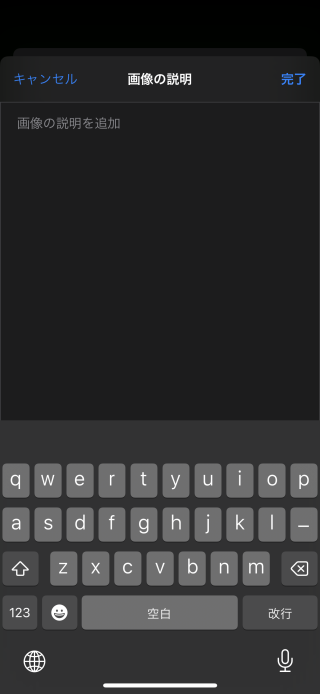 その他のツール・メニューから
なお、これは写真の詳細表示画面から「キャプション」として入力できるものとは異なります。
写真ライブラリを見る 情報を参照・追加・修正する 写真アプリの基本操作
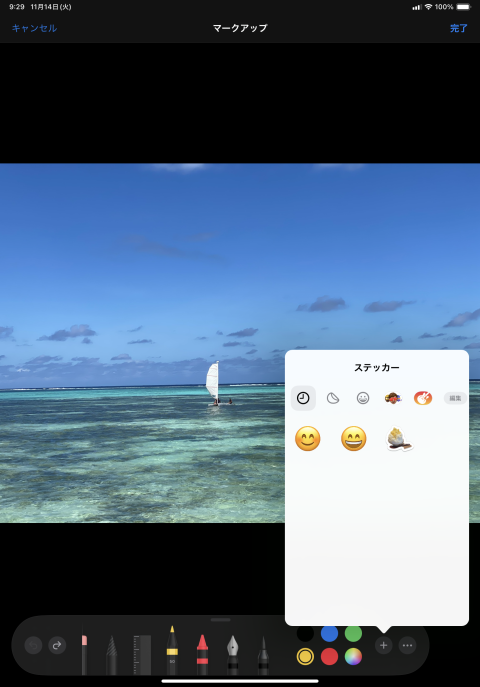
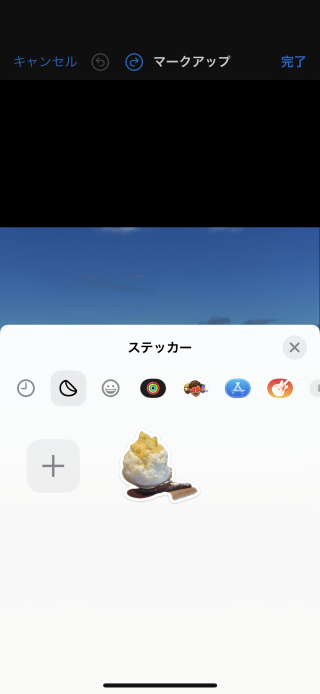 その他のツール・メニューから
自分で写真からステッカーを作ったり(iOS17以降)、絵文字をステッカーとして使ったり、iPhoneにあらかじめ準備されているステッカーを使うことができます。
ステッカーの詳細については iPhoneの「ステッカー」の作り方・使い方 をご覧ください。
iPhoneの「ステッカー」の作り方・使い方
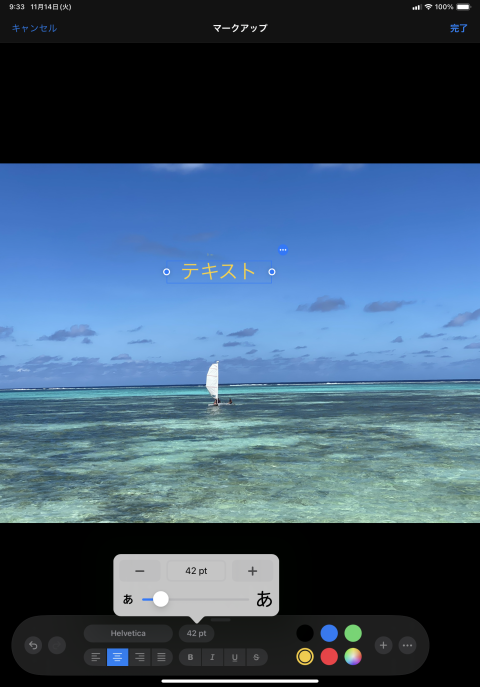
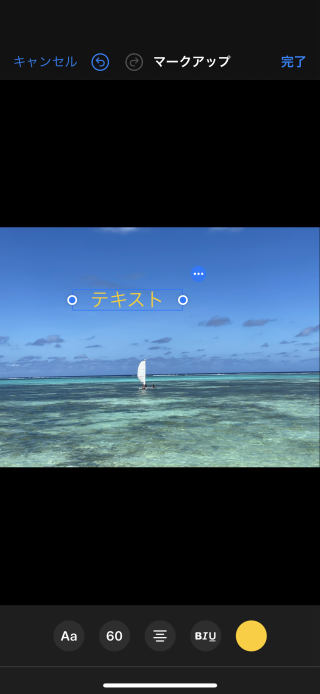 その他のツール・メニューから
「テキストボックス」のへりにある青色の点をドラッグすると「テキストボックス」の大きさが変更できます。 「テキストボックス」の青い枠をドラッグすると位置を移動することができます。 「テキストボックス」は、画面上にいくつも置くことができます。
テキストボックスのそばに並ぶアイコンをタップすると、フォント/書式/色などの変更、コピー、削除ができます。
 テキストボックスのそばに表示される
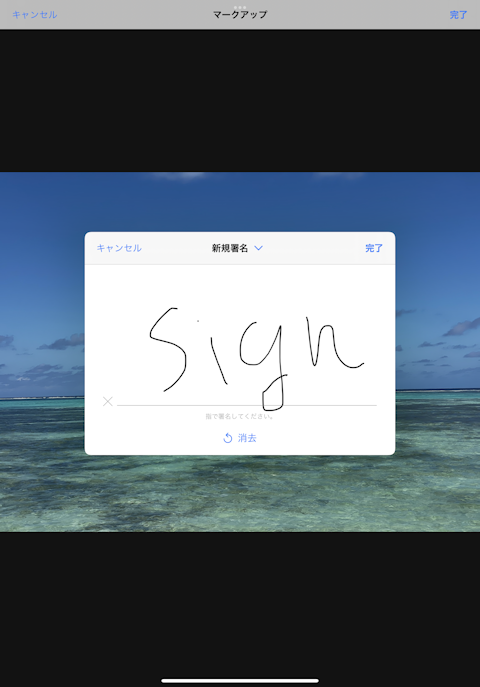
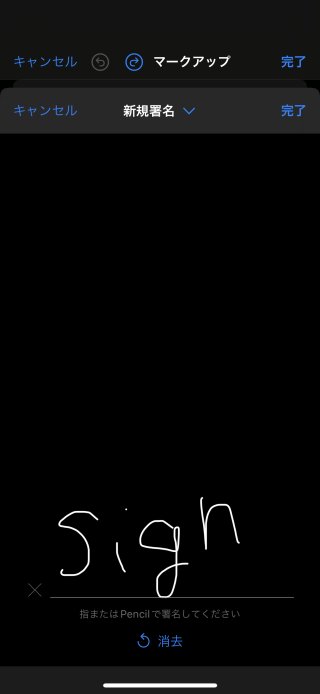 その他のツール・メニューから
一度描いた「署名」は画像としてデバイスに記憶されます。 また、「署名」は複数作って保存しておくことができます。
一度「署名」を作ると、二回目以降はそれが一覧表示されます。 過去に作成した署名を、ほかの写真に貼り付けることができます。 「署名」は、画面上にいくつも置くことができます。
 その他のツール・メニューから
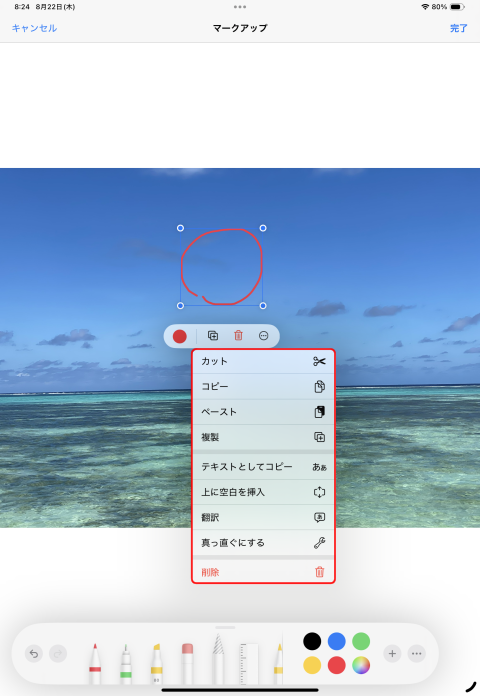
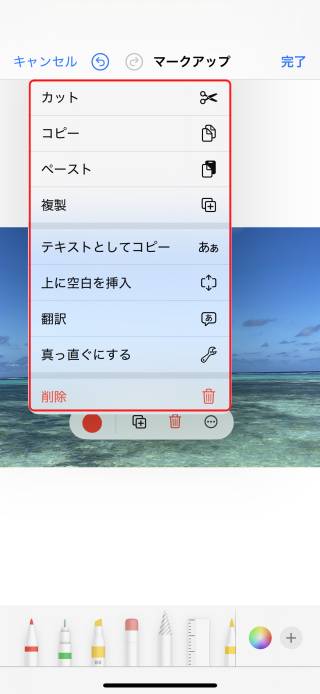
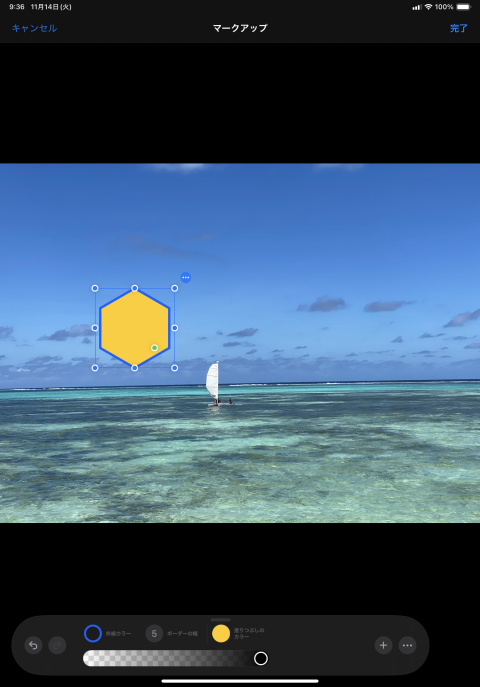
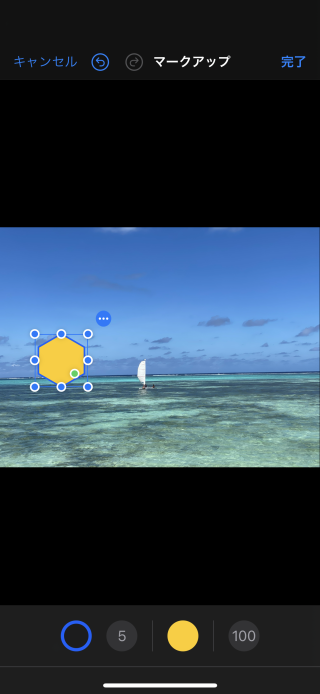
図形のへりにある青色の点をドラッグすると図形の大きさが変更できます。 図形の青い枠をドラッグすると位置を移動することができます。 図形は、画面上にいくつも置くことができます。
図形のそばに並ぶアイコンをタップすると、図形の色、縁取りの色、縁取りの太さ、図形に入れた文字のフォント/書式/色などの変更、コピー、削除ができます。
 図形の中にある緑色のドットをドラッグすると別の形に変形させることができます。
(例えば6角形を8角形に変形)。
図形の中にある緑色のドットをドラッグすると別の形に変形させることができます。
(例えば6角形を8角形に変形)。
図形をダブルタップすると、その中に文字を入れることができます。 この例では「ヨット」と文字を入れています。
シェイプ(図形)の種類は9種類あります。
手書き文字を編集する
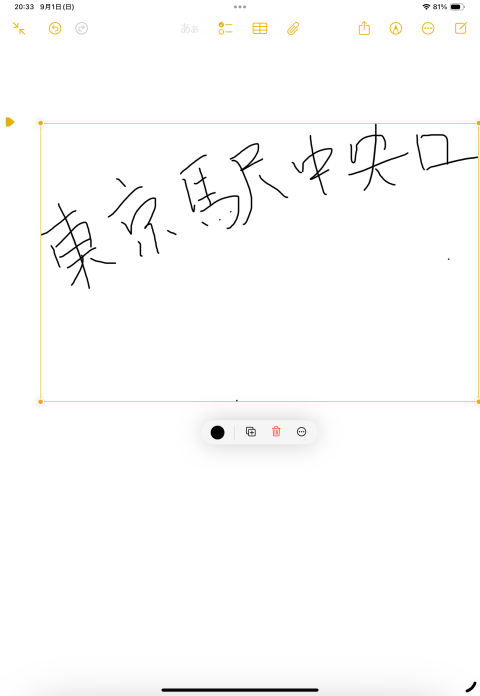
 iOS17までは、マークアップ機能で手書き文字を書いても、それはあくまで「図形」として扱われました。
iOS18以降では、手書き文字を「文字」として理解してくれます。
キーボードから入力したテキストのように編集することができます。
iOS17までは、マークアップ機能で手書き文字を書いても、それはあくまで「図形」として扱われました。
iOS18以降では、手書き文字を「文字」として理解してくれます。
キーボードから入力したテキストのように編集することができます。
手書き文字の編集方法については 「メモ」に手書き文字を入力する方法 をご覧ください。
「メモ」に手書き文字を入力する方法
iPadだけの機能:Apple Pencilでテキストを入力する
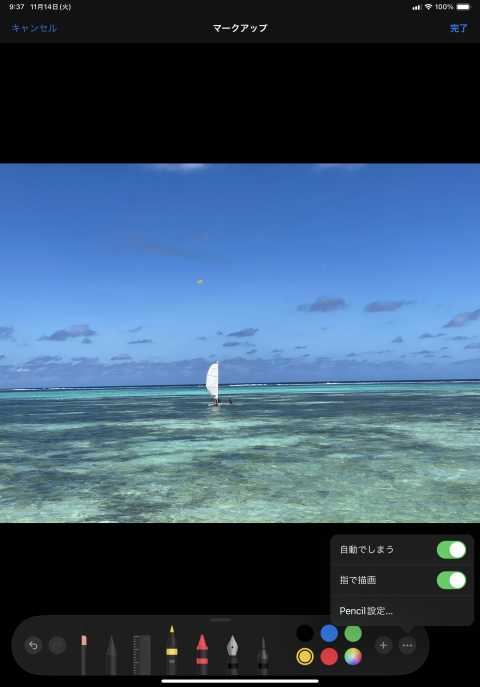 iPadの場合は、画面右下の
自動でしまう を
指で描画 を
Pencil設定 をタップすると Apple Pencil の設定画面を開きます。 この画面は、
アップル純正タッチペン Apple Pencil(アップルペンシル)の使い方
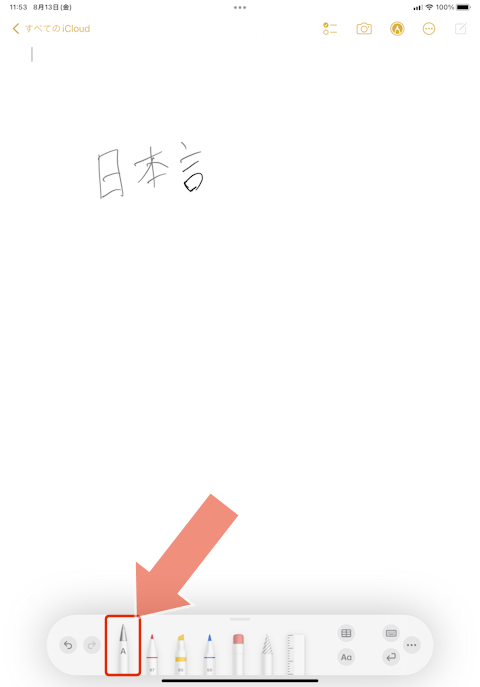 いろいろなアプリの文字入力エリアで、Apple Pencilで手書きしたものがテキストに変換されます(スクリブル(Scribble:落書き)機能)。
キーボードで日本語入力を選んでいると手書き文字も日本語テキストに、英語入力を選んでいると英数テキストに変換されます(日本語対応はiOS15以降)。
いろいろなアプリの文字入力エリアで、Apple Pencilで手書きしたものがテキストに変換されます(スクリブル(Scribble:落書き)機能)。
キーボードで日本語入力を選んでいると手書き文字も日本語テキストに、英語入力を選んでいると英数テキストに変換されます(日本語対応はiOS15以降)。
メモアプリ などの図形入力画面では、ペンに"A"の文字が書かれている“Apple Pencil”描画ツールを選択して描画すると、テキストに変換されます(右図)。
詳しくは iPhoneの文字入力方法/キーボード・音声・画像・ペンで入力する のページの「手書きメモ(描画)を貼りつける/Apple Pencilでテキスト入力する」の章をご覧ください。
iPhoneの文字入力方法/キーボード・音声・画像・ペンで入力する
もっとiPhoneのことを知りたい