 How to use VR PRO FPV flight with DJI drone and VR goggles
VR PRO official site (Michele Vagnetti)
このページを日本語で見る
Table of contents
What you need for FPV flight

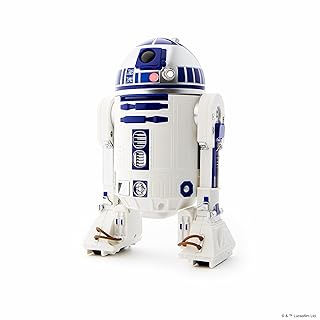
Supported drones , which are also listed on Official website , are DJI's Mavic 2 series, Mavic Pro series, Mavic Air, Mavic Mini, Spark, and Phantom 3/4 series. The Mavic Mini was supported in August 2020 and the Mavic Air 2 was supported in December.
VR goggles can be used with any VR 3D glasses for iPhone that are compatible with Google cardboard specifications. You can now buy Google cardboard compatible VR goggles made of cardboard cheaply as shown in the figure at toy shops. At first, I think it's a good idea to try something cheap like this.
Controller connection cable is used to connect iPhone in the VR goggles to DJI controller. The one that comes with drone is not long enough. It is necessary to purchase a commercially available cable of about 60 cm (2 ft.) separately.
Buy VR goggles (Amazon.com)
Buy Controller connection cable (Amazon.com)
Install VR PRO app
-
VR PRO for SPARK/MAVIC/PHANTOM
Michele Vagnetti Photo/Video Free (with in-app purchase)
This App will let you fly your DJI Drone like never before! it's especially design for provide the best VR FPV flight, prepare your self to an immersive flight experience!
view the details(App Store)
Quick start
Anyway, let's experience FPV flight. Control using VR PRO app instead of DJI FLY app. Except for changing the app, you can follow the usual procedure.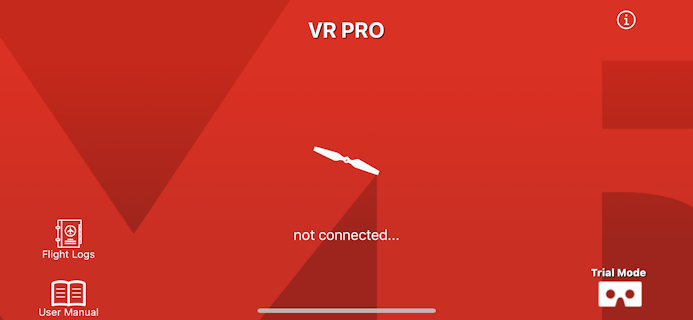 Tap the
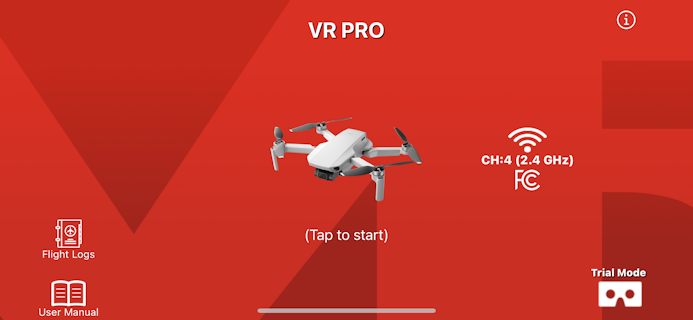 When controller and drone are connected to the app, you will see a screen like this.
An image of connected drone is displayed in the center of the screen, and frequency and channel used for connection are displayed to the right.
Y ou can change the channel manually by tapping the frequency display.
When controller and drone are connected to the app, you will see a screen like this.
An image of connected drone is displayed in the center of the screen, and frequency and channel used for connection are displayed to the right.
Y ou can change the channel manually by tapping the frequency display.
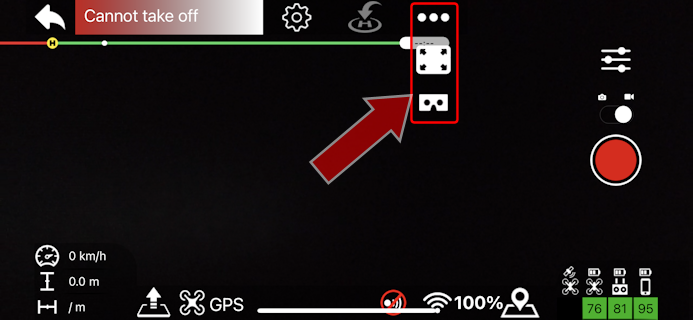
Tap
 If you tap
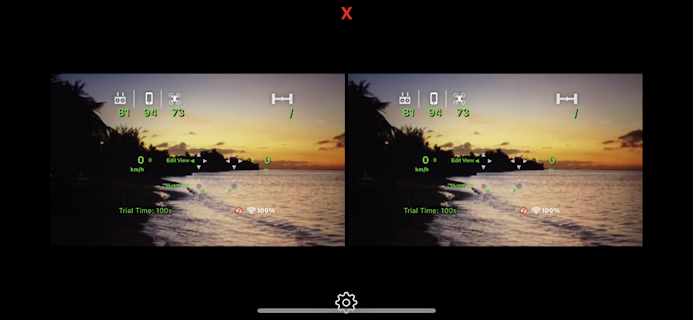
Then, like this, two images from the drone are displayed on the left and right.
You can enjoy FPV flight by setting your iPhone in VR goggles.
The takeoff, landing, and maneuvering methods are the same as when using the DJI FLY app.
If you do not have in-app purchases, you will switch to
Normal control mode
after flying for 100 seconds.
If you tap
Then, like this, two images from the drone are displayed on the left and right.
You can enjoy FPV flight by setting your iPhone in VR goggles.
The takeoff, landing, and maneuvering methods are the same as when using the DJI FLY app.
If you do not have in-app purchases, you will switch to
Normal control mode
after flying for 100 seconds.
Even if you move to the control screen, sometimes the camera image of the drone may not be displayed, or the last footage from the last flight may remain. In such a case, please close the VR PRO app from App switcher and restart the app.
Switch or exit apps: App Switcher (Japanese)
VR mode control screen
This is a screen example for Mavic mini.
| No. | description |
|---|---|
| 1 | Battery level of controller, iPhone and drone are displayed |
| 2 | Distance of the drone from controller (iPhone) is displayed |
| 3 | Speed of the drone is displayed |
| 4 | Shows altitude of the drone from takeoff location |
| 5 | If you have not made in-app purchases, remaining time in VR mode will be displayed |
| 6 | Enabled / disabled status of the vision system is displayed |
| 7 | Displays the signal strength between controller and drone |
Switching VR camera
By pressing the C2 button on the controller or pressing the video button and camera button at the same time (Mavic mini), you can switch between the image from the drone and the image taken by the iPhone camera. You can also maneuver from a ground perspective while wearing VR goggles. (Requires VR goggles that do not block the iPhone camera)
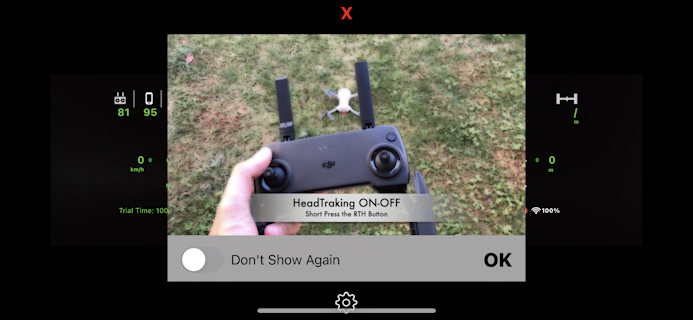
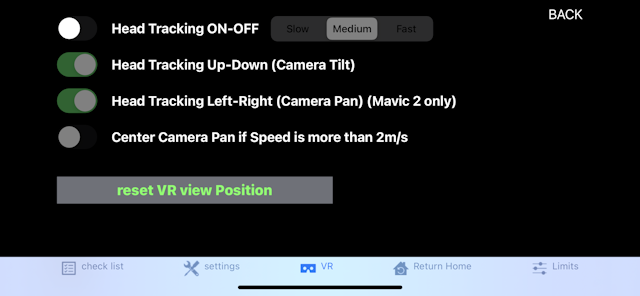
Head tracking can be turned on / off by briefly pressing the 5D button (Mavic pro), Fn button (Mavic Air and Spark), or RTH button (Mavic mini) on the controller. When head tracking is turned on, you can move the drone's camera (gimbal) up and down by moving the head wearing VR goggles up and down. With the Mavic 2, you can also swing the camera left and right.
You can switch the gimbal behavior to “Follow”or“FPV”. In Follow mode, the three axes are stabilized and the field of view is horizontal even while the drone is turning. On the other hand, in FPV mode, the roll axis is not stabilized and the field of view is tilted when turning.
To switch this, press and hold the 5D button (Mavic pro), Fn button (Mavic Air and Spark), or camera button (Mavic mini) on the controller for at least 2 seconds.
Note that only Spark can use head tracking and gimbal FPV mode at the same time.
Adjusting visibility of VR goggles
You can adjust the view of VR goggle according to the shape of the VR goggle and your face and eyes.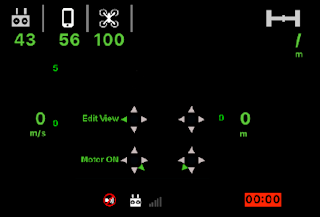 Adjustments are made with the app launched and the controller and drone connected.
A screen like this will appear, so tilt the left stick to the left to enter “Adjustment Mode”.
Adjustments are made with the app launched and the controller and drone connected.
A screen like this will appear, so tilt the left stick to the left to enter “Adjustment Mode”.
 Move the right stick up and down to move the display position up and down.
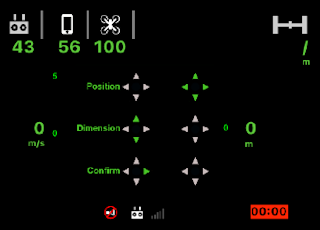
Move the right stick left or right to widen / narrow the positions of the left and right images (adjust eye width).
Move the left stick up and down to change the size of the image.
Move the left stick to the right to save the current settings and exit “Adjustment Mode”.
If the iPhone screen is out of focus due to myopia or presbyopia, move the iPhone forward or backward in the VR goggles to bring it into focus. We recommend using VR goggles with position adjustment and focus adjustment functions.
Normal control mode
In the VR PRO app, you can also operate in Normal control mode without using VR goggles.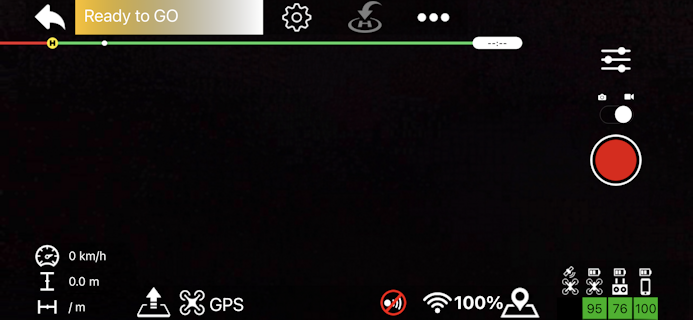 This is Normal control mode.
Basic drone maneuvering can be done without problems.
(Gimbal rotation / zoom, special shooting such as Quick Shot, firmware update, etc. are not possible)
This is Normal control mode.
Basic drone maneuvering can be done without problems.
(Gimbal rotation / zoom, special shooting such as Quick Shot, firmware update, etc. are not possible)
|
|
Speed of the drone is displayed | ||
|
|
Shows altitude of the drone from takeoff location | ||
|
|
Distance of the drone from controller (iPhone) is displayed | ||
|
|
Takeoff / landing button | ||
|
|
Flight mode (GPS / Atti, Sport, Tripod) is displayed. On the Mavic mini, press and hold the video recording button on the controller for more than 2 seconds to switch between flight modes. | ||
|
|
Enabled / disabled status of the vision system is displayed. | ||
|
|
Displays the signal strength between controller and drone | ||
|
|
Display the map (display position of drone or POI). To know about POI, refer to “AR Localizer”section of App settings . | ||
|
|
Number of GPS satellites received and battery level of drone, controller, and iPhone are displayed. | ||
|
|
Shutter / record button | ||
|
|
Camera / video switch | ||
|
|
Start RTH (return to home) | ||
|
|
Time available for flight is displayed | ||
|
|
Switch control screen mode to full screen mode or VR (FPV) mode (see below). | ||
|
|
Open Camera settings screen | ||
|
|
Open App settings screen | ||
 When you tap
In full screen mode, all parameter displays disappear and only the camera image from the drone is displayed. Tap the screen to return the parameter display.
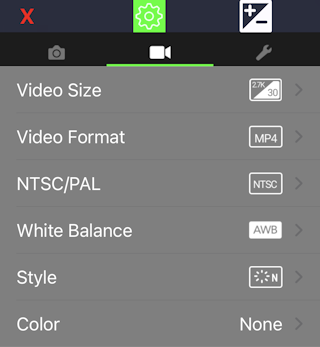
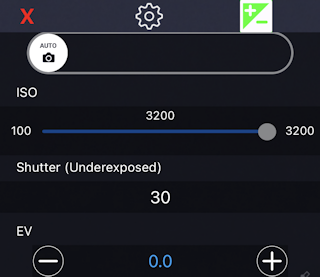
Camera settings
You can set the camera by tapping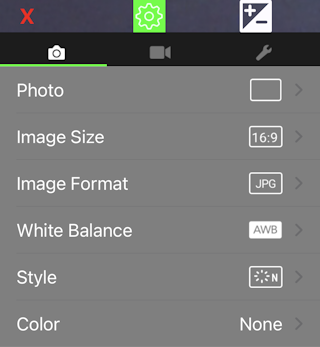 If you tap
 When you tap
 When you tap
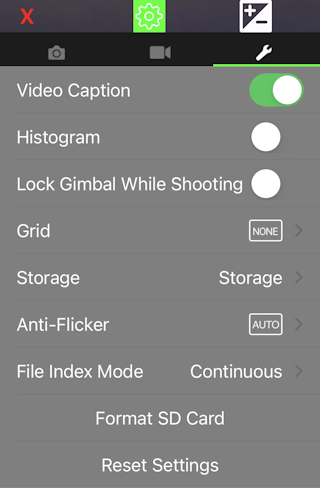
When “Video Caption”is set to
In addition, you can display the histogram, fix the gimbal during shooting, display the grid, check the capacity of the SD card, set the anti-flicker, reset the serial number of the file name, format the SD card, etc.
 When you tap
App settings
You can set the application by tapping If you tap
 Three types of “position markers”can be displayed on top of the image from the drone.
User Location
A blue marker indicates the current position of the controller (iPhone).
Home Point
A green marker indicates the home point, the first place the drone received a powerful satellite positioning system (GNSS) signal after power-on.
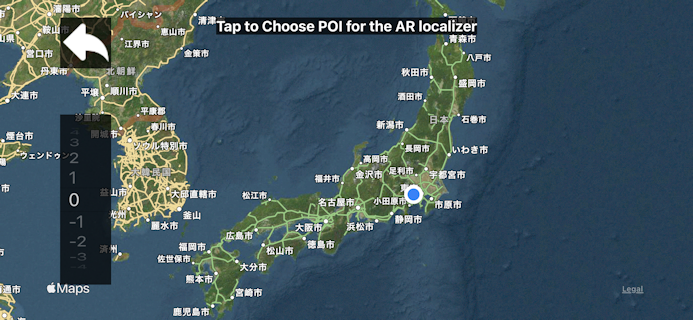
Point Of Interest(POI)
A red marker indicates the POI (where you are interested) and the distance to it. You can specify the places you care about before take off, such as the destination of flight or the target of shooting.
If you tap “Set POI” on the basic setting screen, you will see a screen like this. Tap the map to specify the location of the POI. Also, use the gauge on the left side of the screen to specify the altitude from the takeoff location.
 When you tap
 When you tap
 When you tap
 When you tap
Home point update
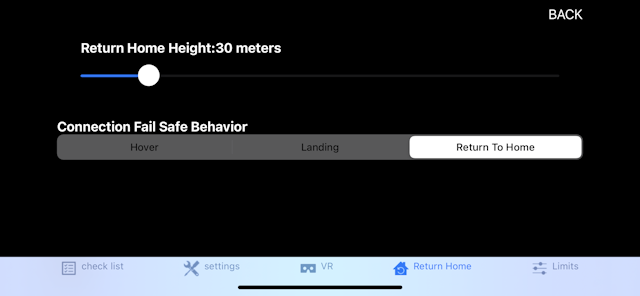
The VR PRO app allows you to update your home point during the drone flight. You can change the location where the drone returns when you activate the RTH function after takeoff. Home point is updated by briefly pressing the RTH and shutter buttons at the same time.To know more about How to Fly Hobby Drone
To know more about iPhone