MEPS 85mm Tinywhoop - High performance freestyle micro drone under 100g
The MEPS 85mm Tinywhoop is a high-performance freestyle micro drone kit with a takeoff weight of less than 100g, based on the BETAFPV Meteor85 frame and sold by MEPSKING , a professional FPV drone parts shop.
このページを日本語で見る
Table of contents

Who is MEPSKING?
MEPSKING is a professional shop for FPV drone parts. It is a one-stop FPV drone parts online shop that not only offers motors and FCs developed in-house, but also handles parts from famous FPV manufacturers around the world. Although it has a history of over 16 years in motor development, it is a relatively new shop that only began full-scale operations as an online parts shop in 2023.
MEPSKING Official site
What is MEPS 85mm Tinywhoop?

The weight excluding the battery is about 55g. Even with a 450mAh 1S battery (about 12g), the takeoff weight is about 67g. Since the takeoff weight (excluding the weight of removable accessories other than the battery) is less than 100g, this is exempt from Japanese "Flight Rules for Unmanned Aerial Vehicles" to the regulations applicable to drones weighing 100g or more. Therefore, it is possible to fly FPV independently without placing a visual observer.
Introduction to FPV drone for beginner / How to fly Racing drone
Model variety
The MEPS 85mm Tinywhoop series comes in two motor types: 11000KV and 8000KV. If you enjoy freestyle acrobatic flying, the 11000KV model is the way to go. If you want to take advantage of the features of the ELRS and enjoy long-distance, long-duration flights, the 8000KV model is the way to go.
There is also a Tinywhoop kit for indoor use, MEPS 65mm Tinywhoop , which uses the Meteor65 frame. If you plan on enjoying it mainly indoors, this is also recommended.
MEPS 85mm Tinywhoop Official site (MEPSKING)
MEPS 65mm Tinywhoop Official site (MEPSKING)
Introducing MEPS 85mm Tinywhoop
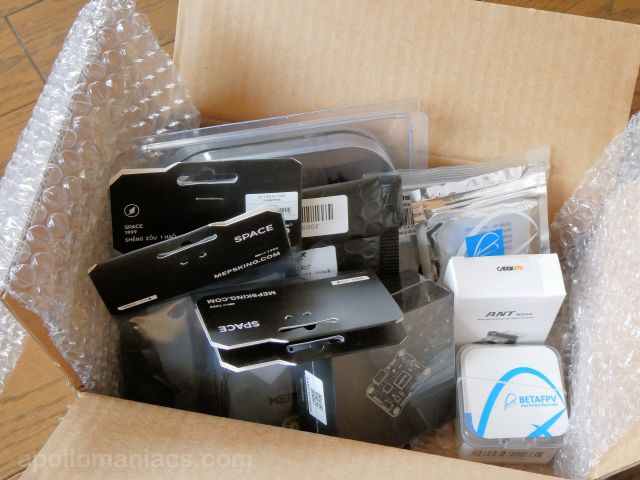 This photo shows the packaging box and all included items.
It will arrive in separate parts.
This photo shows the packaging box and all included items.
It will arrive in separate parts.
To assemble, you will need a soldering iron, a #0 Phillips screwdriver, and a 1.5mm Allen key (hex nut). You will also need to provide your own four screws (M1.4, 5mm length) to attach the FC to the frame. Battery sold separately.
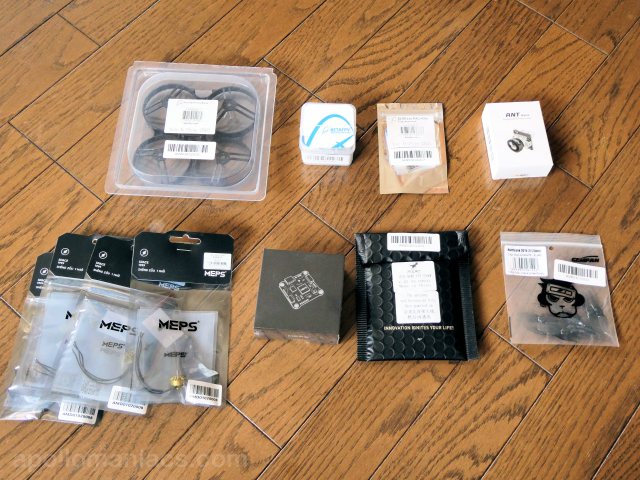 Here is a photo of the complete set of parts.
The top row, from left, is the frame, canopy, ELRS receiver, and camera.
The bottom row, from left, is the four motors, FC, VTX, and propellers.
No instructions are included at all.
Here is a photo of the complete set of parts.
The top row, from left, is the frame, canopy, ELRS receiver, and camera.
The bottom row, from left, is the four motors, FC, VTX, and propellers.
No instructions are included at all.
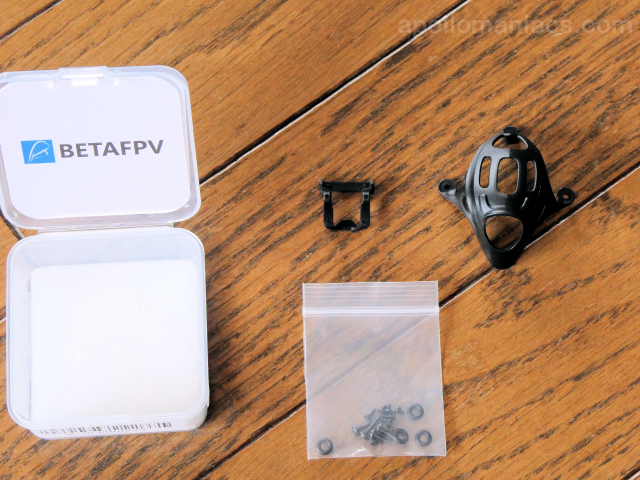 The canopy is the
BETAFPV Micro Canopy Lite (MEPSKING)
.
It includes the canopy itself, a frame for attaching a narrow camera to the canopy, and screws for attaching the canopy to the frame.
The canopy is the
BETAFPV Micro Canopy Lite (MEPSKING)
.
It includes the canopy itself, a frame for attaching a narrow camera to the canopy, and screws for attaching the canopy to the frame.
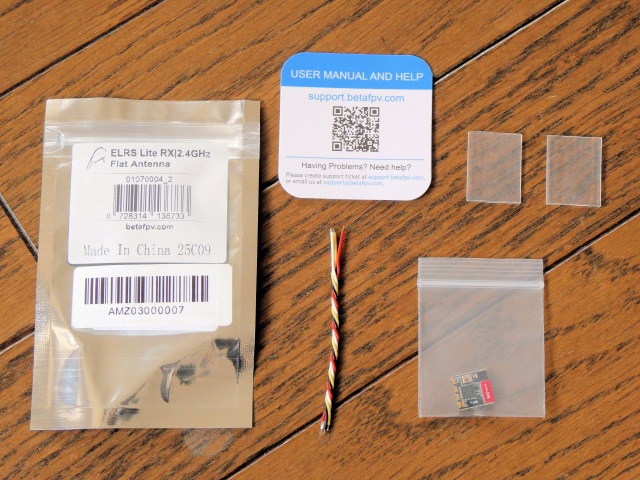 The ELRS receiver is the
BETAFPV ExpressLRS Lite Receiver (MEPSKING)
.
This receiver is also available in a model equipped with a U.FL (IPEX / IPX) connector for connecting an antenna, but the model included in this kit is equipped with a flat antenna on the board.
The kit includes the ELRS receiver itself, a wiring cable, and two heat shrink tubes to protect the board after wiring.
The ELRS receiver is the
BETAFPV ExpressLRS Lite Receiver (MEPSKING)
.
This receiver is also available in a model equipped with a U.FL (IPEX / IPX) connector for connecting an antenna, but the model included in this kit is equipped with a flat antenna on the board.
The kit includes the ELRS receiver itself, a wiring cable, and two heat shrink tubes to protect the board after wiring.
How to use ExpressLRS (ELRS) / Long-distance, high-speed communication protocol
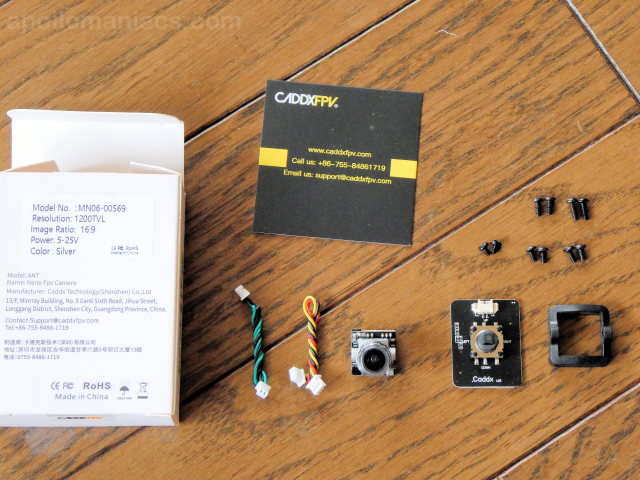 The camera is a
Caddx Ant 1200TVL Camera (MEPSKING)
.
Caddx Ant also has a model with an aspect ratio of 4:3, but the model included in the kit is a 16:9 model.
The kit includes the camera itself, a wiring cable, a joypad for setting up the camera, screws, and a 19mm camera frame for mounting the camera on a wide frame.
The camera is a
Caddx Ant 1200TVL Camera (MEPSKING)
.
Caddx Ant also has a model with an aspect ratio of 4:3, but the model included in the kit is a 16:9 model.
The kit includes the camera itself, a wiring cable, a joypad for setting up the camera, screws, and a 19mm camera frame for mounting the camera on a wide frame.
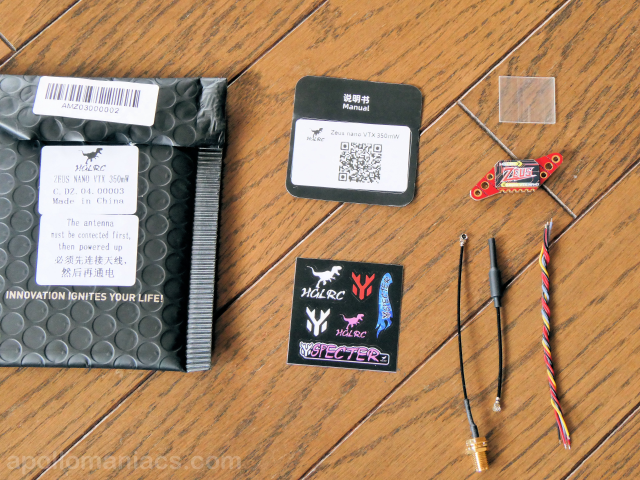 The VTX is the
HGLRC Zeus Nano FPV VTX 350mW (MEPSKING)
.
The package includes the VTX itself, a wiring cable, a U.FL - SMA connector conversion cable, a pigtail antenna, and a heat shrink tube to protect the board after wiring.
The VTX is the
HGLRC Zeus Nano FPV VTX 350mW (MEPSKING)
.
The package includes the VTX itself, a wiring cable, a U.FL - SMA connector conversion cable, a pigtail antenna, and a heat shrink tube to protect the board after wiring.
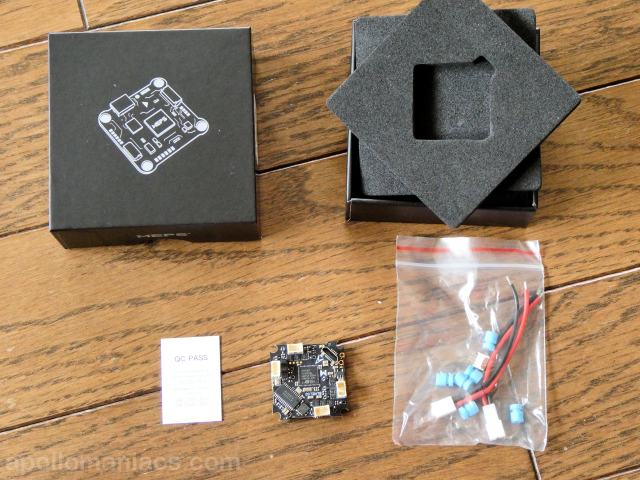 The FC is a
MEPS SZ F411 15A AIO Flight Controller (MEPSKING)
.
The compatible battery size is 1S Lipo.
In addition to the FC itself, two types of battery connection cables (BETAFPV BT2.0 type and JST 2-pin type) and rubber dampers (6 pieces) are included.
Unfortunately, however, screws to secure the FC to the frame are not included.
Screws and Rubber Dampers (BETAFPV)
or other items must be procured separately.
The FC is a
MEPS SZ F411 15A AIO Flight Controller (MEPSKING)
.
The compatible battery size is 1S Lipo.
In addition to the FC itself, two types of battery connection cables (BETAFPV BT2.0 type and JST 2-pin type) and rubber dampers (6 pieces) are included.
Unfortunately, however, screws to secure the FC to the frame are not included.
Screws and Rubber Dampers (BETAFPV)
or other items must be procured separately.
the motor is MEPS SZ1103 FPV Brushless Motor (MEPSKING) , the frame is BETAFPV Meteor85 2S Brushless Mini Quadcopter Frame (MEPSKING) , and the propeller is Gemfan 2015 2-Blade Drone Propeller 1.5mm Shaft (MEPSKING) .
How to buy the MEPS 85mm Tinywhoop
MEPSKING is a parts store, so kits are sold in individual parts. To assemble one drone, you need to select multiple parts and add them to your cart.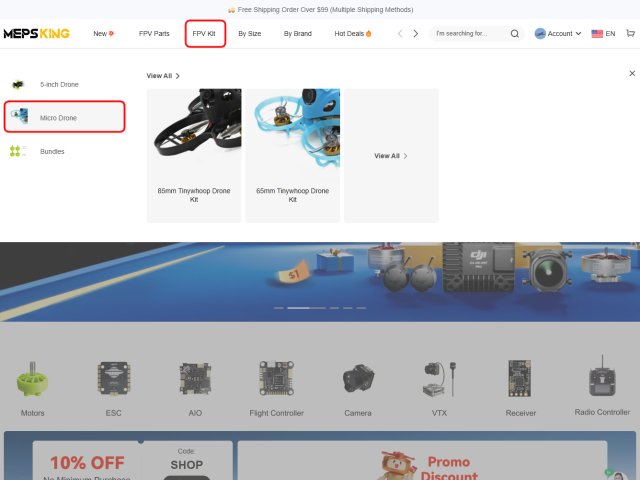 From the
MEPSKING
homepage, select [FPV Kit]-[Micro Drone] from the menu.
From the
MEPSKING
homepage, select [FPV Kit]-[Micro Drone] from the menu.
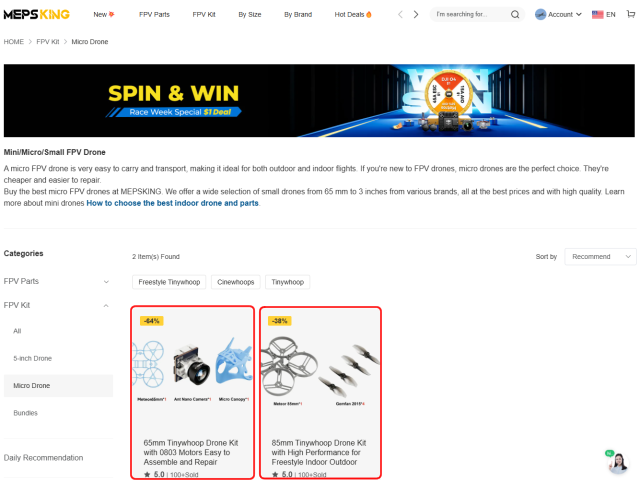 You will then see a screen like this.
Select either 85mm Tinywhoop or 65mm Tinywhoop.
You will then see a screen like this.
Select either 85mm Tinywhoop or 65mm Tinywhoop.
Or click on one of the links below:
MEPS 85mm Tinywhoop Official site (MEPSKING)
MEPS 65mm Tinywhoop Official site (MEPSKING)
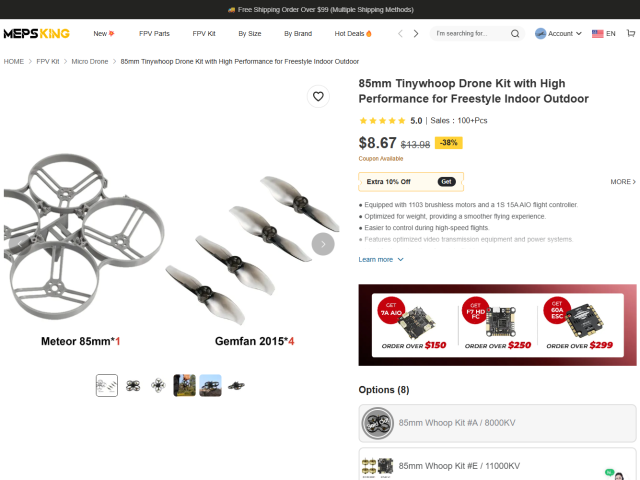 You'll then see a screen like this.
The default option selected is 85mm Whoop Kit #G/Frame+Props.
This is the frame and propeller only.
You'll then see a screen like this.
The default option selected is 85mm Whoop Kit #G/Frame+Props.
This is the frame and propeller only.
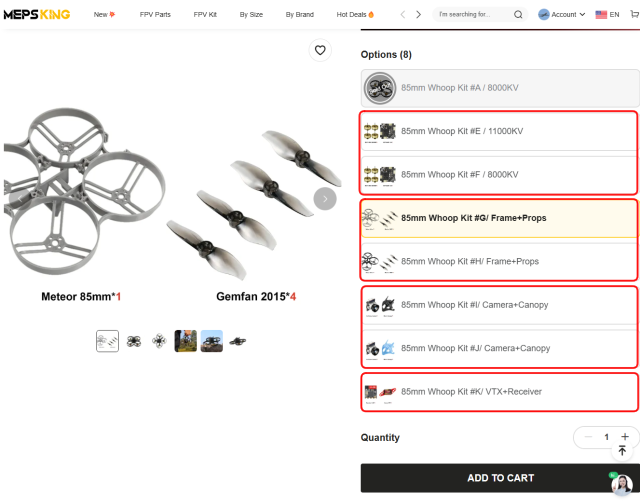 If you scroll down the screen, you will see a list of parts like this.
For the motor and FC, choose either "Kit #E/11000KV" or "Kit #F/8000KV".
For the frame and propellers, choose either "Kit #G (Gray)" or "Kit #H (Black)" .
For the camera and canopy, choose either "Kit #I (Black)" or "Kit #J (Blue)".
Then add "Kit #K/VTX+Receiver".
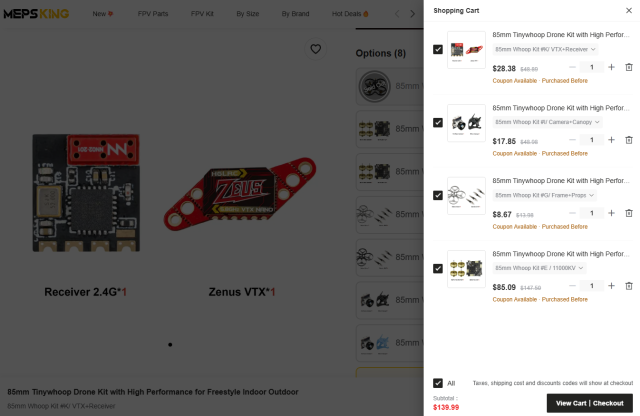 Select each part in order and press the "ADD TO CART" button, and the parts will be added to your cart, as shown in this screen.
You can place your order by clicking the "VIEW CART | Checkout" button at the bottom right of the screen.
Select each part in order and press the "ADD TO CART" button, and the parts will be added to your cart, as shown in this screen.
You can place your order by clicking the "VIEW CART | Checkout" button at the bottom right of the screen.
In my case, it took about two weeks from ordering to the product arriving in Japan.
How to assemble MEPS 85mm Tinywhoop
MEPSKING has posted a video explaining how to assemble it on Google Drive, so I recommend watching this first.Wiring the parts
Wire each part as shown in the diagram below.

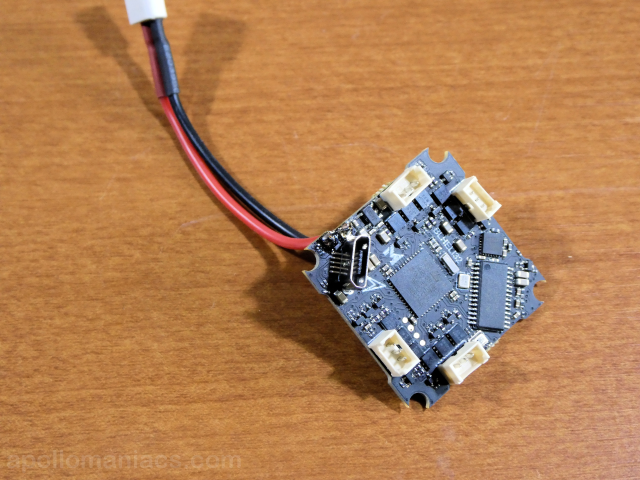 Attach the included battery cable to the FC.
Match the markings on the board and connect the red cable to [+] and the black cable to [-].
Attach the included battery cable to the FC.
Match the markings on the board and connect the red cable to [+] and the black cable to [-].
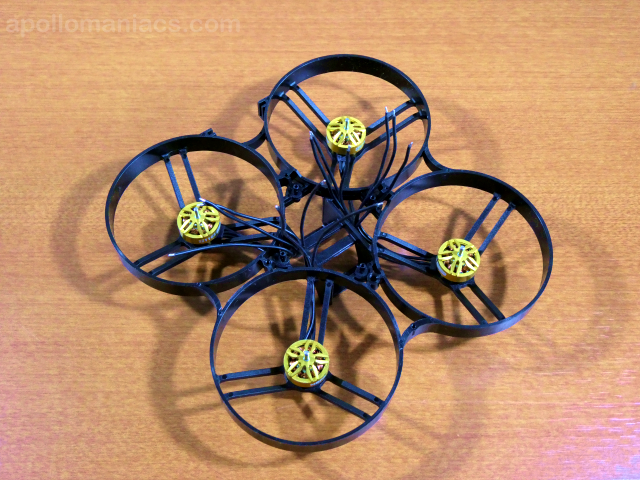 Attach the motors to the frame.
Attach the four motors with the four screws provided.
Attach the motors to the frame.
Attach the four motors with the four screws provided.
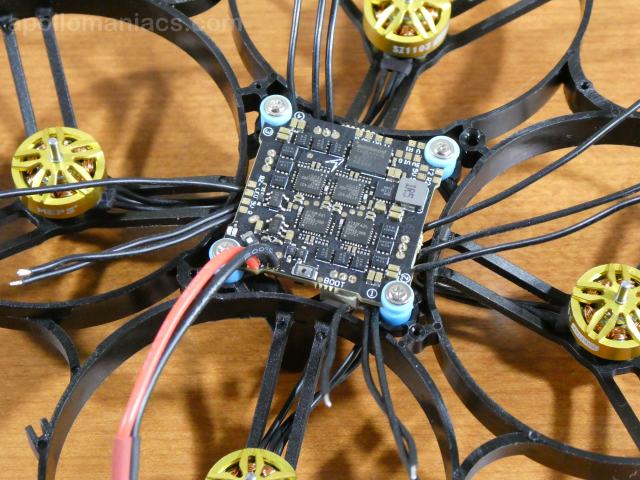 Attach the FC to the frame.
The white arrow engraved on the circuit board indicates the forward direction.
First insert the rubber damper included with the FC into the circuit board, and then insert that into the frame.
The fixing screws will need to be obtained separately.
Attach the FC to the frame.
The white arrow engraved on the circuit board indicates the forward direction.
First insert the rubber damper included with the FC into the circuit board, and then insert that into the frame.
The fixing screws will need to be obtained separately.
In the assembly video provided by MEPSKING, the FC is attached to the frame at this point, but it may be better to wire the camera, VTX, and receiver to the FC first.
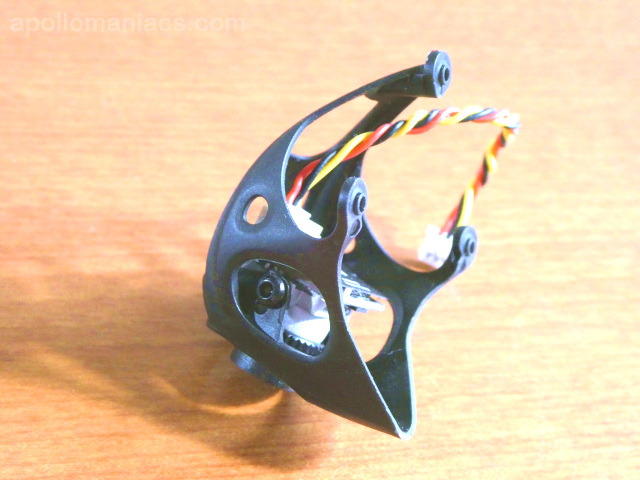 Attach the camera to the canopy.
Align the holes on the side of the camera with the holes in the canopy and attach using the screws included with the camera.
The screws are 1.5mm Allen keys (hex nuts).
The shortest screws will fit.
Attach the camera to the canopy.
Align the holes on the side of the camera with the holes in the canopy and attach using the screws included with the camera.
The screws are 1.5mm Allen keys (hex nuts).
The shortest screws will fit.
At this stage, if you connect a battery to the FC and scan the channels with the FPV goggles, you will be able to receive the camera image.
At this stage the electrical assembly is complete.
How to use ExpressLRS (ELRS) / Long-distance, high-speed communication protocol
Installing and using Betaflight Configurator for beginners
Installing and using BLHeli Configurator / How to solve yaw spin
MEPS 85mm Tinywhoop Specification
| item | description |
|---|---|
| Manufacturer | MEPSKING |
| Flight Time | 5-7min |
| Wheelbase | 87.7mm |
| Props |
Gemfan 2015 2-Blade Drone Propeller 1.5mm Shaft (MEPSKING)
Size: 2.0 inch, Pitch: 1.5 inch, Mounting Holes: M1.5 |
| Motors |
MEPS SZ1103 FPV Brushless Motor (MEPSKING)
KV: 8000kv/11000kv, Rated Voltage(Lipo): 3S |
| Weight | About 55g |
| Frame | BETAFPV Meteor85 2S Brushless Mini Quadcopter Frame (MEPSKING) |
| FC & ESC |
MEPS SZ F411 15A AIO Flight Controller (MEPSKING)
Input Voltage: 1S Lipo, Firmware: BLHeli 32 & MEPSF411 |
| VTX |
HGLRC Zeus Nano FPV VTX 350mW (MEPSKING)
Built-in Microphone, Input voltage:DC 5V, Antenna interface: ipex, Output power: PIT/25/100/200/350mW, Standard 40 channels. A/B/E/F/R frequency group, Frequencies: 5.8GHz |
| RX |
BETAFPV ExpressLRS Lite Receiver (MEPSKING)
Range: About 600 meters, Telemetry Power: 17mW, Frequency Bands (Nano receiver 2.4G version): 2.4GHz ISM, Input Voltage: 5V, Antenna: Integrated SMD ceramic antenna |
| CAMERA |
Caddx Ant 1200TVL Camera (MEPSKING)
Horizontal Resolution: 1200 TVL, IMAGE: 16:9, Power Input: DC 5-25V |
| CANOPY |
BETAFPV Micro Canopy Lite (MEPSKING)
Tilt: 0-45° |
To know more about How to Fly Hobby Drone
To know more about iPhone