


 How to use ImgBurn, copy Blu-ray/DVD
Using the free software "ImgBurn", you can import (rip) and burn Blu-ray/DVD discs.
Here I will introduce how to use ImgBurn, especially for copying Blu-ray/DVD discs.
このページを日本語で見る
Table of contents
Blu-ray data types
| Type | description |
|---|---|
| BDMV | A type that dump out all files contained in a Blu-ray disc. By converting this to BDISO format and writing it to BD-R, you can recreate the original Blu-ray disc. |
| BDISO | Blu-ray disc image file. Disk image according to ISO 9660 / UDF file system. By writing this to a BD-R, you can recreate the original Blu-ray disc. |
| BDremux / BD remux |
A file that extracts the data (.ts file) of a specific video and audio track from a Blu-ray disc.
This does not include chapter information, menus, subtitles, etc.
Although it is not possible to reproduce the original Blu-ray disc from this data, the video and audio resolution and bit rate are the same as the original Blu-ray disc. |
| BDrip / BD rip |
A type that encodes the video track on a Blu-ray disc, compresses and converts it into video data in mp4 format or mkv format.
It is not possible to recreate the original Blu-ray disc from this data. Also, the video and audio resolution and bit rate are inferior to the original Blu-ray disc. |
ImgBurn installation and initial settings
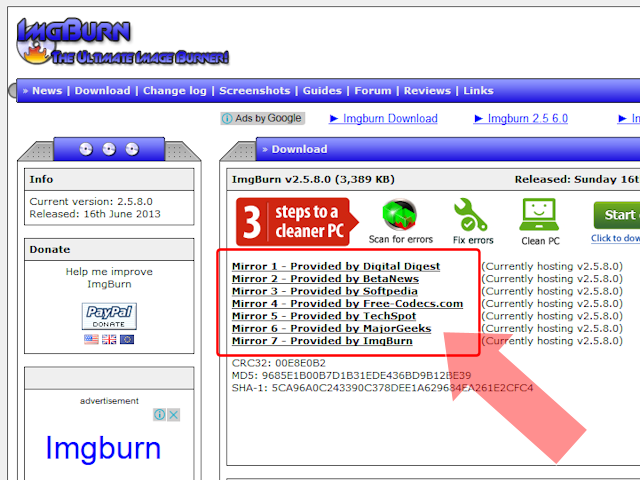 Click on the words "Mirror 7 - Provided by ImgBurn" to download from the
ImgBurn download page
.
If you are unable to download for some reason, click on any text from “Mirror 1” to “Mirror 6” to download.
Click on the words "Mirror 7 - Provided by ImgBurn" to download from the
ImgBurn download page
.
If you are unable to download for some reason, click on any text from “Mirror 1” to “Mirror 6” to download.
When you download it, you will get a file with a file name such as “SetupImgBurn_2.5.8.0.exe”. Double-click this to install it. ImgBurn is widely compatible with Win95 to Win11.
Note: Be sure to download from ImgBurn's official website . Items distributed elsewhere may be at risk of being contaminated with viruses.
ImgBurn download page
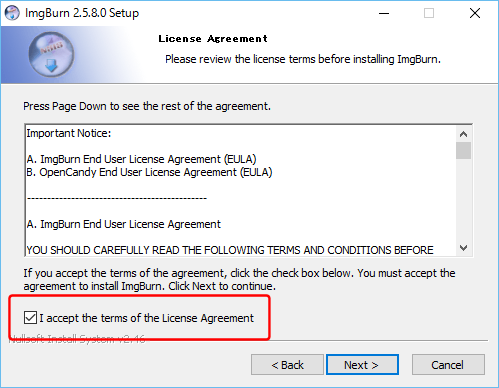 On the license agreement screen, check the box and click "Next".
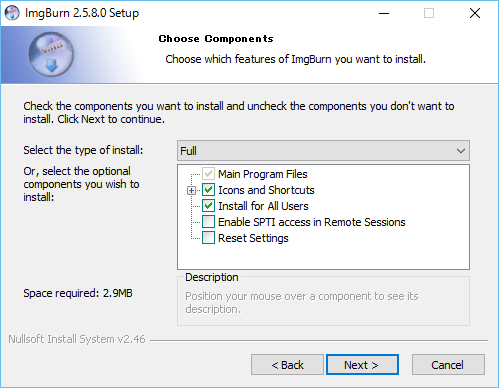 You can leave the default values on the screen for selecting files to install.
If there are any shortcuts to other software/services, such as "Uniblue Desktop Shortcuts", uncheck them.
Click Next.
You can leave the default values on the screen for selecting files to install.
If there are any shortcuts to other software/services, such as "Uniblue Desktop Shortcuts", uncheck them.
Click Next.
 As you proceed with the installation, a screen like this to select the installation of another software/service will be displayed.
Software that has "Recommended by ImgBurn" written in the title is unnecessary software.
Read carefully and uncheck the installation.
As you proceed with the installation, a screen like this to select the installation of another software/service will be displayed.
Software that has "Recommended by ImgBurn" written in the title is unnecessary software.
Read carefully and uncheck the installation.
 Two installation selection screens for other software/services will be displayed in succession.
Uncheck the installation.
Two installation selection screens for other software/services will be displayed in succession.
Uncheck the installation.
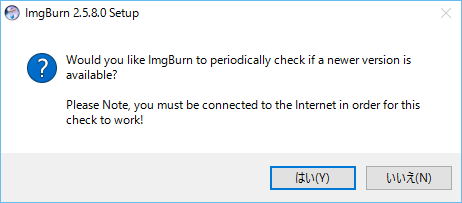 Then you will be asked something like this.
Select whether to check whether a new version of ImgBurn is available at startup.
Please choose according to your preference.
Then you will be asked something like this.
Select whether to check whether a new version of ImgBurn is available at startup.
Please choose according to your preference.
ImgBurn hasn't been updated in the last 10 years. There will be no problem if you select "No".
 Next, the browser will start up and a "Thankyou" screen will be displayed, but you can close it.
Click "Close".
Next, the browser will start up and a "Thankyou" screen will be displayed, but you can close it.
Click "Close".
Commercially available Blu-ray/DVD discs are encrypted, so separate decryption software is required to read them with software such as ImgBurn. However, decrypting and importing (ripping) Blu-ray/DVD discs is illegal in some countries. Please use at your own risk.
Blu-ray/DVD discs that have been burned with videos shot by yourself using a camcorder are not encrypted, so no decryption software is required. Of course it's not illegal either.
 Click the
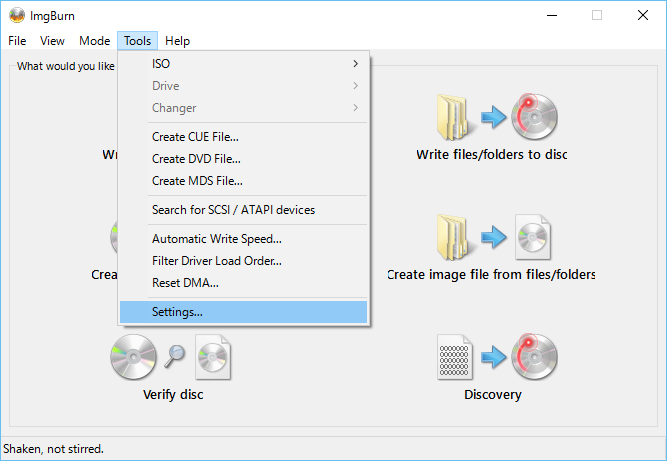 Various settings of ImgBurn are called from [Tools] - [Settings..].
However, there are no settings changes required to copy Blu-ray/DVD.
Various settings of ImgBurn are called from [Tools] - [Settings..].
However, there are no settings changes required to copy Blu-ray/DVD.
If your computer has 4GB or more of memory, it is recommended to increase the read buffer/write buffer size (around 256MB ~ 512MB). The read buffer size is "Read Buffer Size" on [Page 2] of the [Build] tab. The write buffer size can be specified in "Buffer Size" on [Page 2] of the [I/O] tab.
Blu-ray/DVD ripping
To copy a Blu-ray/DVD, first import (rip) the disc image onto your computer's hard disk, and then write it to a blank Blu-ray/DVD disc. If you have two Blu-ray/DVD drives, you can also directly copy (on-the-fly) from Blu-ray/DVD disc to Blu-ray/DVD disc. However, if the original disk is encrypted, the decryption software will affect it and cause a verification error when writing, so on-the-fly is not possible.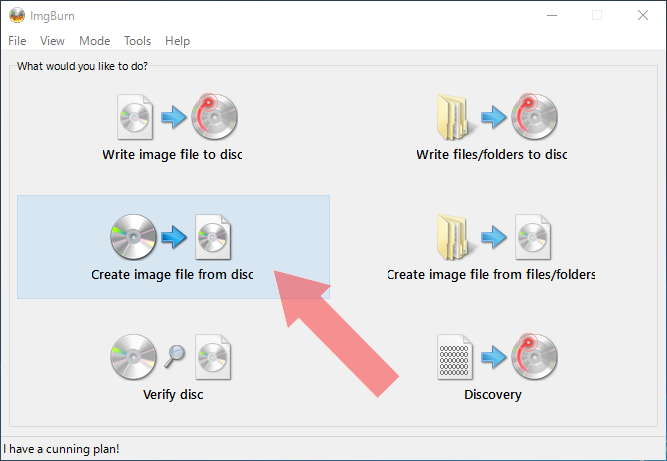 Click the "Create image file from disc" button to import Blu-ray/DVD to your computer.
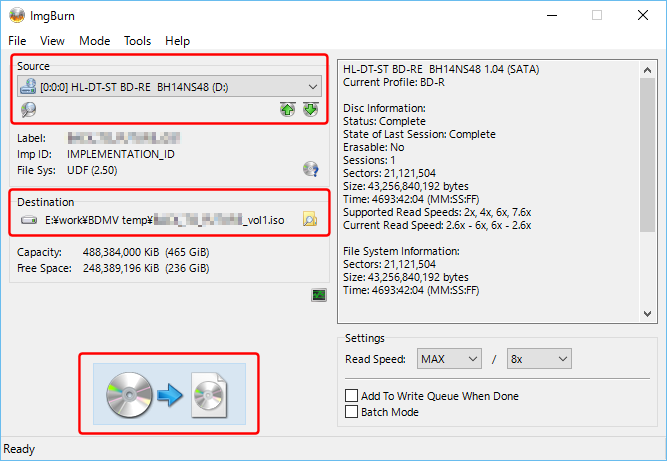 When you insert the Blu-ray/DVD disc you want to read, a screen like this will appear.
If multiple drives are installed, you can select the drive to read from in the "Source" field.
You can change the import destination folder/file name by clicking the folder icon in the "Destination" field. If you are importing a DVD, please choose a hard disk with free space of 8.5 GB (dual layer) or 50 GB (dual layer) or more for Blu-ray.
Once the settings are complete, click the illustration at the bottom left of the screen.
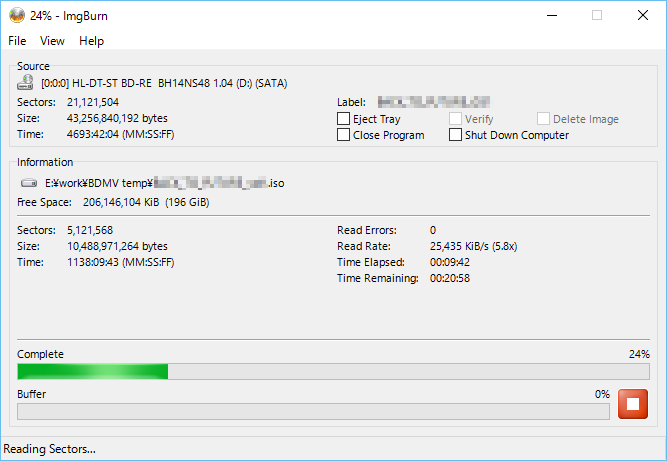 A screen like this will appear while reading. Wait as long as possible without doing anything else on your computer.
The time it takes to read depends on the disk capacity and drive performance. In the case of Blu-ray, it will be more than 20 minutes.
If you check "Shut Down Computer" at the top right of the screen, your computer will automatically shut down after reading is complete.
A screen like this will appear while reading. Wait as long as possible without doing anything else on your computer.
The time it takes to read depends on the disk capacity and drive performance. In the case of Blu-ray, it will be more than 20 minutes.
If you check "Shut Down Computer" at the top right of the screen, your computer will automatically shut down after reading is complete.
 Reading is complete when a screen like this appears.
The ".iso" format file should be stored in the specified folder.
This is an "image file" from which the entire Blu-ray/DVD has been extracted.
Reading is complete when a screen like this appears.
The ".iso" format file should be stored in the specified folder.
This is an "image file" from which the entire Blu-ray/DVD has been extracted.
Select [Mode]-[Ez-Mode Picker...] to return to the menu screen.
To learn how to burn an image file to a blank disc, please see Burn ISO image file to Blu-ray/DVD below.
Burn ISO image file to Blu-ray/DVD
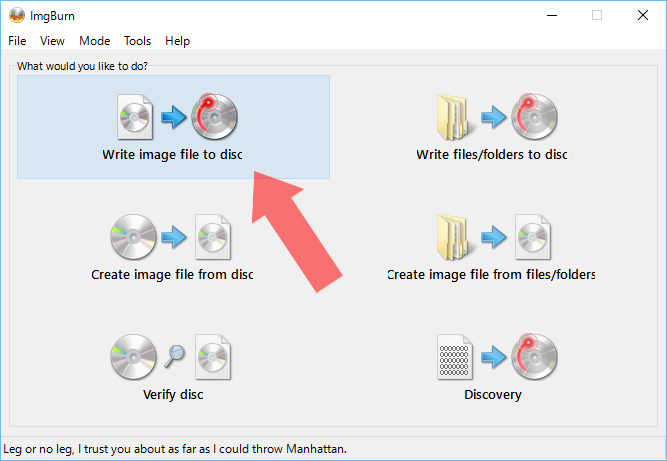 Click the "Write image file to disc" button to write the ISO image file to Blu-ray/DVD.
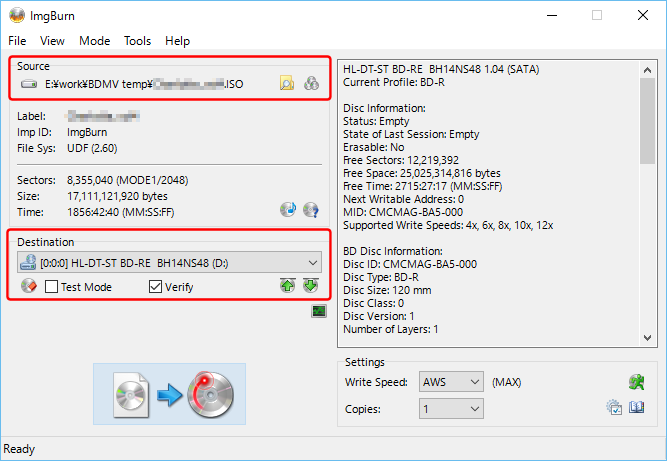 When you insert a blank writable disc into the drive, a screen like this will appear.
Click the folder icon in the "Source" field to select the image file (".iso") to write.
If multiple drives are installed, you can select the drive to write to in the "Destination" field. If you check "Verify", it will also perform verification check after writing.
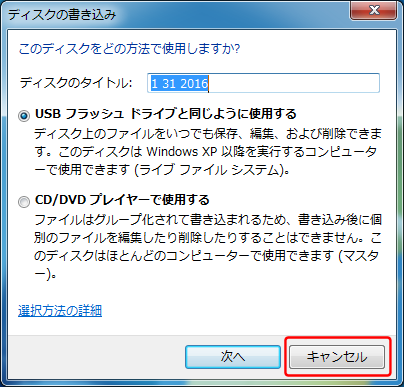 Note that when you insert a blank disc into the drive, a message like this may also be displayed from the Windows OS.
Select "Cancel" to close this.
Note that when you insert a blank disc into the drive, a message like this may also be displayed from the Windows OS.
Select "Cancel" to close this.
| Media | Capacity | Purchase |
|---|---|---|
| DVD-R、DVD+R (Single Layer) | 4.7GB |  |
| DVD-R DL (Double Layer) | 8.5GB | |
| BD-R (Single Layer) | 25GB | |
| BD-R DL (Double Layer) | 50GB | |
 Configure settings for writing on the [Tools]-[Settings..]-[Write] tab.
For DVDs, you can specify whether to finalize or not in the [Write Type] field.
When writing an image file, select [DAO(Disk at once)]. It also does finalization.
This specification is not required for Blu-ray.
Configure settings for writing on the [Tools]-[Settings..]-[Write] tab.
For DVDs, you can specify whether to finalize or not in the [Write Type] field.
When writing an image file, select [DAO(Disk at once)]. It also does finalization.
This specification is not required for Blu-ray.
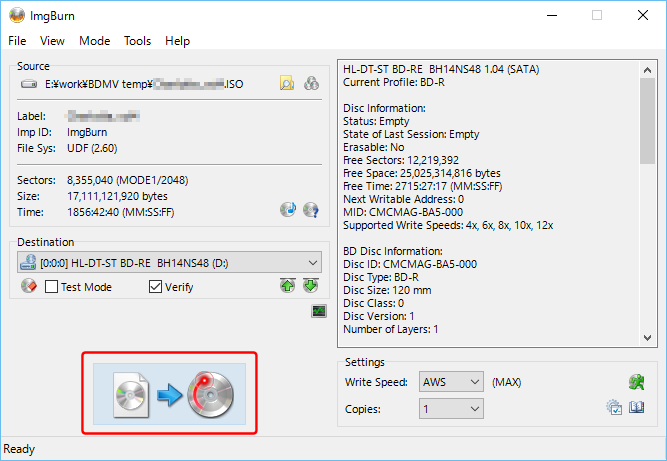 Once the settings are complete, click the illustration at the bottom left of the screen.
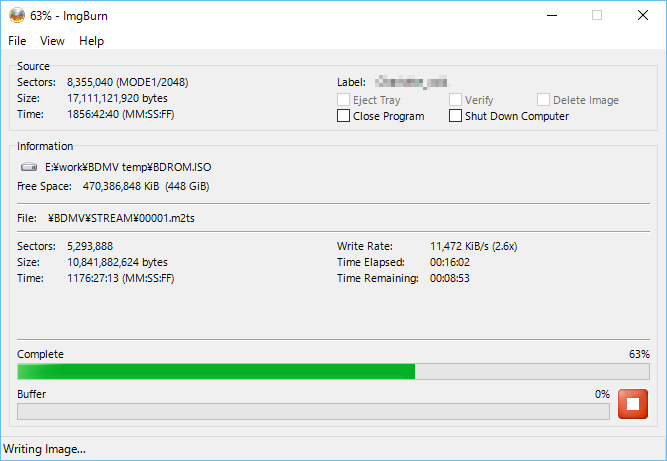
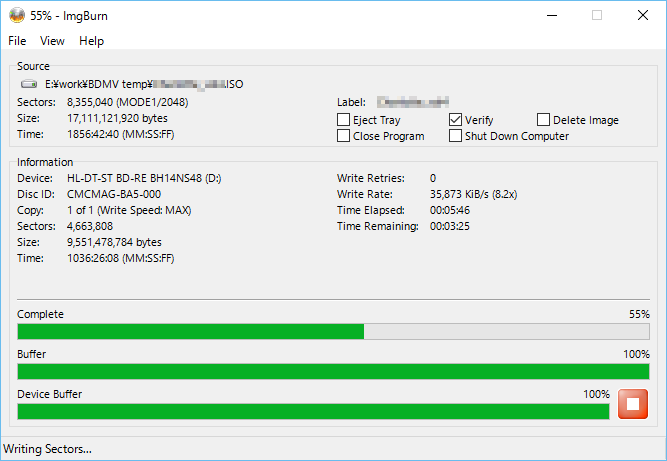 A screen like this will appear while writing. Wait as long as possible without doing anything else on your computer.
The time it takes to write depends on the capacity of the image file and the performance of the drive, but in the case of Blu-ray it takes over 20 minutes, and verification takes nearly twice that time.
If you check "Shut Down Computer" at the top right of the screen, you can automatically shut down your computer after writing is complete.
Writing is complete when a screen like this appears.
A screen like this will appear while writing. Wait as long as possible without doing anything else on your computer.
The time it takes to write depends on the capacity of the image file and the performance of the drive, but in the case of Blu-ray it takes over 20 minutes, and verification takes nearly twice that time.
If you check "Shut Down Computer" at the top right of the screen, you can automatically shut down your computer after writing is complete.
Writing is complete when a screen like this appears.
Select [Mode]-[Ez-Mode Picker...] to return to the menu screen.
Precautions when writing multiple discs continuously
If you want to burn multiple Blu-ray/DVD discs in succession, please allow some time between each disc to allow the Blu-ray/DVD drive to cool down. Otherwise, writing the second and subsequent disks may fail.
Perform only verification check
You can also perform verification check between ISO image files and Blu-ray/DVD discs individually. If you think that writing may have failed, try verifying it.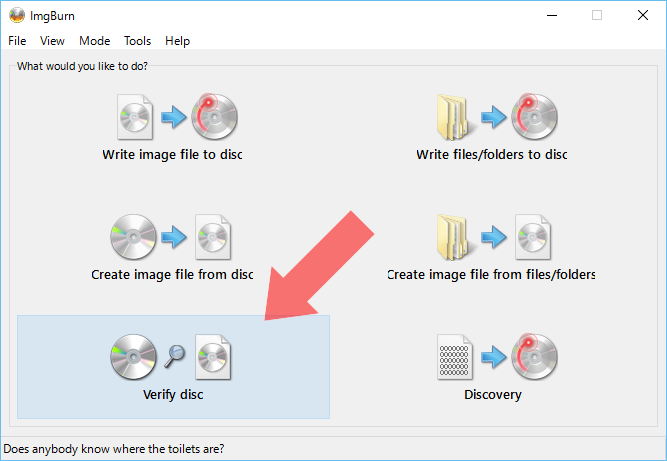 To verify only, click the "Verify disc" button.
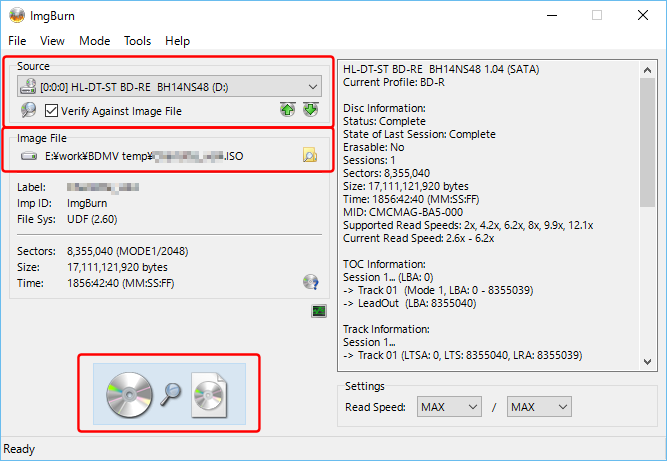 When you insert the Blu-ray/DVD disc you want to check, a screen like this will appear.
If multiple drives are installed, you can select the drive to read from in the "Source" field.
Select the ISO image file (".iso") to be compared by clicking the folder icon in the "Image File" column.
Once the settings are complete, click the illustration at the bottom left of the screen to start checking.
Create ISO image file
If you already have a [BDMV] or [VIDEO_TS] folder that has been ripped from a Blu-ray/DVD, create an ISO image file before writing it to a disc.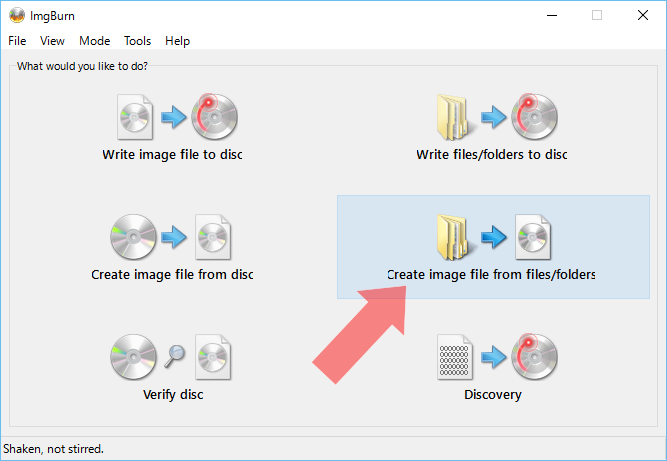 To create an ISO image file, click the "Create image file from files/folders" button.
 Drag and drop the data you want to write into the "Source" field.
For Blu-ray, specify two folders: [BDMV] and [CERTIFICATE].
For DVDs, specify [VIDEO_TS] (and [AUDIO_TS] if available).
Drag and drop the data you want to write into the "Source" field.
For Blu-ray, specify two folders: [BDMV] and [CERTIFICATE].
For DVDs, specify [VIDEO_TS] (and [AUDIO_TS] if available).
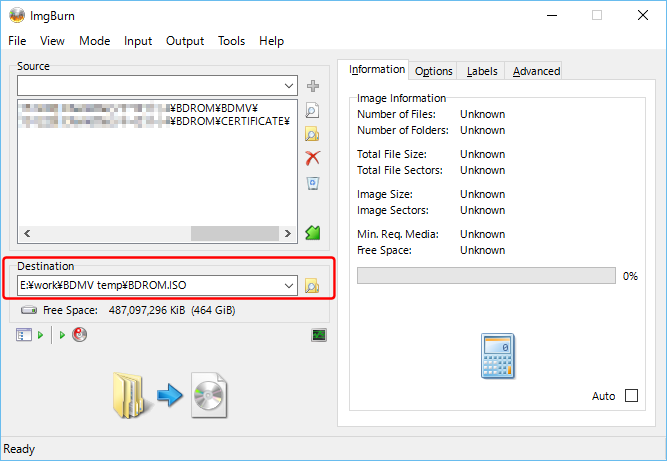 Specify the storage location of the ISO image file to be created in the "Destination" field.
Click the folder icon to specify the folder.
Specify the storage location of the ISO image file to be created in the "Destination" field.
Click the folder icon to specify the folder.
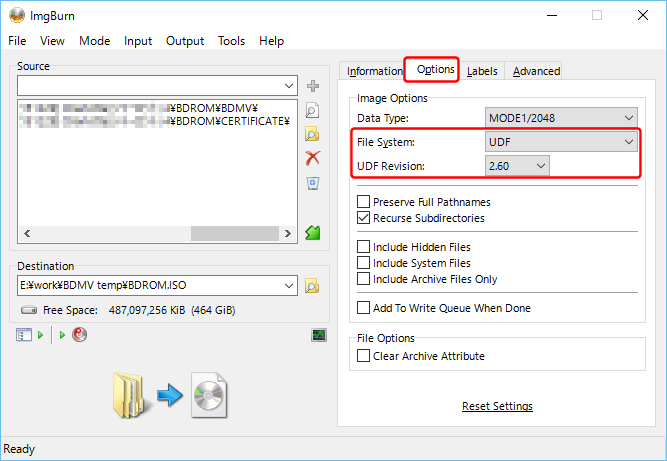 Specify the file system and UDF revision in the "Options" field.
| Media | File System | UDF Revision |
|---|---|---|
| BD-R | UDF | 2.60 |
| BD-RE | UDF | 2.50 |
| DVD | ISO9660 + UDF | 1.02 |
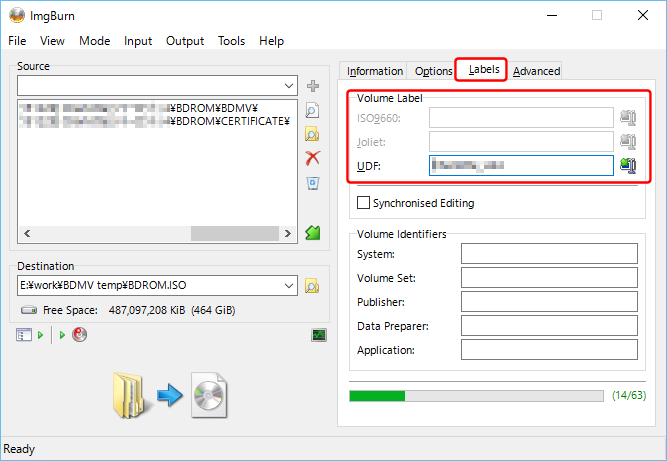 Specify the volume label in the "Labels" field.
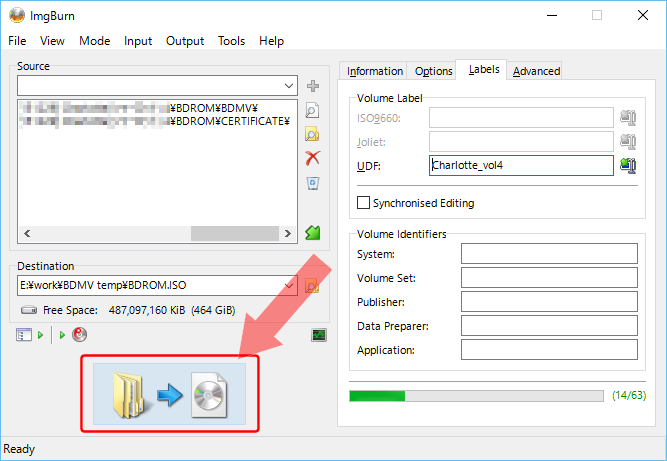 Once the settings are complete, click the illustration at the bottom left of the screen.
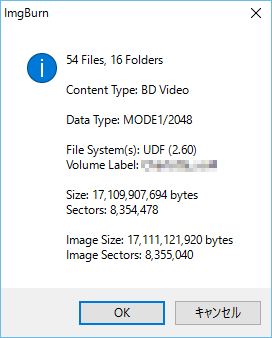 A confirmation screen like this will then appear.
Check that the specification is correct.
If it is correct, click "OK".
A confirmation screen like this will then appear.
Check that the specification is correct.
If it is correct, click "OK".
 The creation of the ISO image file will then begin.
It takes about 20 minutes to create a Blu-ray (single layer: max. 25GB).
Creation is complete when a screen like this appears.
Burn the resulting ISO file to a disc using the steps shown in
Burn ISO image file to Blu-ray/DVD
.
Once you create an ISO file, you can copy it to as many copies as you like.
The creation of the ISO image file will then begin.
It takes about 20 minutes to create a Blu-ray (single layer: max. 25GB).
Creation is complete when a screen like this appears.
Burn the resulting ISO file to a disc using the steps shown in
Burn ISO image file to Blu-ray/DVD
.
Once you create an ISO file, you can copy it to as many copies as you like.
Select [Mode]-[Ez-Mode Picker...] to return to the menu screen.
Burn ISO image file to Blu-ray/DVD
Blu-ray/DVD cannot be read or errors occur!?
Blu-ray/DVDs have higher information density than CDs, and slight errors may cause reading errors. If an error occurs, please wipe the Blu-ray/DVD clean and try reading it again. Reading errors may also occur if the Blu-ray/DVD drive is tilted or installed vertically. Lay the computer down so that the Blu-ray/DVD disc can be set horizontally, and then try reading it again.Additionally, compatibility issues may occur with free software such as DAEMONTOOL and DVD43. Updating these software to the latest version or terminating the resident status of tools that are not in use may help.
Burn .CDI format files to CD-R
With ImgBurn, you can also burn .CDI (Compact Disk Image) format files generated with the software "DiscJuggler" to CD-R.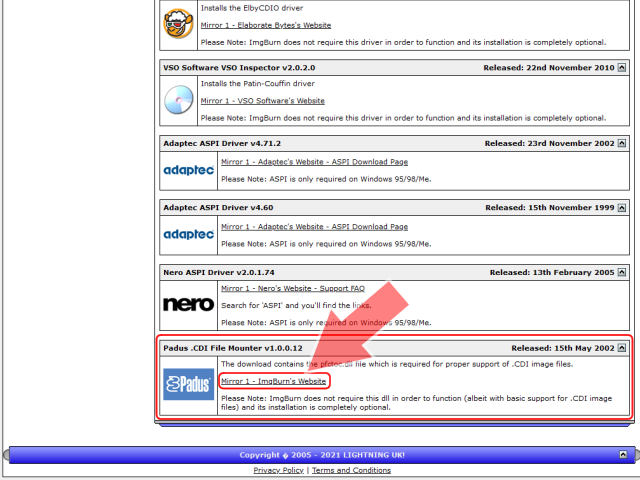 To write CDI format files to CD-R, you need to install a plug-in.
The plugin can be downloaded from
ImgBurn official website download page
.
Open the official website and scroll to the bottom of the screen.
Then there is a plugin called "Padus .CDI File Mounter".
Click the link here to download a compressed file called "pfctoc.zip".
To write CDI format files to CD-R, you need to install a plug-in.
The plugin can be downloaded from
ImgBurn official website download page
.
Open the official website and scroll to the bottom of the screen.
Then there is a plugin called "Padus .CDI File Mounter".
Click the link here to download a compressed file called "pfctoc.zip".
ImgBurn official website download page
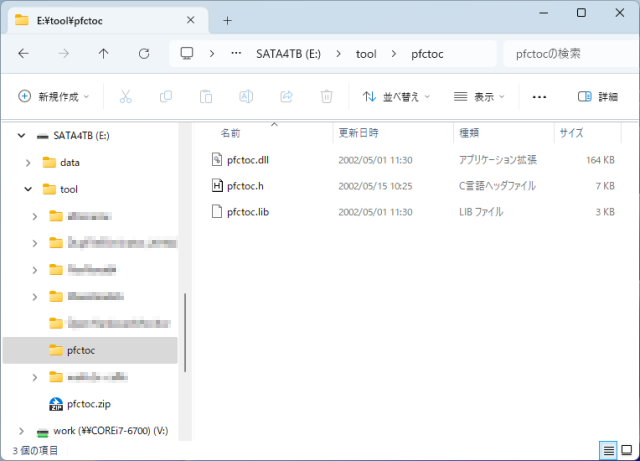 When you unzip "pfctoc.zip", you will get three files like this.
Move all these to ImgBurn's installation folder.
When you unzip "pfctoc.zip", you will get three files like this.
Move all these to ImgBurn's installation folder.
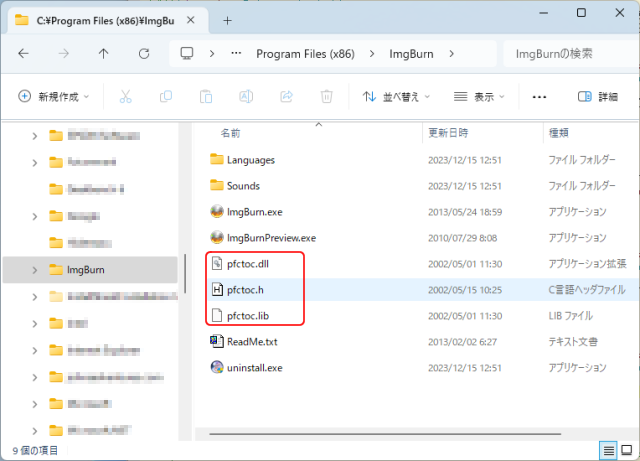 ImgBurn installation folder is usually "C:\Program Files (x86)\ImgBurn"
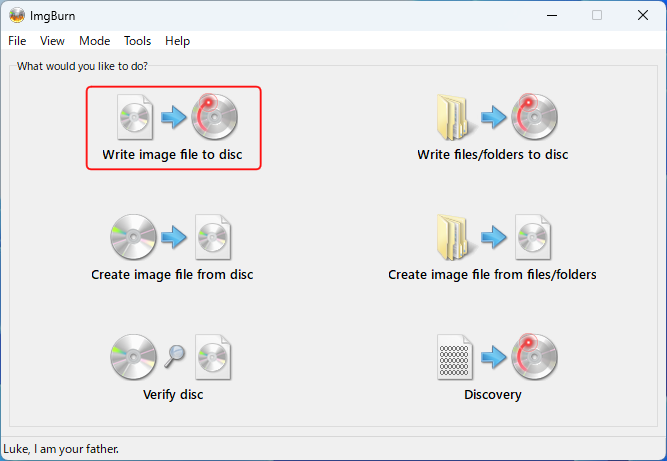 Click the "Write image file to disc" menu to write a .CDI file.
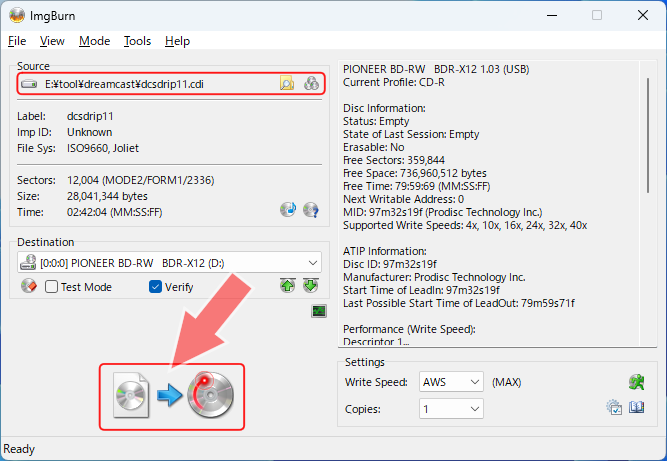 Click the folder icon in the "Source" field at the top of the screen and specify the CDI format file you want to write.
Insert a blank CD-R into the BD/DVD drive.
Then click the icon at the bottom of the screen to start writing.
Click the folder icon in the "Source" field at the top of the screen and specify the CDI format file you want to write.
Insert a blank CD-R into the BD/DVD drive.
Then click the icon at the bottom of the screen to start writing.
 If writing is successful, a screen like this will appear.