

How to enjoy MSFS's Photo Mode and World Photographer
MSFS2024 has added a new camera called "Photo Mode" that allows you to take screen captures by adjusting the angle, exposure, and depth of field. You can take photos of every flight scene in the game and save them as images.In addition, an activity called "World Photographer" has been added that uses this "Photo Mode." Here we will introduce how to enjoy this new activity.
このページを日本語で見る
Contents

What is World Photographer?
"World Photographer" is an activity where you visit tourist spots around the world by airplane and take photos. You can view the photos you take at any time in the "Photo Album". Just like the conventional " Discovery Flight " activity, you can start flying above the world's famous spots without any complicated procedures and take photos as if you were a photographer.However, each activity has specified conditions such as the subjects to include, camera angles, and flight conditions. If the conditions are not met, the activity will not be considered as "goal achievement" if you just take photos as you think of them.
How to enjoy 'World Photographer'
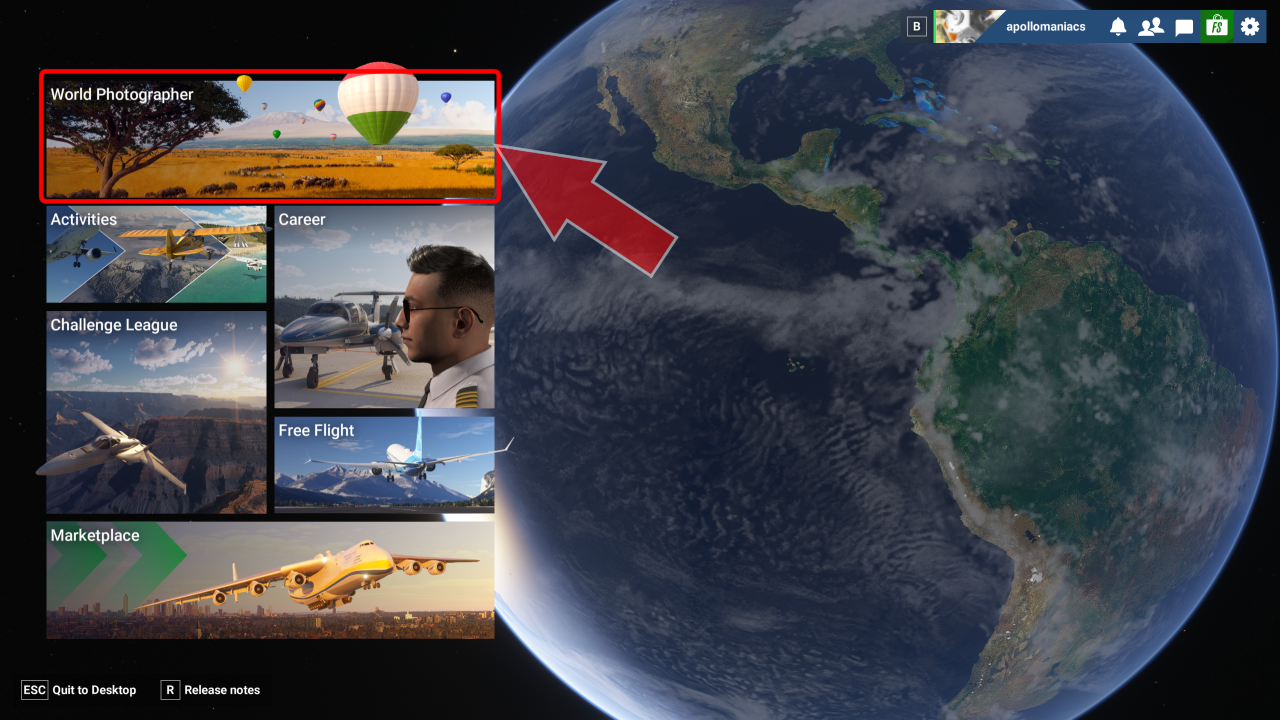 On the game's main screen, select the "World Photographer" menu.
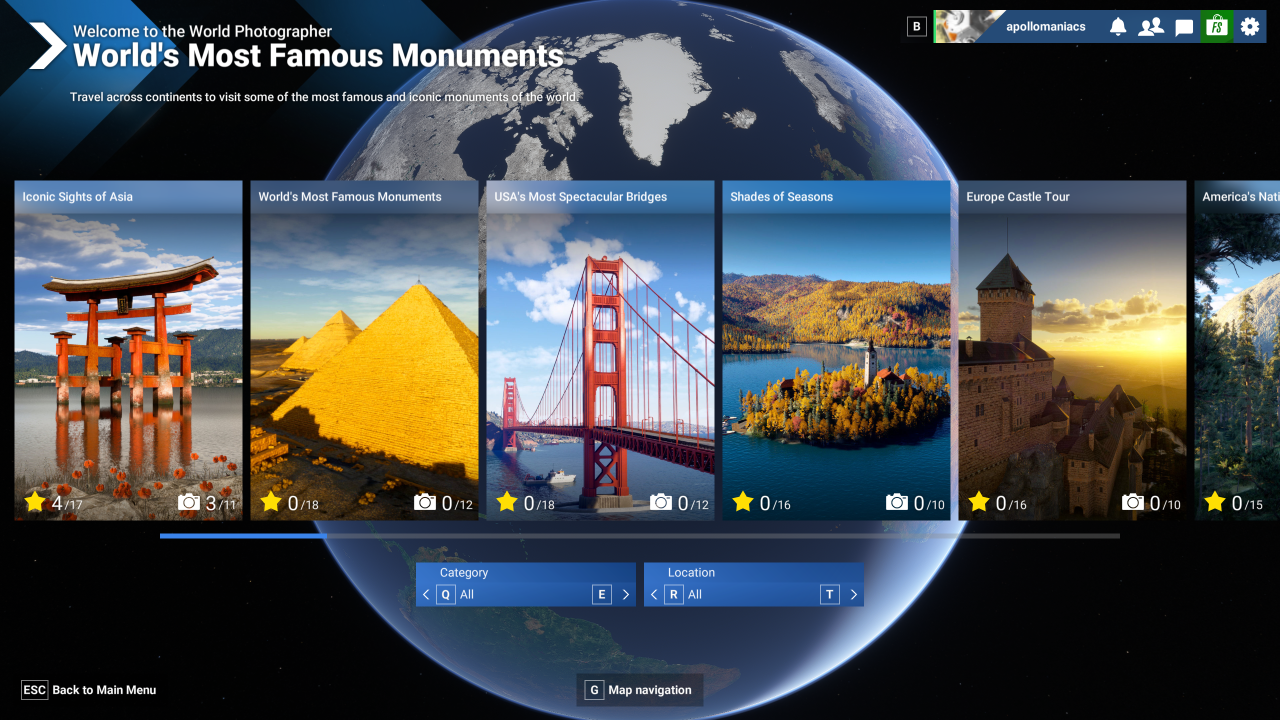 You'll then see a screen like this.
Click on the category you'd like to try.
As of the release of MSFS2024, there are 32 categories, with more than 10 activities in each category.
You'll then see a screen like this.
Click on the category you'd like to try.
As of the release of MSFS2024, there are 32 categories, with more than 10 activities in each category.
By clicking [<][>] in the "Category" and "Location" columns below the menu, you can specify conditions to narrow down activities.
You can also press the [G] key on your keyboard or the [Y] button on your controller to switch screens and select activities from the world map (map navigation).
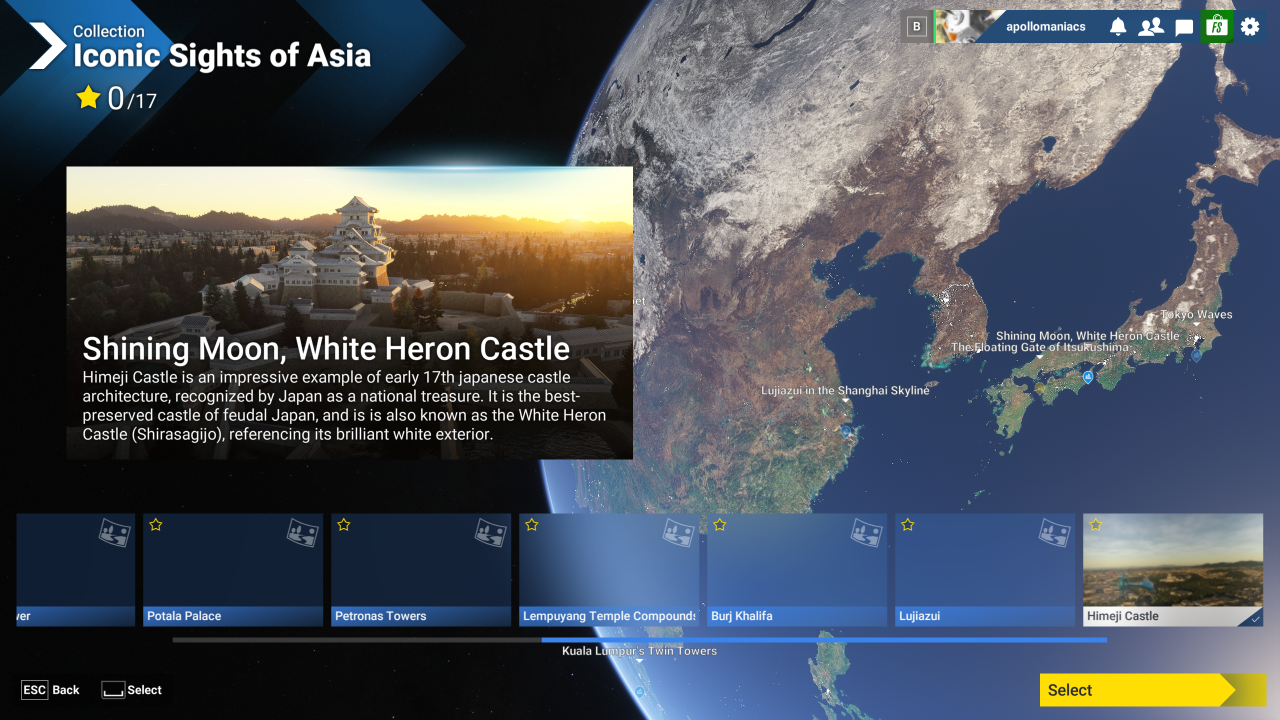 For example, if you select a category on the screen above, you'll see a screen like this.
There will be a row of activities lined up at the bottom center of the screen.
Choose the activity you want to try and click the [Select] button at the bottom right of the screen.
For example, if you select a category on the screen above, you'll see a screen like this.
There will be a row of activities lined up at the bottom center of the screen.
Choose the activity you want to try and click the [Select] button at the bottom right of the screen.
For activities you've already attempted, a thumbnail of the photo you took will be displayed. For activities you haven't attempted yet, no image will be displayed.
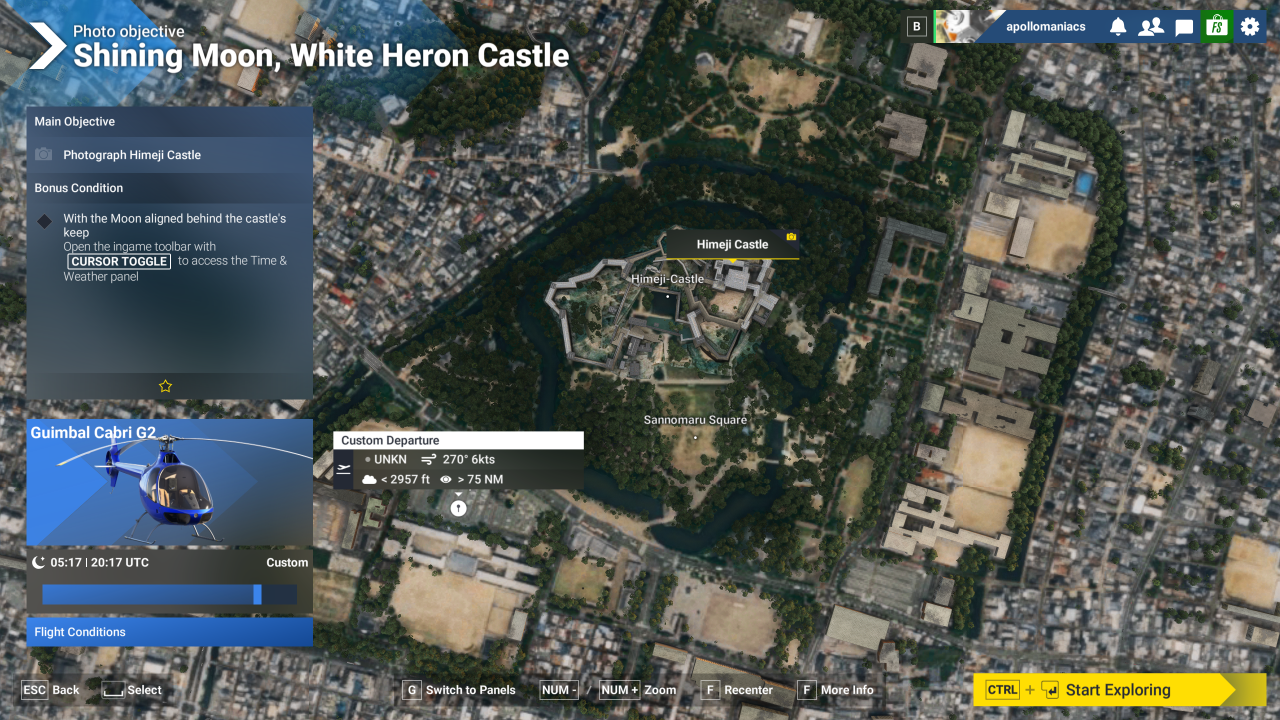 Once you select an activity, you'll see a screen like this.
The goal for this activity is displayed on the left side of the screen.
It gives you instructions on what to shoot and how to shoot it.
Once you select an activity, you'll see a screen like this.
The goal for this activity is displayed on the left side of the screen.
It gives you instructions on what to shoot and how to shoot it.
If multiple goals are listed, achieving them simultaneously will earn you bonus points.
You can change the aircraft, time, and flight conditions by clicking on them at the bottom left of the screen.
You can change the flight start point by clicking on the aerial photo in the center of the screen. In this case, the flight will start northward from about 1,500 feet above the specified location. (The flight altitude will vary depending on the aircraft selected.)
When you're ready, click the [Start Exploring] button at the bottom right of the screen.
 Your activity data will then begin loading.
Once loading is complete, the screen will change.
Click the [READY TO FLY] button at the bottom right of the screen.
Your activity data will then begin loading.
Once loading is complete, the screen will change.
Click the [READY TO FLY] button at the bottom right of the screen.
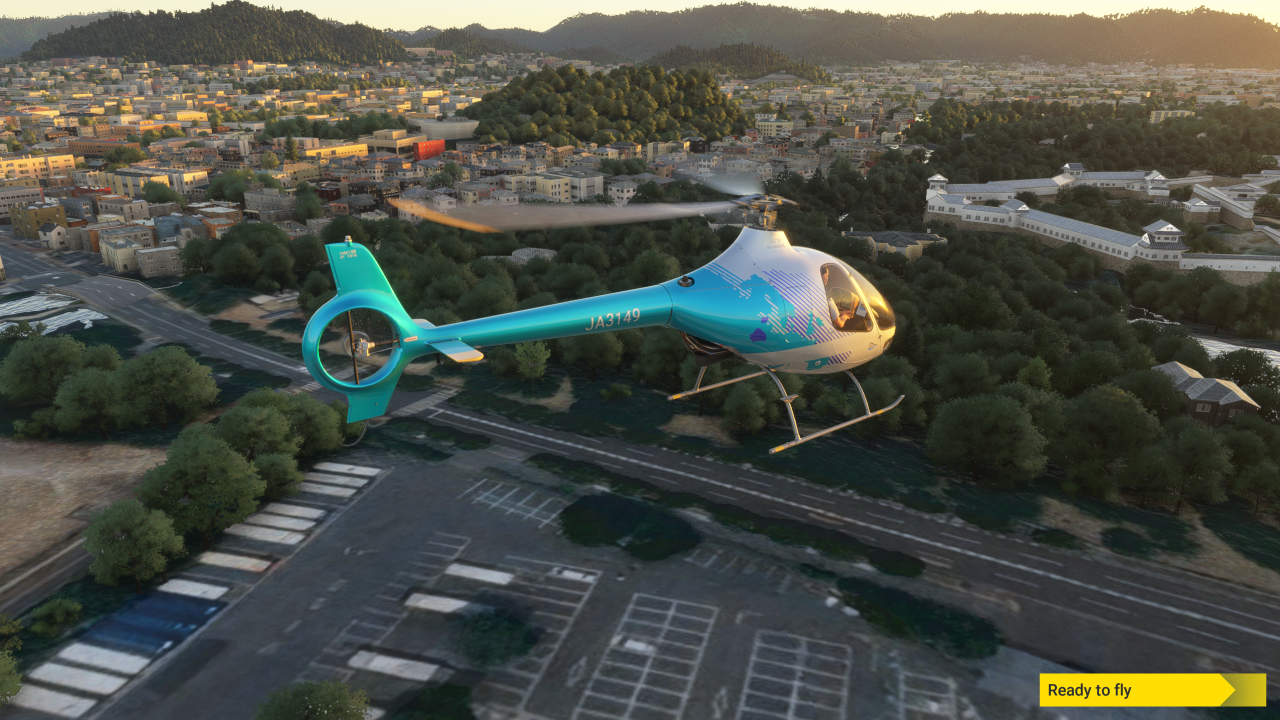
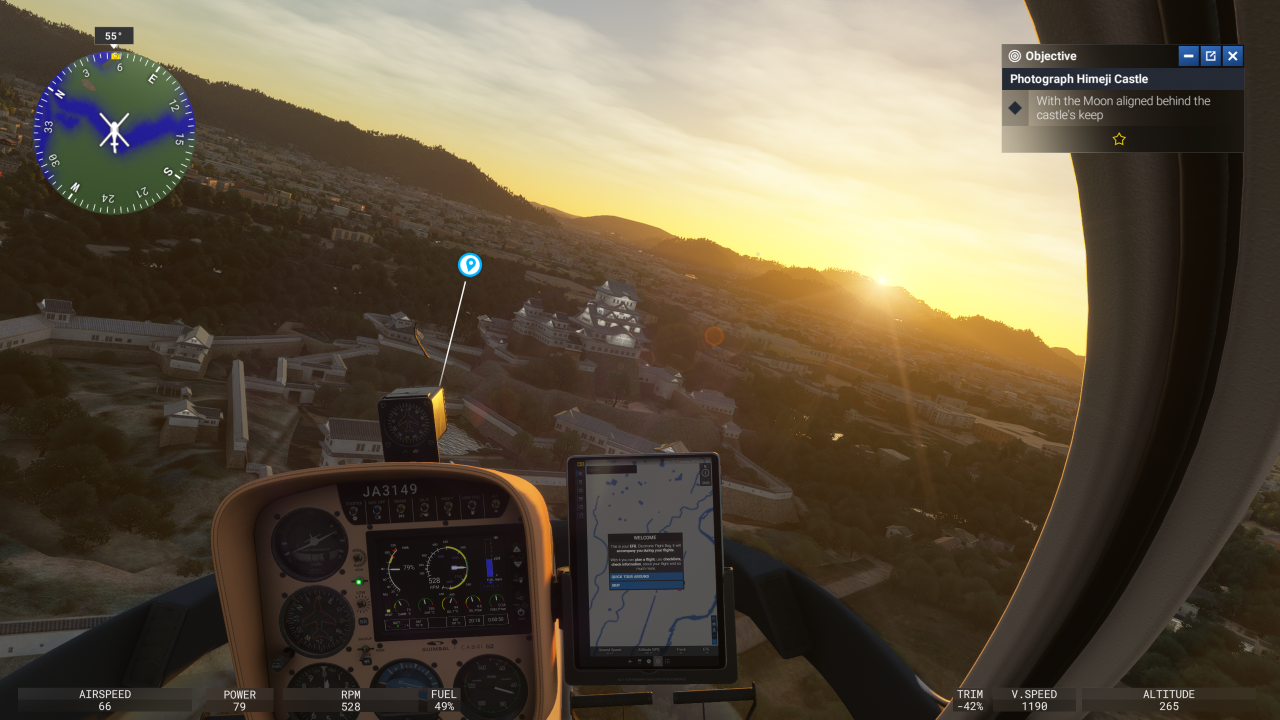 You'll suddenly find yourself flying in the right direction from the right position.
Use the control stick to fly and capture the photo you want to achieve your activity goal.
You'll suddenly find yourself flying in the right direction from the right position.
Use the control stick to fly and capture the photo you want to achieve your activity goal.
If you want to cancel the activity, press the [ESC] key.
 To take a photo, switch to "
Photo Mode."
You'll then see the following screen, where you can adjust the camera position, angle, zoom, exposure, and depth of field.
To take a photo, switch to "
Photo Mode."
You'll then see the following screen, where you can adjust the camera position, angle, zoom, exposure, and depth of field.
"Photo Mode" can be called up from various flights throughout the game, not just from "World Photographer".
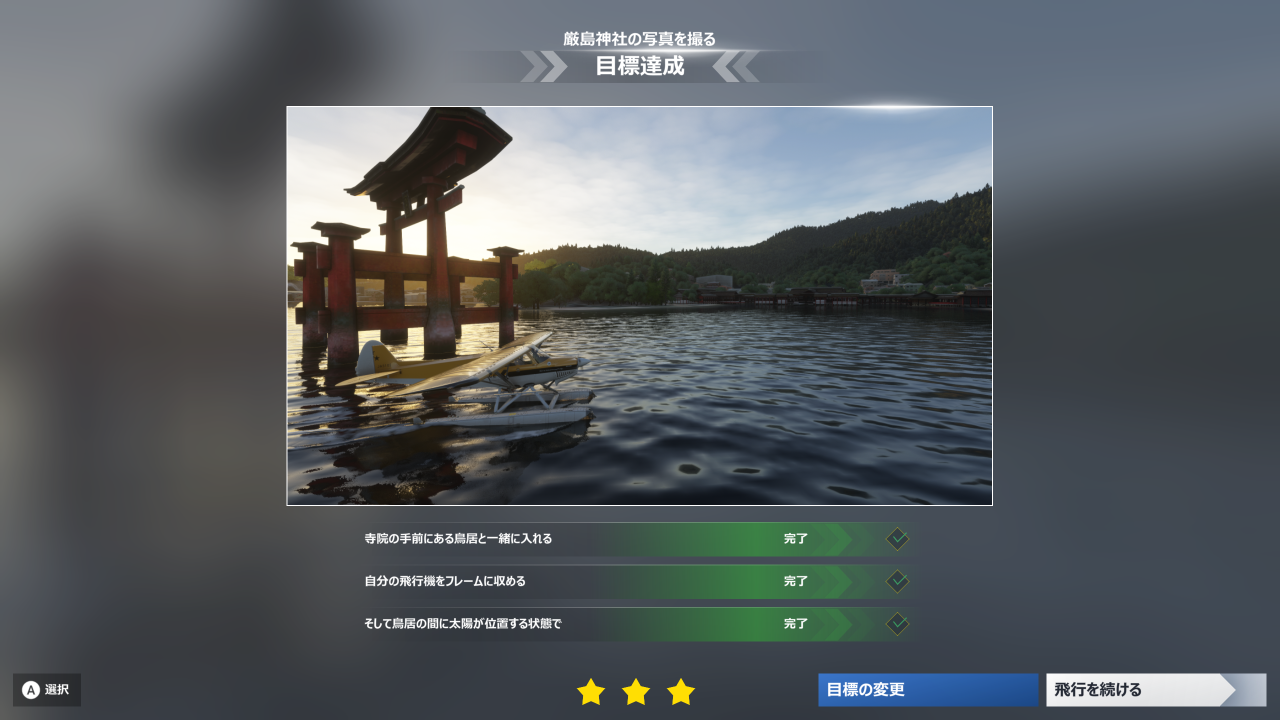 Once you've taken a photo, the screen will look like this.
When you achieve your activity goal, "OBJECTIVE COMPLETE" will be displayed.
Once you've taken a photo, the screen will look like this.
When you achieve your activity goal, "OBJECTIVE COMPLETE" will be displayed.
If there are multiple goals, each goal you achieve will be marked with a checkmark and the star at the bottom center of the screen will turn colored.
You can attempt the same activity as many times as you like and take as many photos as you like. However, the number of goals you achieve will only count as one per activity.
Viewing photos you've taken/How to use the photo album
All photos taken in "Photo Mode" during the game, not just by "World Photographer", can be viewed in the Photo Album.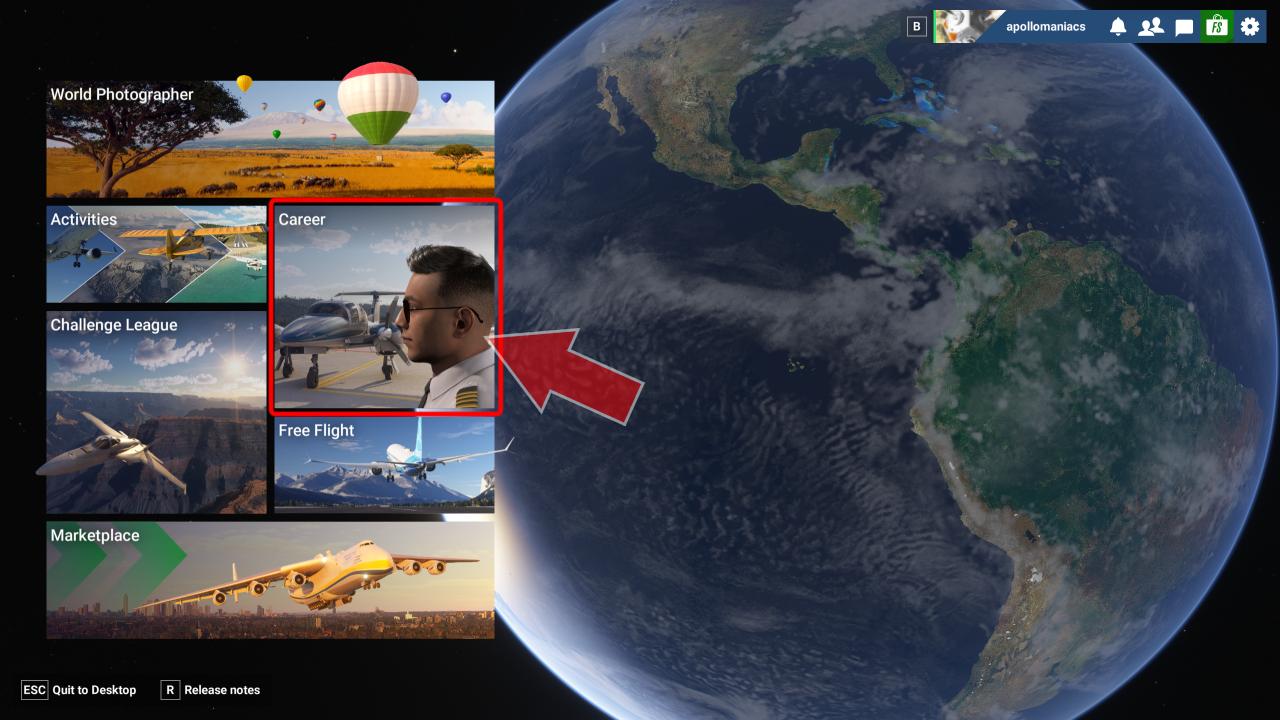 On the game's main screen, select the "Career" menu.
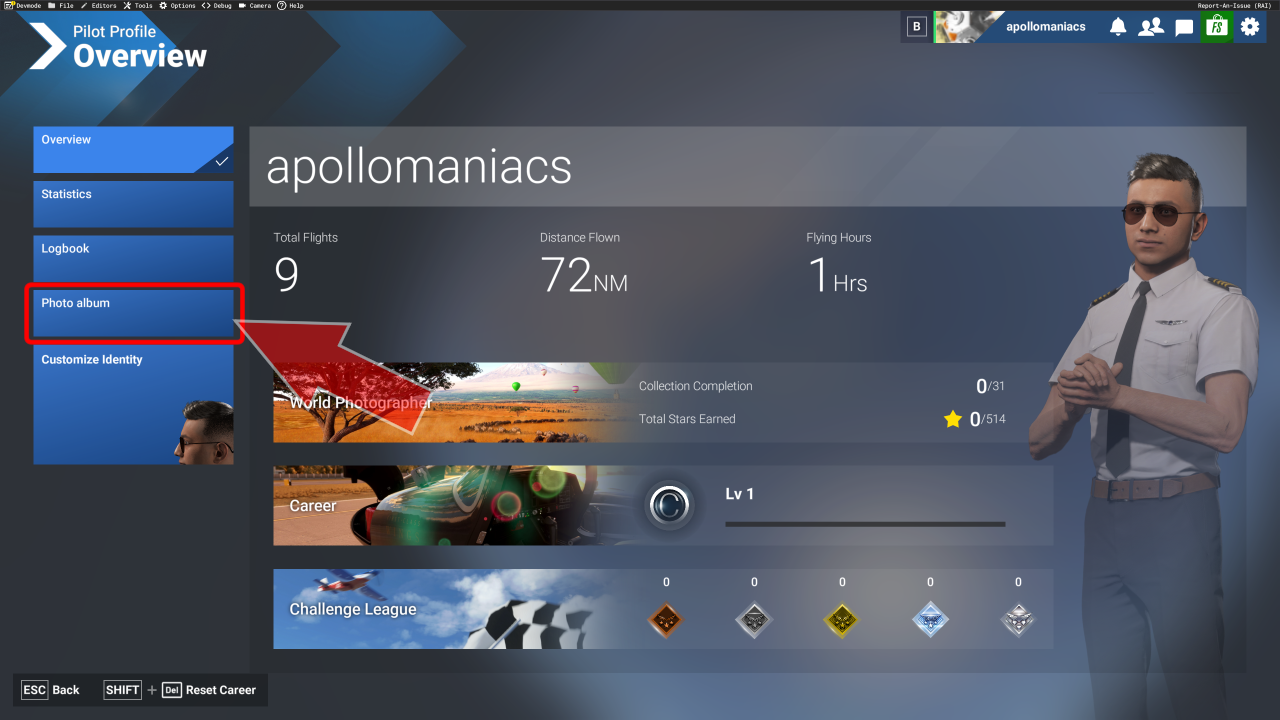 You'll then see a screen like this.
Select "Photo album" from the menu on the left.
You'll then see a screen like this.
Select "Photo album" from the menu on the left.
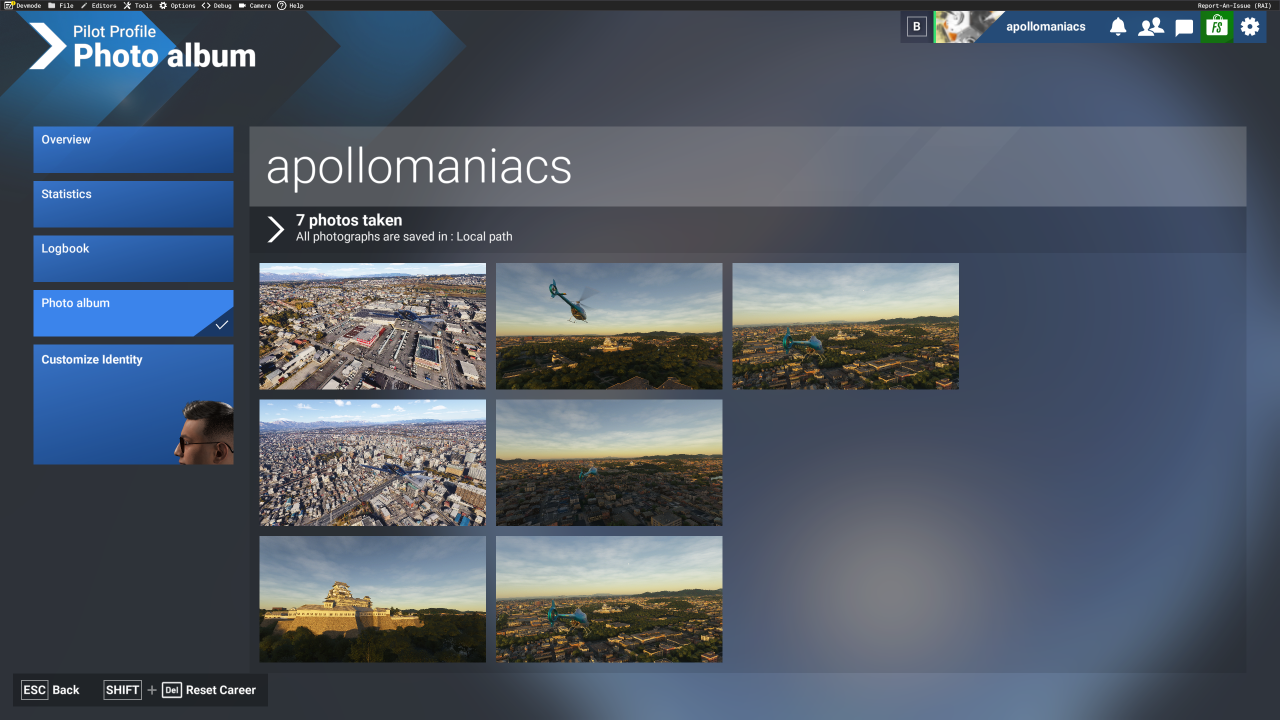 You will then see a list of thumbnails of all the photos you have taken.
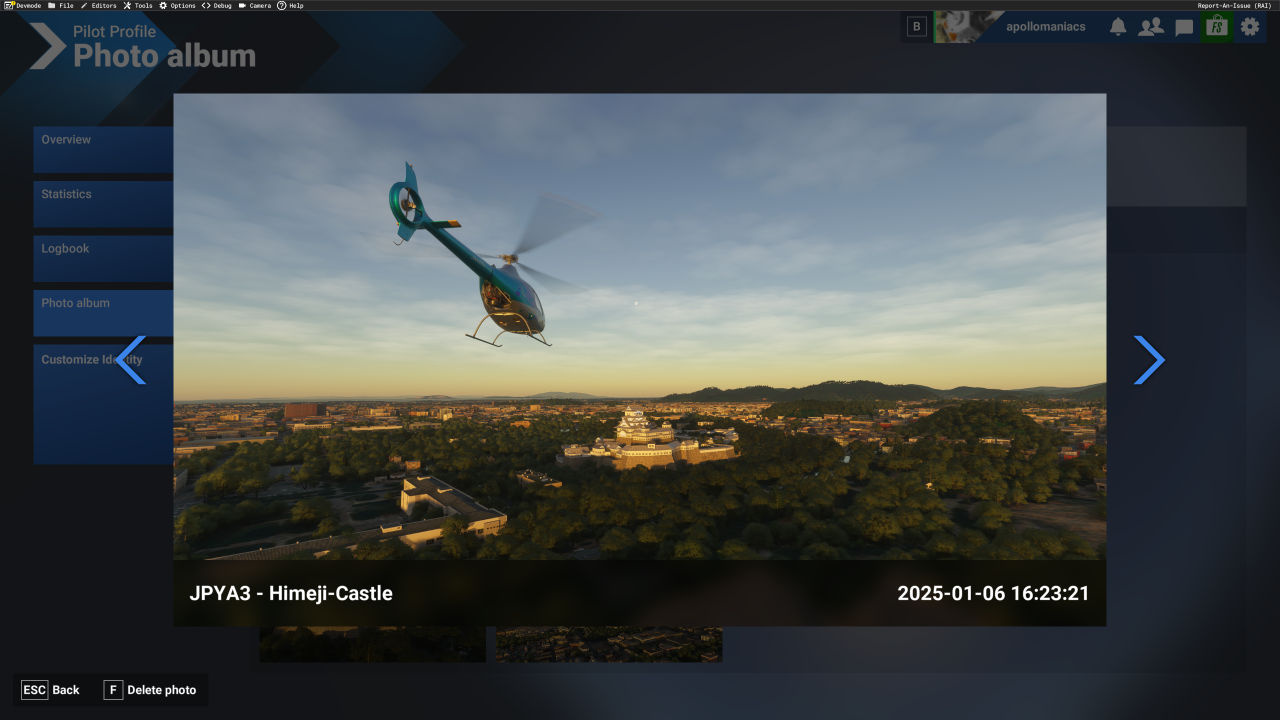 Click on the thumbnail to enlarge the photo.
You can also delete this photo by pressing the [F] key.
The folder where the captured photos are saved
The photos you take will be saved inC:\Users\[username]\AppData\Roaming\Microsoft Flight Simulator 2024\Screenshot
(for the Steam version of MSFS). The image will be saved in ".png" format with the same resolution as the game screen and the file name will be the capture date and time, such as "yyyy-mm-dd-hh-mm-ss.png".
How to use the 'Photo Mode' camera
The operation method is almost the same as that of a drone camera .Enable/Disable Photo Mode
Each time you press the key shown in the diagram, photo mode will be enabled/disabled. You can activate photo mode and take photos in most situations in MSFS, not just in the "World Photographer" menu. On a controller, you can also exit photo mode by pressing the [B] button.
| MSFS2024 | |
|---|---|
| Keybord | [Shift]+[V] |
| Controller | [LB]+[RB] / [B](off) |
![Photo mode toggle : [Shift]+[V]](flight/msfs_camera_photomode_photomodetoggle_kybd.png "Photo mode toggle : [Shift]+[V]")
![Photo mode toggle : [LB]+[RB] / [B](off)](flight/msfs_camera_photomode_photomodetoggle_ctrl.png "Photo mode toggle : [LB]+[RB] / [B](off)")
Take a photo/press the shutter
| MSFS2024 | |
|---|---|
| Keybord | [Space] |
| Controller | [A] |
![Take Picture : [Space]](flight/msfs_camera_photomode_takepicture_kybd.png "Take Picture : [Space]")
![Take Picture : [A]](flight/msfs_camera_photomode_takepicture_ctrl.png "Take Picture : [A]")
Look up, down, left and right
| MSFS2024 | |
|---|---|
| Keybord | [I]/[K]/[J]/[L] or Arrow Key |
| Controller | Right thum stick |
![Pitch up/down and Pan left/right : [I][K][J][L] or Arrow Key](flight/msfs_camera_photomode_pitchpan_kybd.png "Pitch up/down and Pan left/right : [I][K][J][L] or Arrow Key")

Move the camera up, down, left and right
Use the [E][Q] keys to move up and down, and the [A][D] keys to move left and right.
| MSFS2024 | |
|---|---|
| Keybord | [E]/[Q]/[A]/[D] |
| Controller | up/down : [RT]/[LT], left/right : Left thum stick |
![Move up/down/left/right : [E][Q][A][D]](flight/msfs_camera_photomode_moveupdownleftright_kybd.png "Move up/down/left/right : [E][Q][A][D]")
![Move up/down : [RT]/[LT], left/right : Left thum stick](flight/msfs_camera_photomode_moveupdownleftright_ctrl.png "Move up/down : [RT]/[LT], left/right : Left thum stick")
Move the camera forward and backward
| MSFS2024 | |
|---|---|
| Keybord | [W]/[S] |
| Controller | Left thum stick Up/Down |
![Move forward/backward : [W]/[S]](flight/msfs_camera_photomode_moveforwardbackward_kybd.png "Move forward/backward : [W]/[S]")

Zoom in / zoom out
| MSFS2024 | |
|---|---|
| Keybord | In : [Shift]+[O] or [;] Out : [Shift]+[U] or [-] |
| Controller | In : [Y]+[RT] Out : [Y]+[LT] |
![Zoom In/Out : [Shift]+[O][U] or [;]/[-]](flight/msfs_camera_photomode_zoominout_kybd.png "Zoom In/Out : [Shift]+[O][U] or [;]/[-]")
![Zoom In/Out : [Y]+[RT]/[LT]](flight/msfs_camera_photomode_zoominout_ctrl.png "Zoom In/Out : [Y]+[RT]/[LT]")
Roll the camera
| MSFS2024 | |
|---|---|
| Keybord | [O]/[U] |
| Controller | [LB]+Right thum stick Left/Right |
![Roll left/right : [O]/[U]](flight/msfs_camera_photomode_rollleftright_kybd.png "Roll left/right : [O]/[U]")
![Roll left/right : [LB]+Right thum stick Left/Right](flight/msfs_camera_photomode_rollleftright_ctrl.png "Roll left/right : [LB]+Right thum stick Left/Right")
Reset camera roll (level)
| MSFS2024 | |
|---|---|
| Keybord | [Shift]+[Space] |
| Controller | Right thum stick Push |
![Reset horizon : [Shift]+[Space]](flight/msfs_camera_photomode_resethorizon_kybd.png "Reset horizon : [Shift]+[Space]")

Enable/Disable Auto Exposure
Auto exposure automatically adjusts brightness to suit the brightness of the scene.
| MSFS2024 | |
|---|---|
| Keybord | [2] or [Shift]+[F4] |
| Controller | [X]+Directional Pad Up |
![Toggle auto exposure : [2] or [Shift]+[F4]](flight/msfs_camera_photomode_toggleautoexposure_kybd.png "Toggle auto exposure : [2] or [Shift]+[F4]")
![Toggle auto exposure : [X]+Directional Pad Up](flight/msfs_camera_photomode_toggleautoexposure_ctrl.png "Toggle auto exposure : [X]+Directional Pad Up")
Increase/decrease exposure
Increasing the exposure makes the screen brighter, decreasing it makes the screen darker.
| MSFS2024 | |
|---|---|
| Keybord | Inc : [T] or [Shift]+[F3] Dec : [G] or [Shift]+[F2] |
| Controller | Inc : [X]+[RB] Dec : [X]+[LB] |
![Exposure Increase/Decrease : [T]/[G] or [Shift][F3]/[F2]](flight/msfs_camera_photomode_exposureincreasedecrease_kybd.png "Exposure Increase/Decrease : [T]/[G] or [Shift][F3]/[F2]")
![Exposure Increase/Decrease : [X]+[RB]/[LB]](flight/msfs_camera_photomode_exposureincreasedecrease_ctrl.png "Exposure Increase/Decrease : [X]+[RB]/[LB]")
Enable/Disable Autofocus
| MSFS2024 | |
|---|---|
| Keybord | [1] or [F4] |
| Controller | [X]+Directional Pad Down |
![Toggle auto focus : [1] or [F4]](flight/msfs_camera_photomode_toggleautofocus_kybd.png "Toggle auto focus : [1] or [F4]")
![Toggle auto focus : [X]+Directional Pad Down](flight/msfs_camera_photomode_toggleautofocus_ctrl.png "Toggle auto focus : [X]+Directional Pad Down")
Increase/decrease depth of field
Increasing the depth of field will allow a wider area to be in focus.
| MSFS2024 | |
|---|---|
| Keybord | Inc : [R] or [Shift]+[F7] Dec : [F] or [Shift]+[F6] |
| Controller | Inc : [X]+[RT] Dec : [X]+[LT] |
![Focus Increase/Decrease : [Shift]+[Space]/[Ctrl]+[Space]](flight/msfs_camera_photomode_focusincreasedecrease_kybd.png "Reset cockpit view : [Shift]+[Space]/[Ctrl]+[Space]")