


How to expand C drive on Windows 11 PC. Copy SSD to enlarge and reassign partition / How to use Macrium Reflect Home
If your computer's C drive is running out of space, copy it to a large-capacity SSD and replace it. You can easily copy an entire hard disk or SSD to another disk using Macrium Reflect Home, a software that can back up and clone disks. You can also rearrange and resize each partition.
How to expand drive capacity / Clone (copy) and replace
If your hard disk or SSD is running low on capacity, you can clone (copy) it to a larger capacity disk and replace it. You can even expand the capacity of your C drive, which is the Windows startup drive, by cloning and replacing it. Once the cloning is complete, you can continue using Windows as before by simply replacing the SSD.Time it takes to clone (copy)
The time it takes to clone (copy) depends on the amount of data to be copied and the access speeds of the source and destination disks. In my tests, it took about two hours to copy a 2TB SSD (about 1.5TB of data) to a 3TB hard disk, and about five hours to copy it to a 4TB SSD.
SSDs in particular take a long time to write to, and writing large amounts of data can cause degradation due to heat generation. To avoid mistakes and rework, and to verify the procedure, we recommend testing the procedure on a blank hard disk before making the actual copy.
What is Macrium Reflect Home?
Macrium Reflect Home is a software developed by Macrium Software that can back up and restore disks on Windows computers. It is a highly functional software that can automatically take backups according to a schedule and restore in the event of a crash.One of the many features it has is the ability to clone (copy) a disk. You can even copy the entire Windows boot drive. Even if you have created multiple partitions (drives) on a single hard disk or SSD, you can rearrange the layout of each partition or make detailed changes to their capacity before copying them.
Macrium Reflect Home is a paid software that costs USD 49.99 per year or USD 79.99 for a one-time payment, but a 30-day free trial is available. I think the free trial is sufficient for many users. It's an excellent software, so it's worth purchasing, but it's a bit expensive for just cloning a disk. It would be nice if they offered a cheaper software that focuses on the cloning function...

Preparing the New SSD Drive
 First, prepare a new disk to copy to.
There are many types of M.2 SSDs, including 2280 / 2260 / 2242 / 2230 sizes, single-sided / double-sided component mounting methods, M Key / B Key / B&M Key connector shapes, and NVMe / SATA / AHCI interfaces.
Check the specifications of the SSD that can be installed in your computer.
Most recent computers are compatible with "2280/single-sided/M Key/NVMe."
First, prepare a new disk to copy to.
There are many types of M.2 SSDs, including 2280 / 2260 / 2242 / 2230 sizes, single-sided / double-sided component mounting methods, M Key / B Key / B&M Key connector shapes, and NVMe / SATA / AHCI interfaces.
Check the specifications of the SSD that can be installed in your computer.
Most recent computers are compatible with "2280/single-sided/M Key/NVMe."
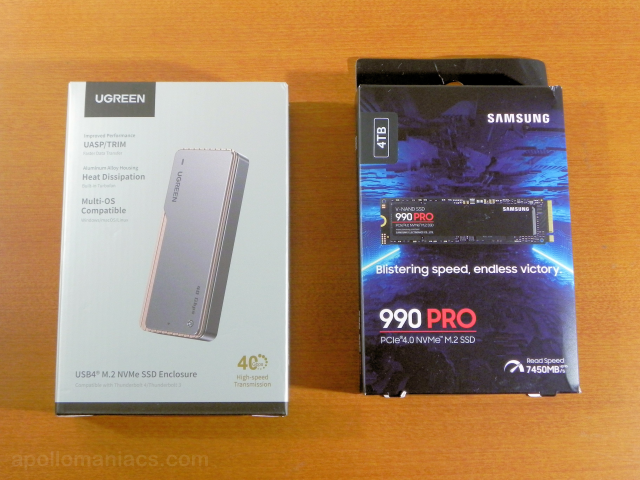
You will also need to prepare a USB-connected SSD enclosure (case) to house the destination SSD during copying. The speed specifications of the USB you connect are important. If your computer has a USB 4.0 port, you will be able to copy faster if you use an SSD enclosure that is also compatible with USB 4.0.
The disk prepared this time is a Samsung 990 PRO 4TB (Amazon.com) with 2280/single-sided/M Key/NVMe, and the SSD enclosure is the UGREEN M.2 SSD Case 15976-40GB (Amazon.com) which is compatible with USB 4.0.
-
Samsung 990 PRO 4TB PCIe Gen 4.0 x4 NVMe M.2 (2280) SSD MZ-V9P4T0B-IT

Samsung 2023-10-31 USD299.99
Consider this a cheat code; Our Samsung 990 PRO Gen4 SSD helps you reach near max performance* with lightning-fast speeds; Whether you’re a hardcore gamer or a tech guru, you’ll get power efficiency built for the final boss

-
UGREEN 40Gbps M.2 NVMe Enclosure with Cooling Fan
Ugreen Group Limited USD129.99
This NVME Enclosure features UGREEN Exclusive Triple Heat Dissipation Mechanism. The pure aluminum alloy casing provides excellent heat conductivity, while the silicone thermal pad absorbs and disperses the heat generated by the hard drive. The high-speed cooling fan accelerates the heat dissipation process, effectively reducing the hard drive temperature and improving its stability and reliability
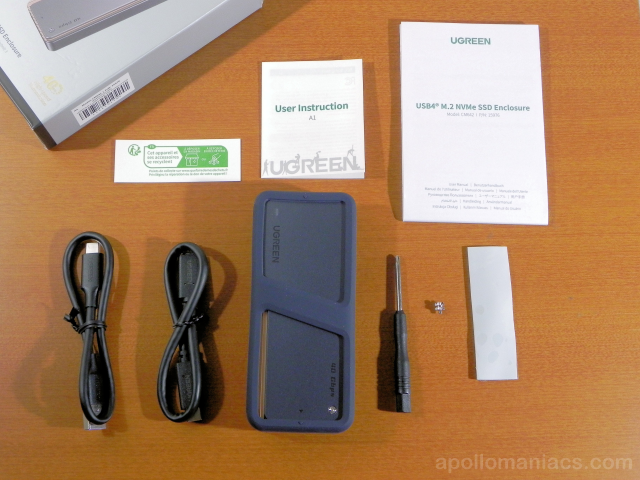 This is what's included in the UGREEN M.2 SSD case box.
The top row is the instruction manuals.
The bottom row is a USB Type-A to Type-C cable, a USB Type-C to Type-C cable, an SSD case, a Phillips head screwdriver, extra SSD mounting screws, and a thermal pad.
This is what's included in the UGREEN M.2 SSD case box.
The top row is the instruction manuals.
The bottom row is a USB Type-A to Type-C cable, a USB Type-C to Type-C cable, an SSD case, a Phillips head screwdriver, extra SSD mounting screws, and a thermal pad.
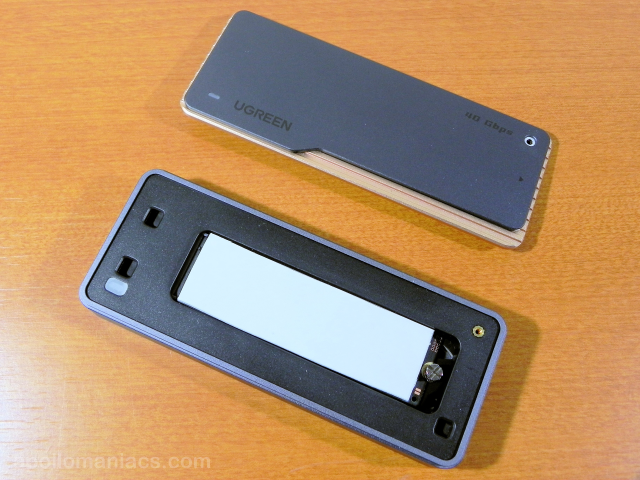
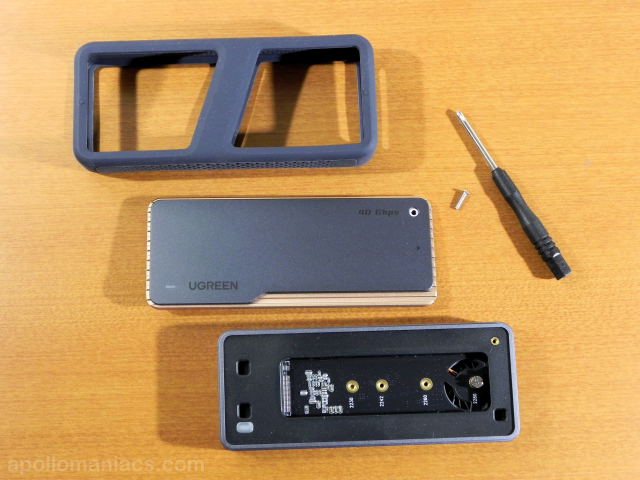 Remove the SSD case from the silicone case, remove one screw, and slide the top cover to open the case.
This case is compatible with M.2 SSDs of sizes 2280 / 2260 / 2242 / 2230, single-sided / double-sided component mounting methods, M Key / B&M Key terminal shapes, and NVMe interfaces.
Remove the SSD case from the silicone case, remove one screw, and slide the top cover to open the case.
This case is compatible with M.2 SSDs of sizes 2280 / 2260 / 2242 / 2230, single-sided / double-sided component mounting methods, M Key / B&M Key terminal shapes, and NVMe interfaces.
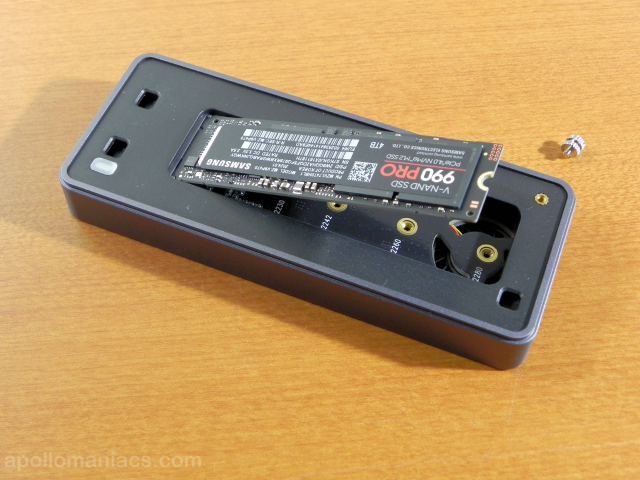 The SSD is installed as shown in the picture.
Insert the module into the socket at an angle and secure it with screws from above.
Please note that the module cannot be inserted horizontally.
Use the screws that are pre-installed to secure the module.
The SSD is installed as shown in the picture.
Insert the module into the socket at an angle and secure it with screws from above.
Please note that the module cannot be inserted horizontally.
Use the screws that are pre-installed to secure the module.
 Attach the thermal pad, close the top cover and you're ready to go.
Connect the case to your computer's USB 4.0 port with the high-speed USB Type-C to Type-C cable included with the case and you'll be able to transfer data at speeds of up to 40 Gbps.
Attach the thermal pad, close the top cover and you're ready to go.
Connect the case to your computer's USB 4.0 port with the high-speed USB Type-C to Type-C cable included with the case and you'll be able to transfer data at speeds of up to 40 Gbps.

Macrium Software Registration and Downloads
To use Macrium Reflect Home, even for the free trial, you will need to register as a user. All you need to register is your name, email address, and password.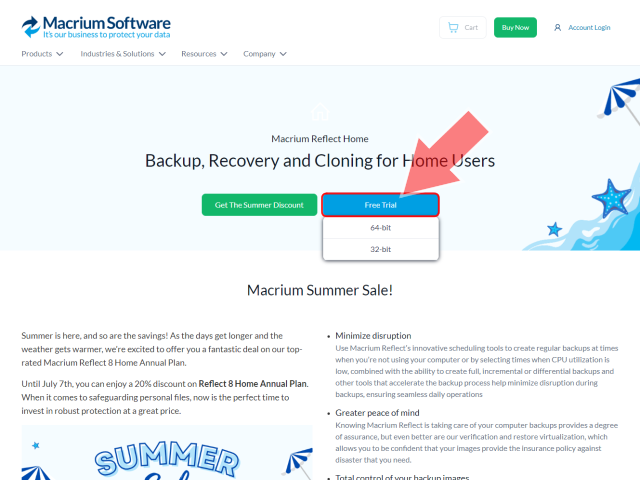 When you open the
Macrium Reflect
Home page, you will see the screen shown on the right.
Click the blue "Free Trial" button.
Then, you will be presented with the options of [64-bit]/[32-bit] as shown here.
Select the one that matches the version of Windows you are using.
Normally, you should select [64-bit].
When you open the
Macrium Reflect
Home page, you will see the screen shown on the right.
Click the blue "Free Trial" button.
Then, you will be presented with the options of [64-bit]/[32-bit] as shown here.
Select the one that matches the version of Windows you are using.
Normally, you should select [64-bit].
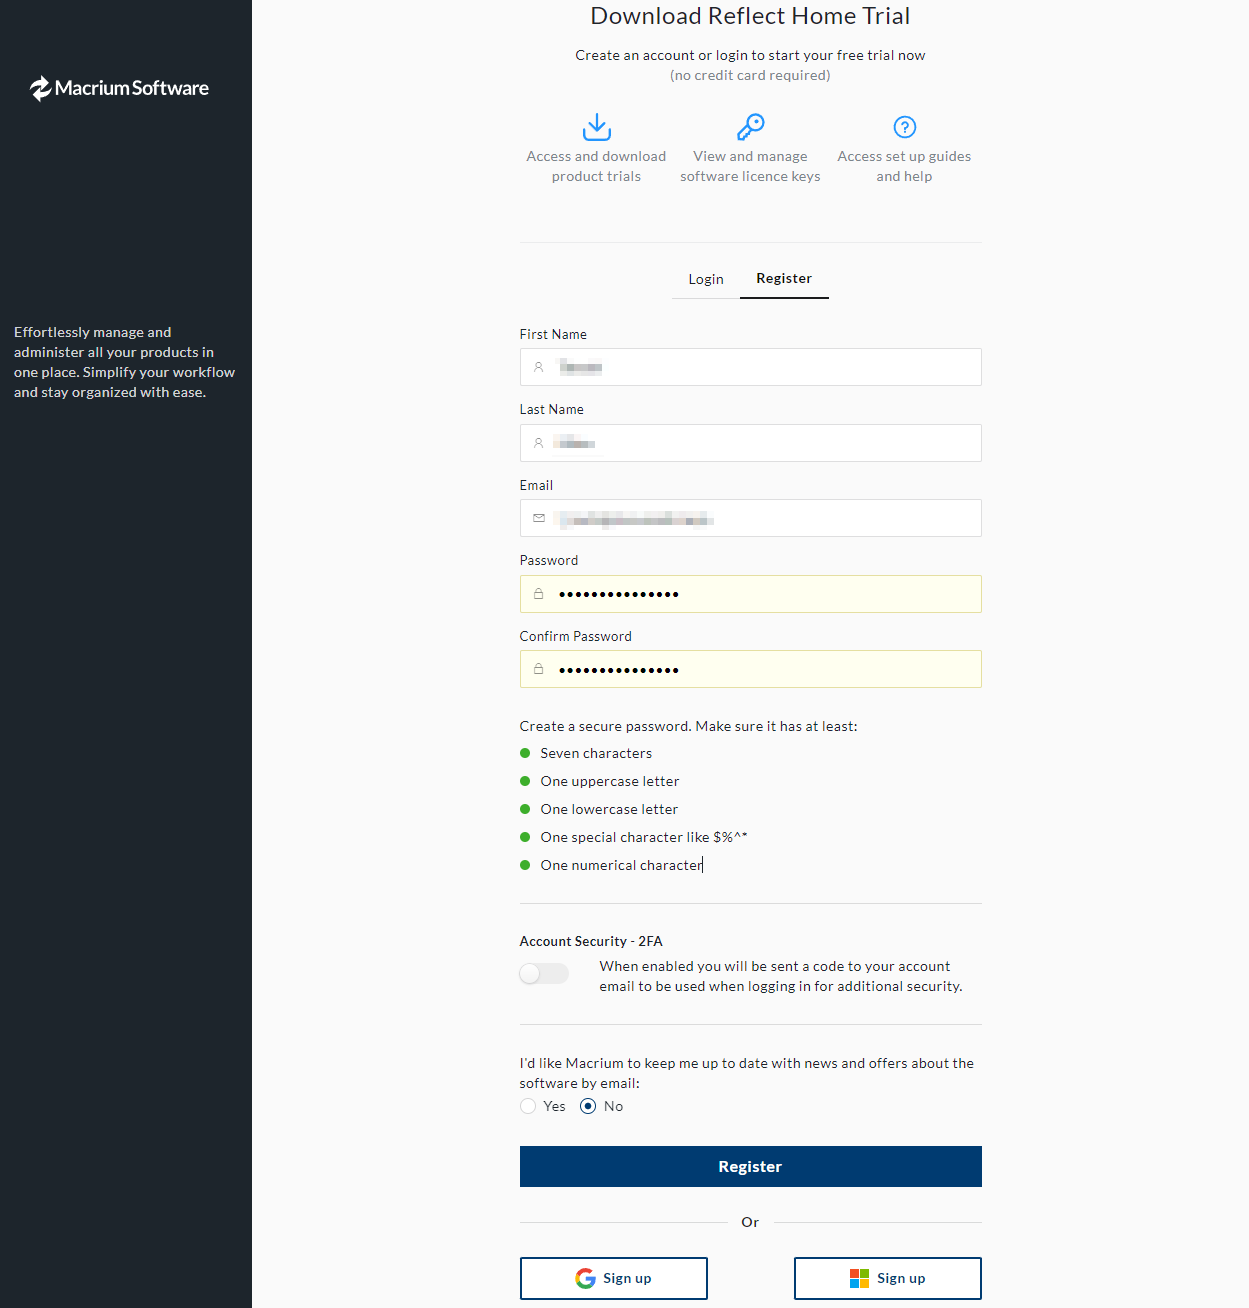 The screen will switch to the user registration screen.
Enter your name, email address, and password.
The screen will switch to the user registration screen.
Enter your name, email address, and password.
Please enter a password that satisfies the conditions written below the input area. In other words, it must be at least seven characters long and contain at least one uppercase letter, lowercase letter, symbol, and number.
Turning on "Account Security - 2FA" will enable two-factor authentication. When logging in, you will need to enter a verification code sent to you by email. If you are only using the free trial, you can leave it off.
If you select "Yes" in the radio button below, you will receive Macrium Software newsletters. Choose whichever you prefer.
Once you have finished entering the information, click the "Register" button.
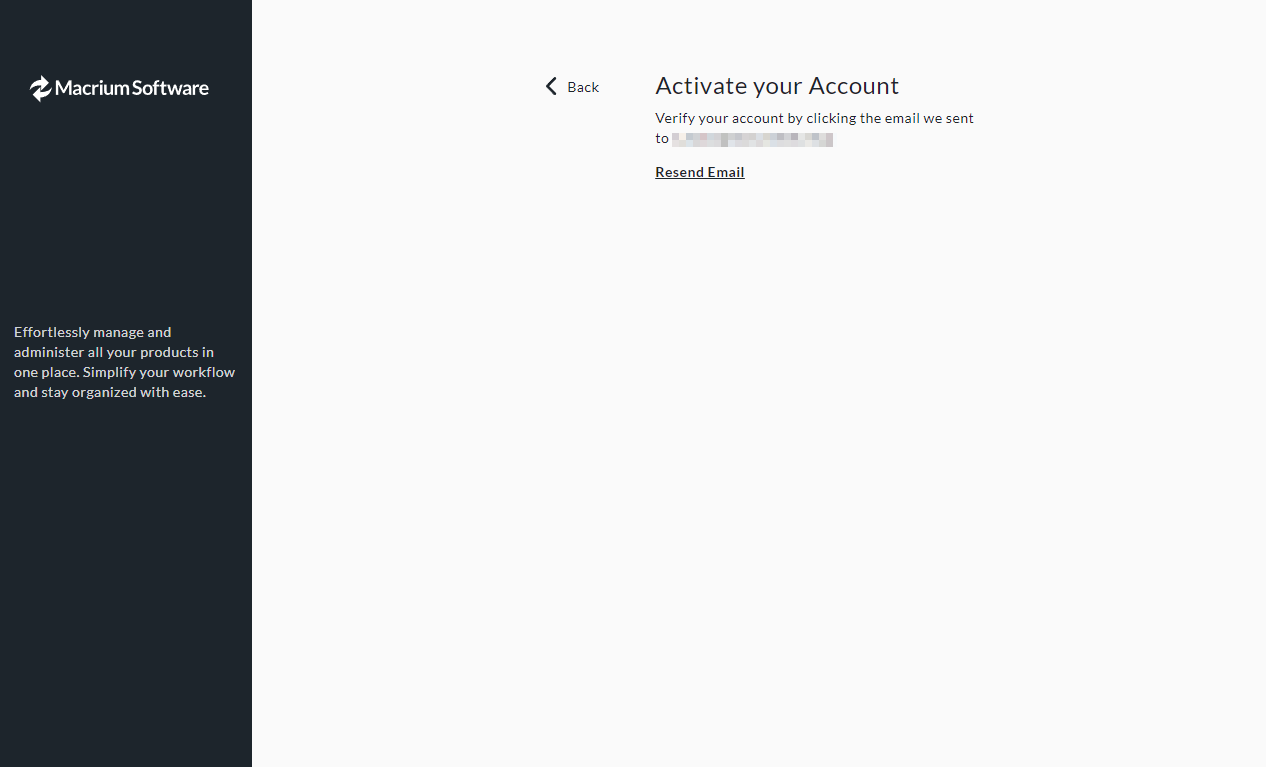 The screen will then change to this one.
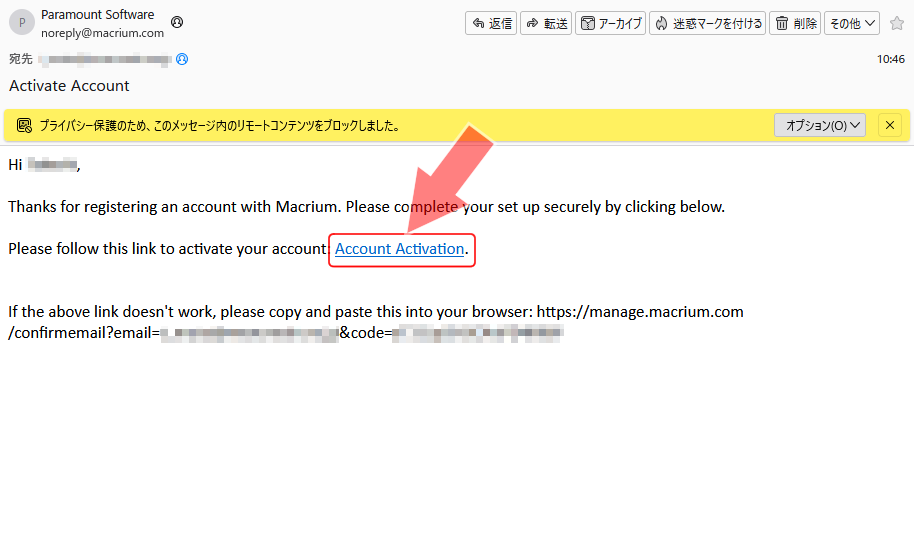 An email like the one shown on the right will be sent to the email address you entered on the user registration screen.
The sender's name will be "Paramount Software."
Click on "Account Activation" in the email.
An email like the one shown on the right will be sent to the email address you entered on the user registration screen.
The sender's name will be "Paramount Software."
Click on "Account Activation" in the email.
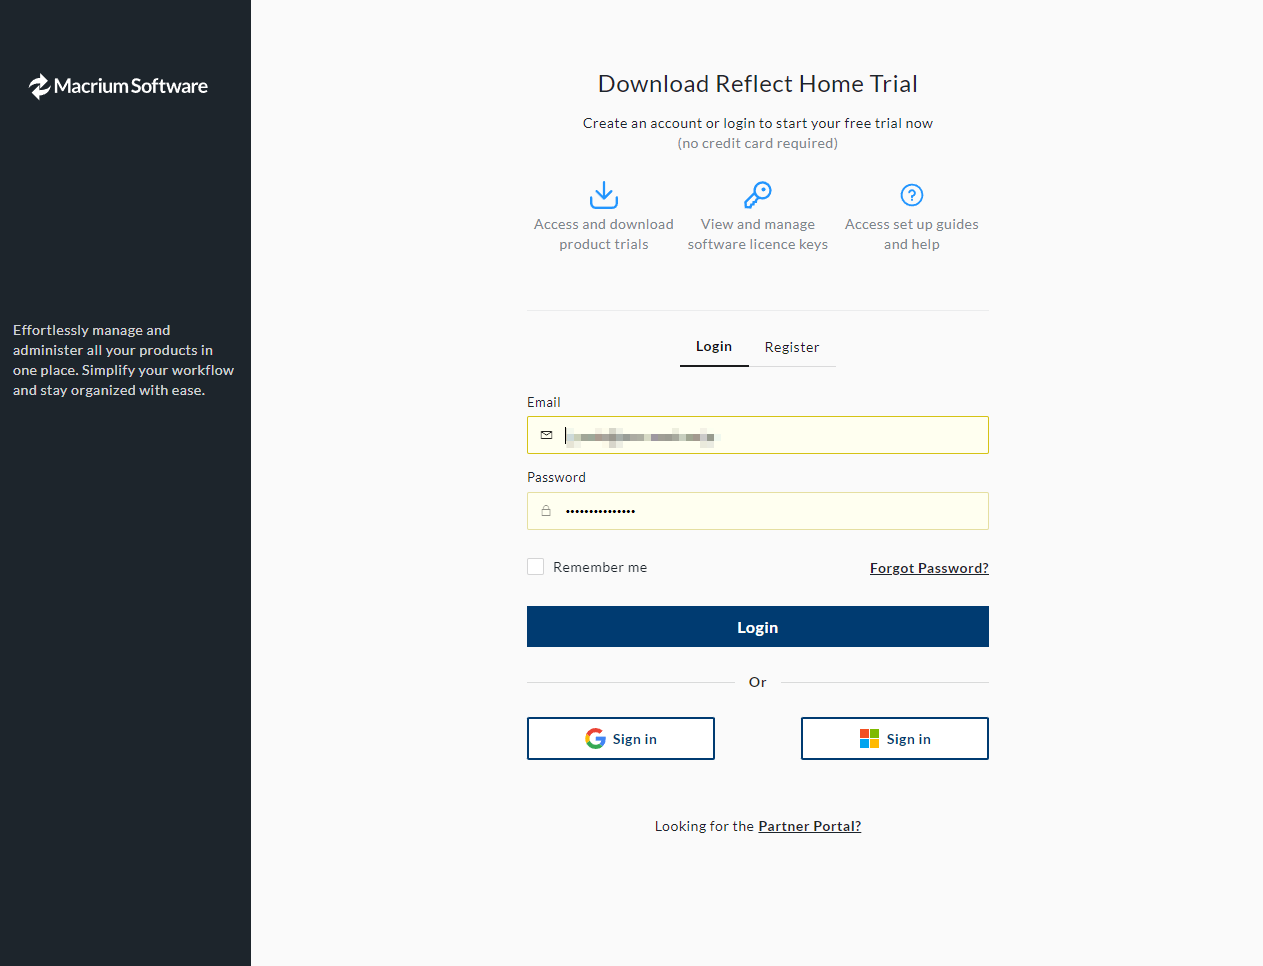 The message "Account Activated" will then be displayed on the browser screen, and after a while the screen shown on the right will appear.
This is the Macrium Software login screen.
Click "Login".
The message "Account Activated" will then be displayed on the browser screen, and after a while the screen shown on the right will appear.
This is the Macrium Software login screen.
Click "Login".
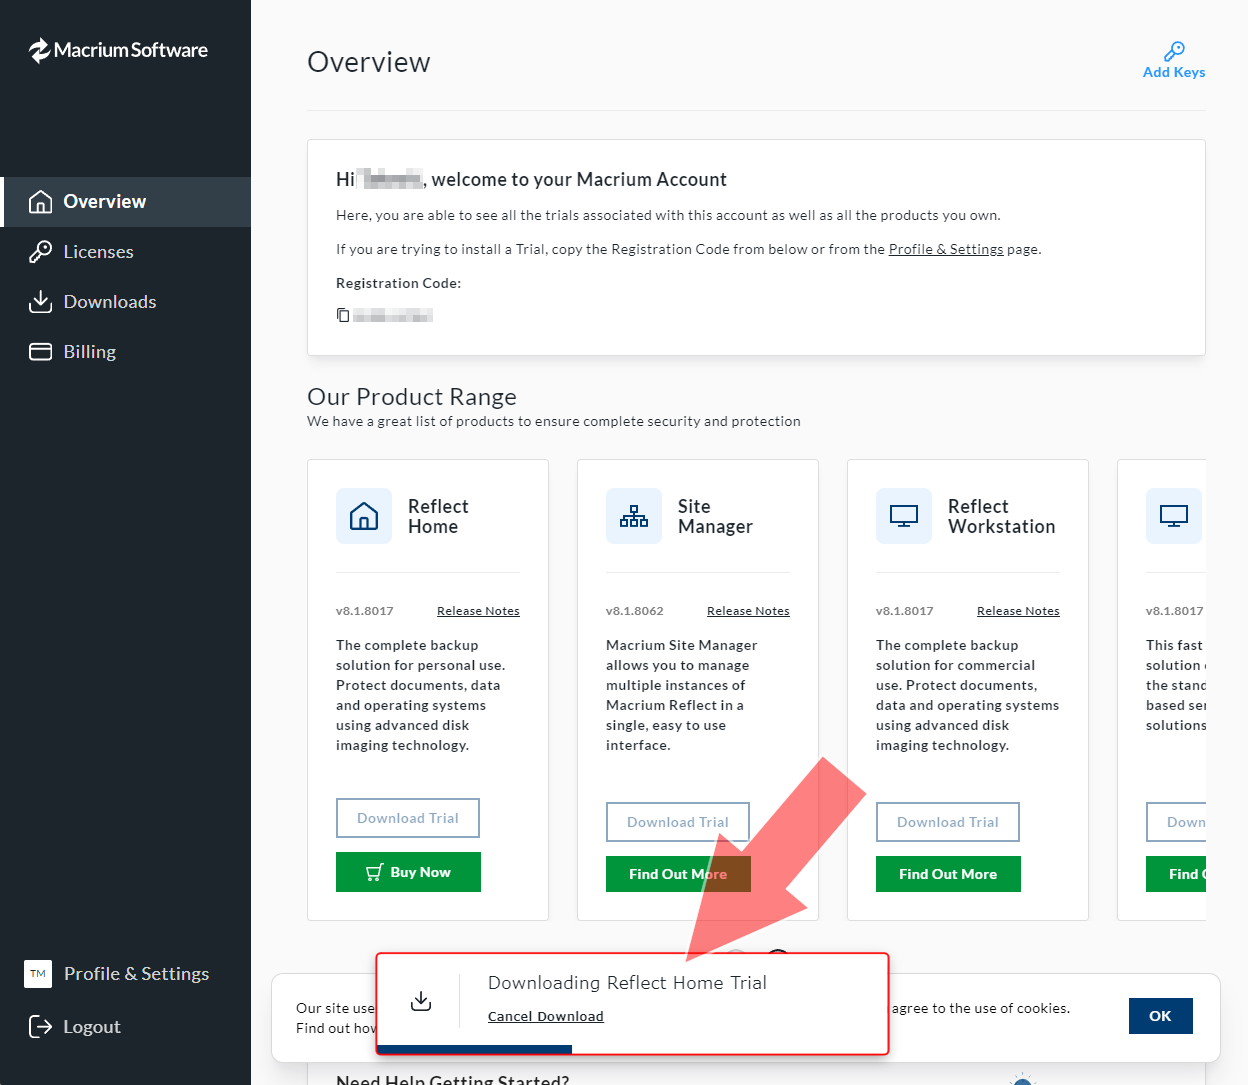 Once you have successfully logged in, the Macrium Reflect Home installer will begin downloading immediately.
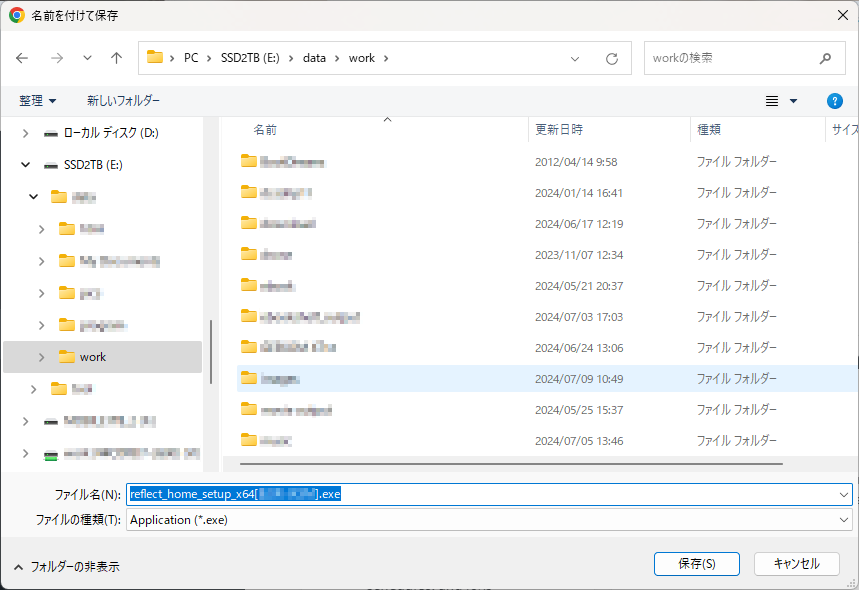 Once the download is complete, File Explorer will launch.
Select the folder where you want to save the installer.
Once the download is complete, File Explorer will launch.
Select the folder where you want to save the installer.
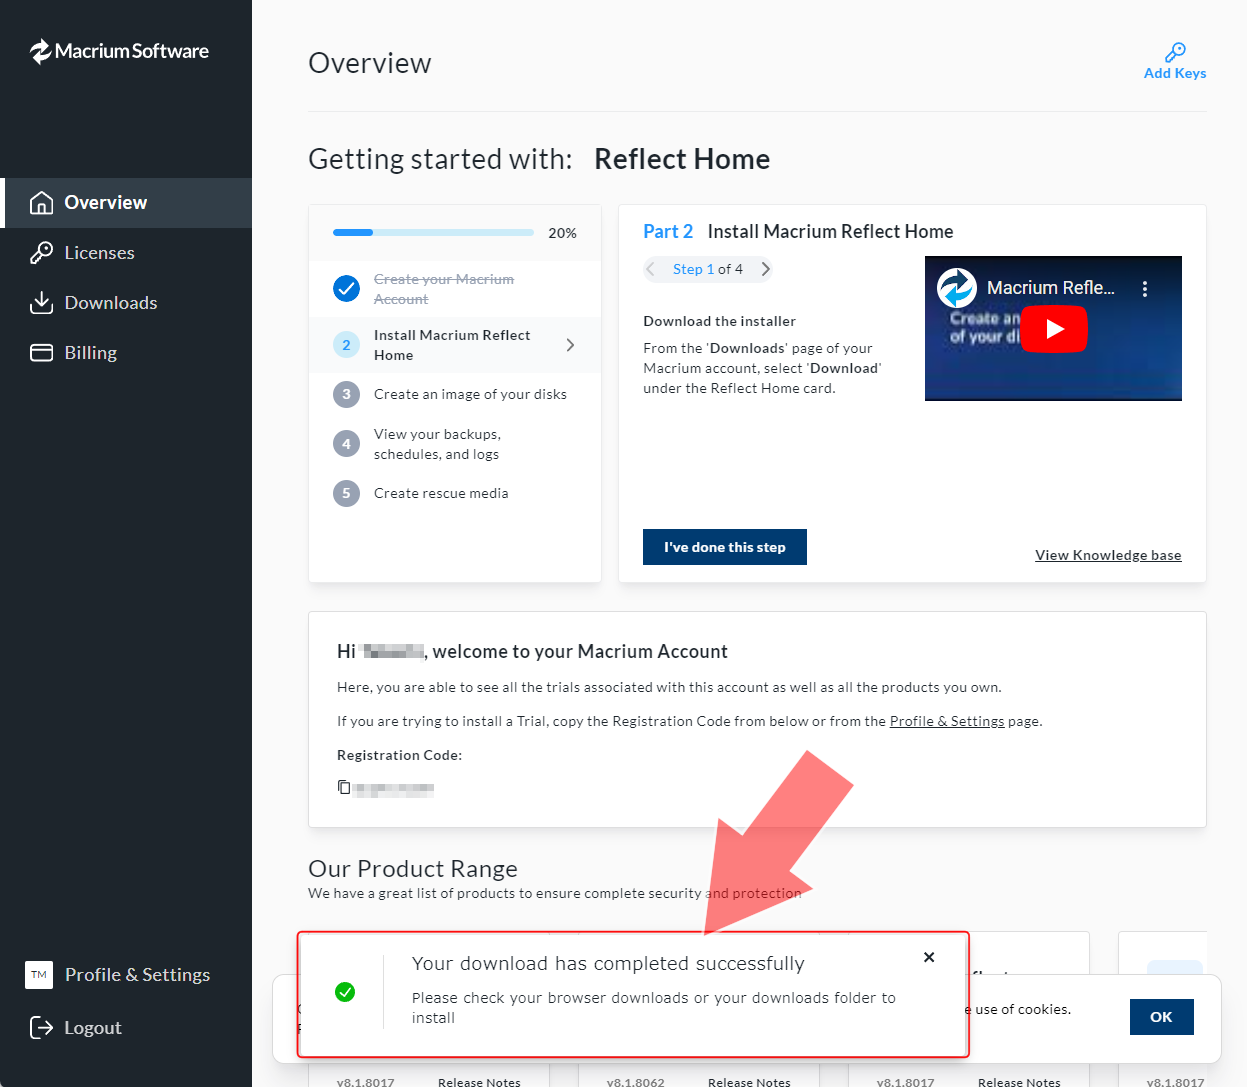 When you see this screen, the download is complete.
Installing Macrium Reflect Home
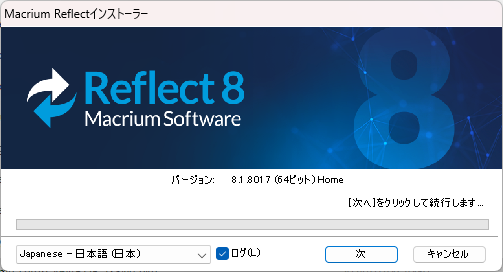 Double-click the downloaded installer to begin the installation.
Click "Next".
Double-click the downloaded installer to begin the installation.
Click "Next".
 You will see a screen like this.
Click "Next".
You will see a screen like this.
Click "Next".
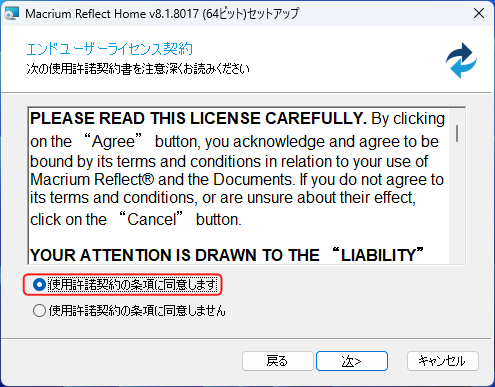 Select "I accept the terms of the license agreement" and click "Next."
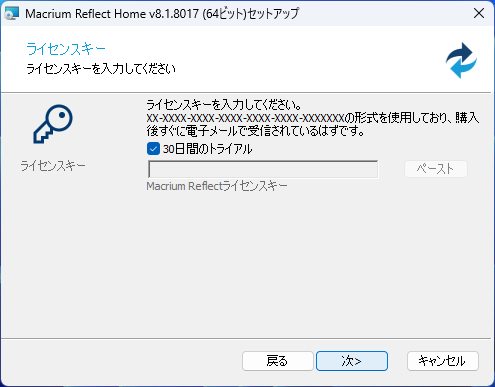 Next, you will be asked to enter your license key.
Make sure that "30 day trial" is checked and click "Next".
Next, you will be asked to enter your license key.
Make sure that "30 day trial" is checked and click "Next".
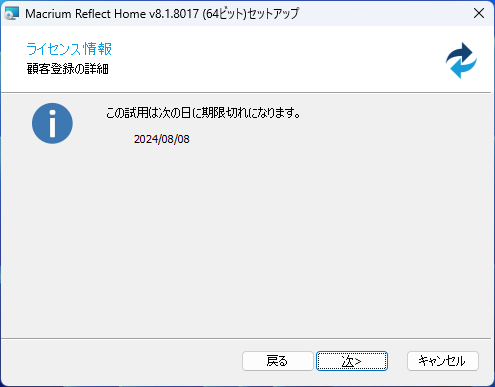 The trial period will be displayed.
Click "Next".
The trial period will be displayed.
Click "Next".
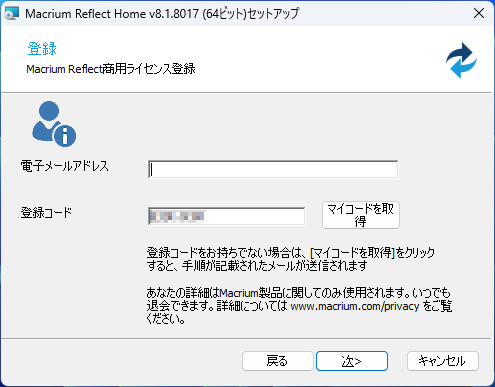 Next, you will be taken to the license registration screen.
Enter the email address you entered when registering as a user and click "Next".
Next, you will be taken to the license registration screen.
Enter the email address you entered when registering as a user and click "Next".
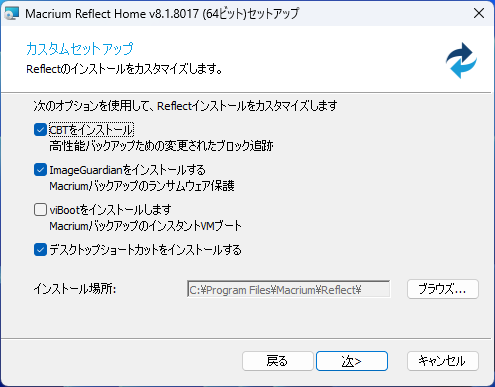 This is customizing the installation.
No changes are necessary.
Click "Next".
This is customizing the installation.
No changes are necessary.
Click "Next".
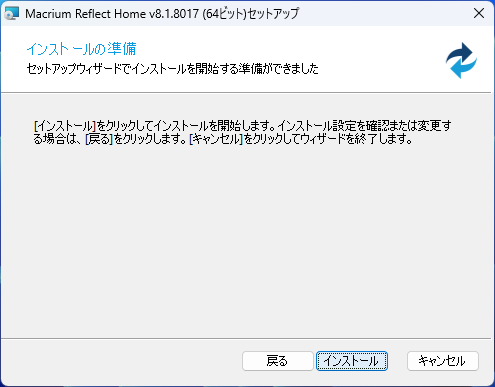 Click Install.
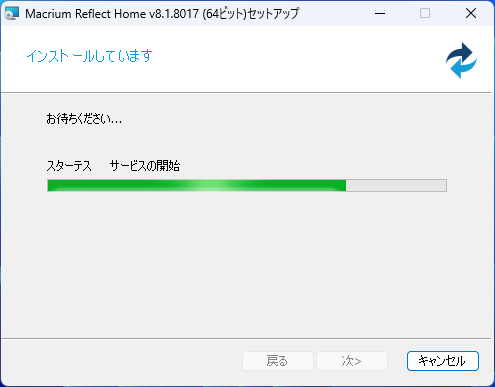 The installation will finally begin.
It will only take a few minutes.
The installation will finally begin.
It will only take a few minutes.
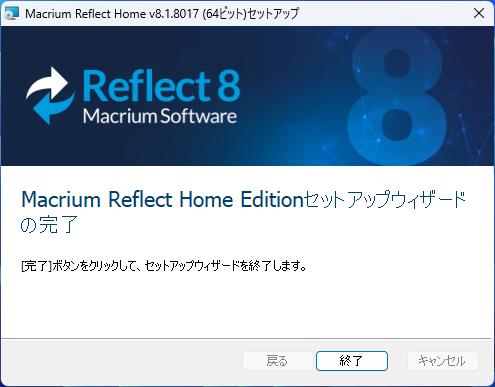 When you see this screen, the installation is complete.
Click "Finish".
When you see this screen, the installation is complete.
Click "Finish".
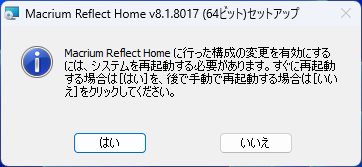 If you see this screen, you will need to restart your computer.
Click "Yes" to restart your computer.
If you see this screen, you will need to restart your computer.
Click "Yes" to restart your computer.
Clone C drive SSD
This section explains the procedure for cloning an SSD that includes a C drive with Windows installed. In this example, the source disk is a 2TB SSD. Only 300GB is allocated to the C drive, with approximately 1.5TB of the remaining capacity going to the D drive, and the rest being the system area, recovery area, etc. To copy this to a new SSD, I will expand the C drive to approximately 1TB and add the remainder to the D drive.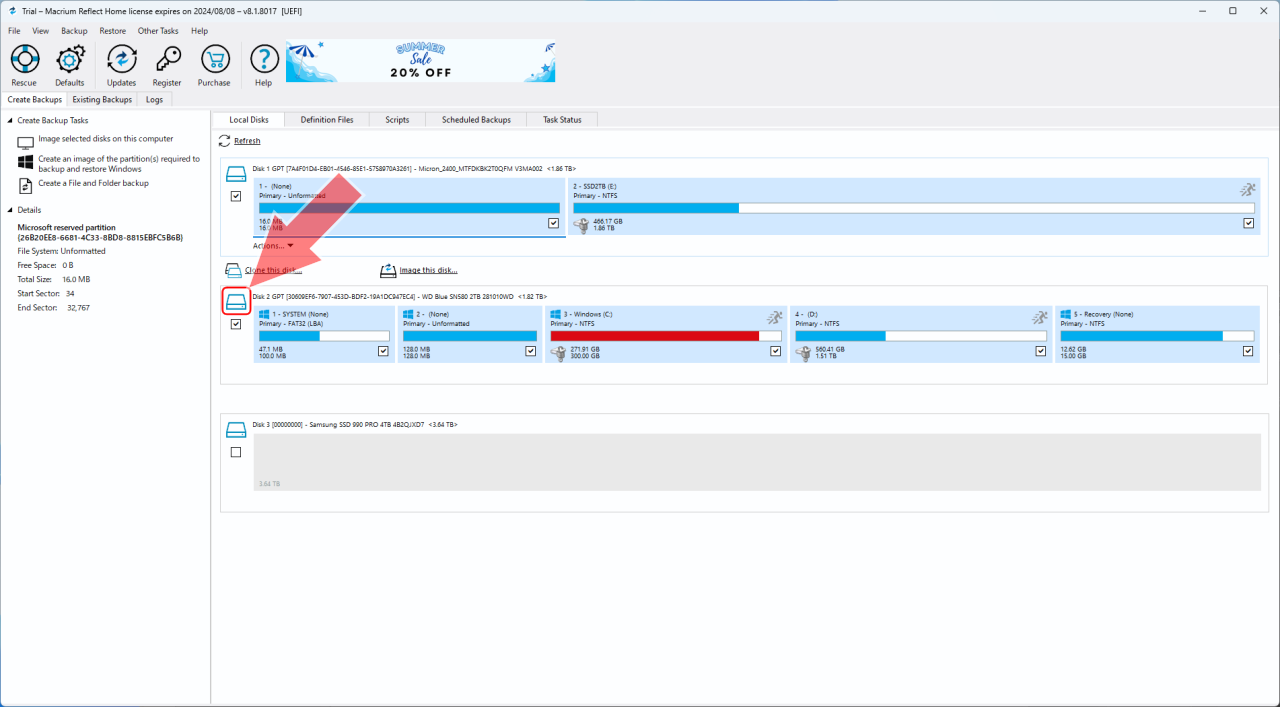 Click the
Analysis of the disks connected to your computer will begin, and after a while you will see the screen shown on the right. A list of the disks connected to your computer is displayed.
By default, the top disk in the list is selected. Beneath the selected disk is a menu that reads "Clone this disk."
The disk we will be cloning this time is the second disk which contains the C drive, so click on that icon.
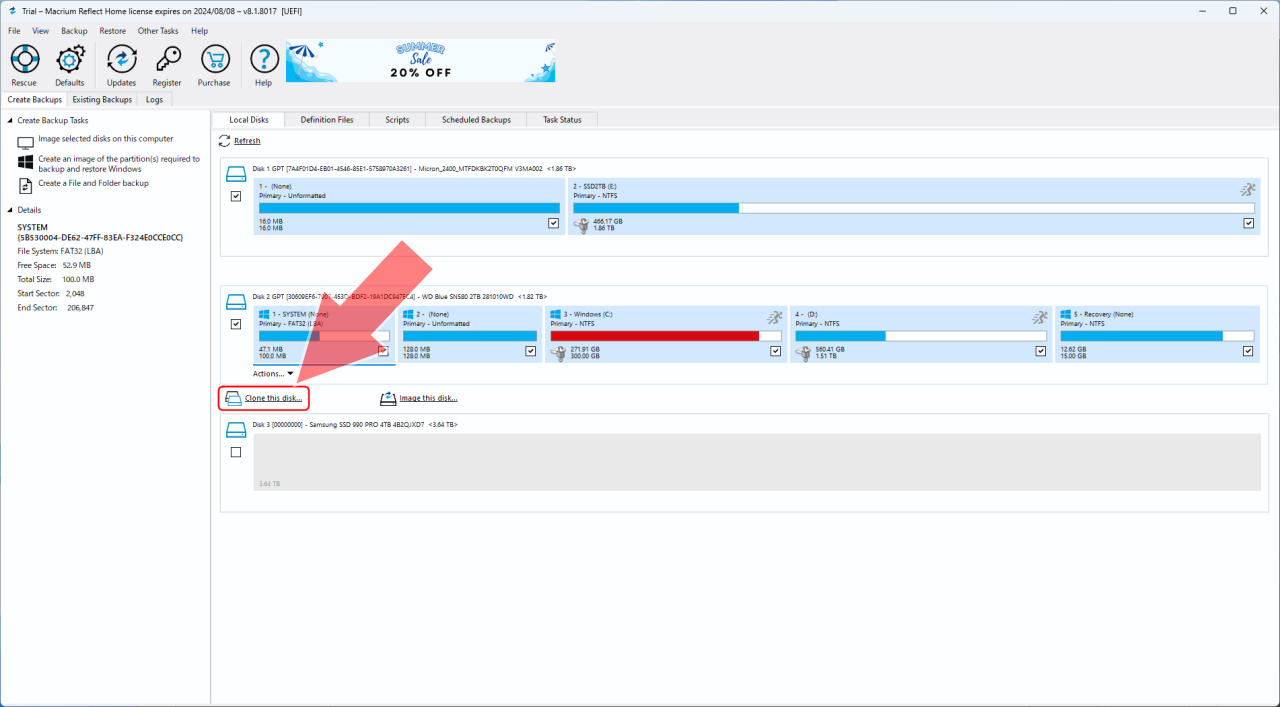 "Disk 2" is selected.
Next, click "Clone this disk."
"Disk 2" is selected.
Next, click "Clone this disk."
 Click "Select a disk to clone to".
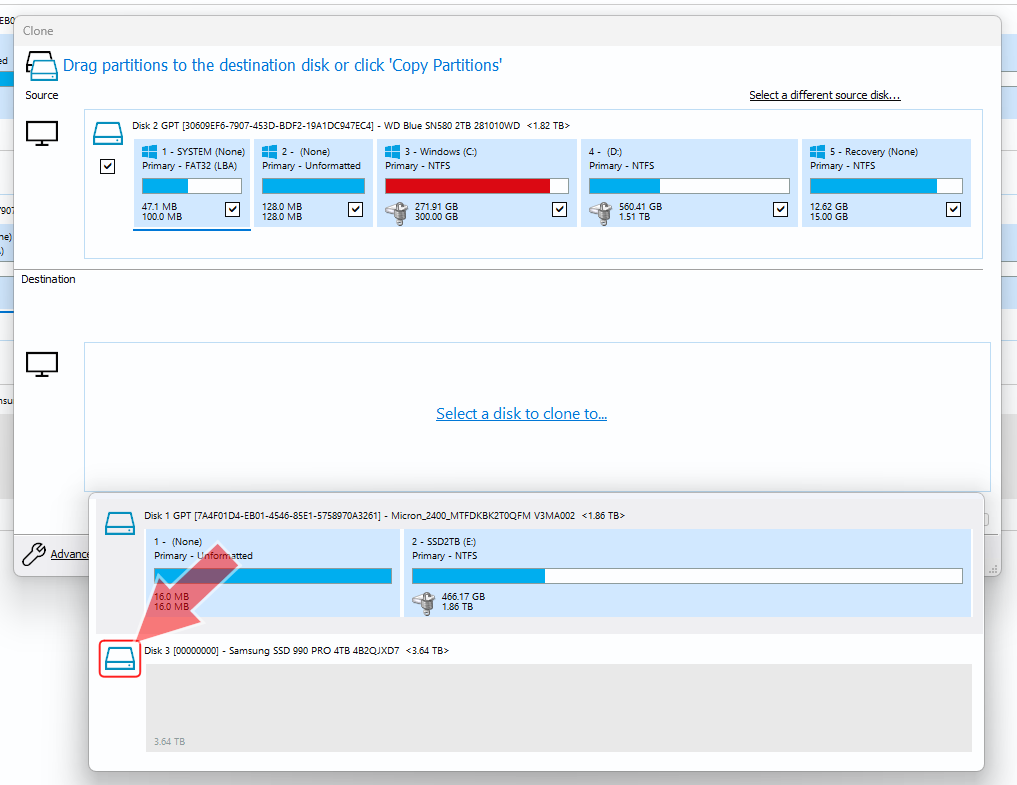 A list of disks will then be displayed.
Select the disk you want to copy to.
A list of disks will then be displayed.
Select the disk you want to copy to.
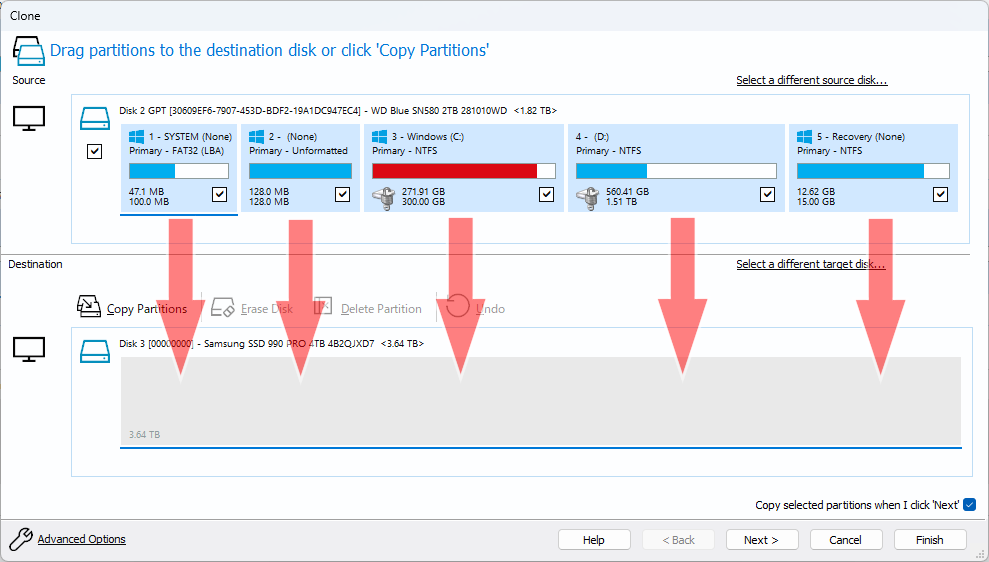 Drag and drop all partitions from the source disk to the destination disk.
The only partitions visible to the user on this disk are drive C (No. 3) and drive D (No. 4), but we'll start by allocating all partitions in this order.
Drag and drop all partitions from the source disk to the destination disk.
The only partitions visible to the user on this disk are drive C (No. 3) and drive D (No. 4), but we'll start by allocating all partitions in this order.
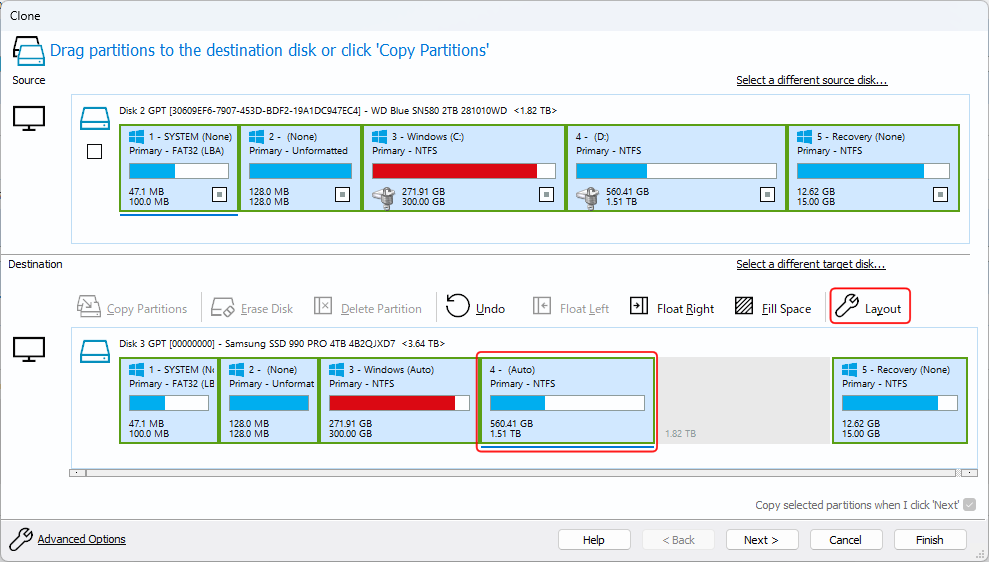
 Once you've dragged and dropped all the partitions, you'll see the screen on the right.
Because the destination disk has a larger capacity, free space is shown in grey on the far right.
Once you've dragged and dropped all the partitions, you'll see the screen on the right.
Because the destination disk has a larger capacity, free space is shown in grey on the far right.
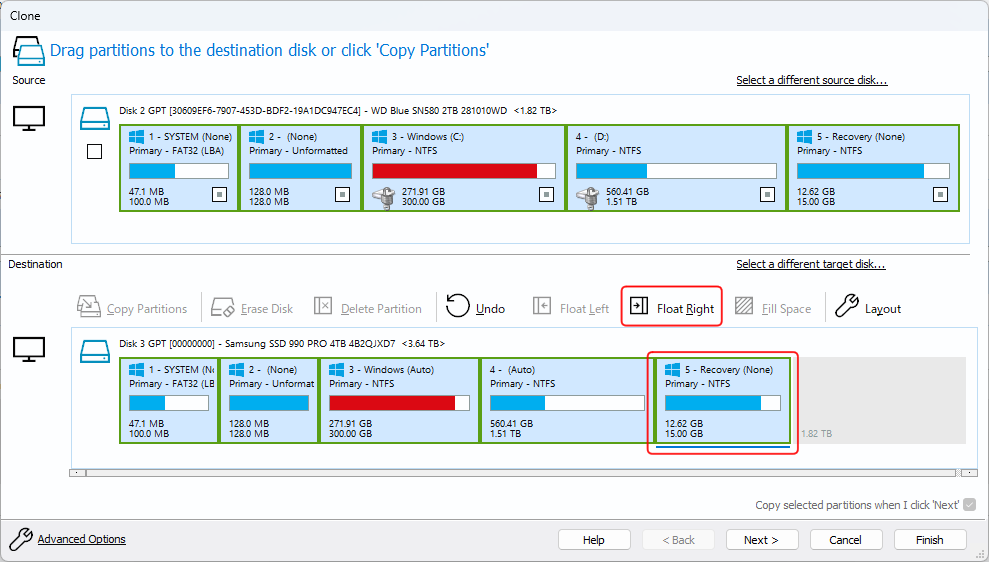
Move the No.5:Recovery partition, which is at the far right (back), to the very back of the disk. Click on the Recovery partition, then click "Float Right" from the icons at the top.
 Partition No. 5 has been moved.
Next, we will expand the space of the D drive (No. 4). Click on the No. 4 partition and then click "Layout" from the icons at the top.
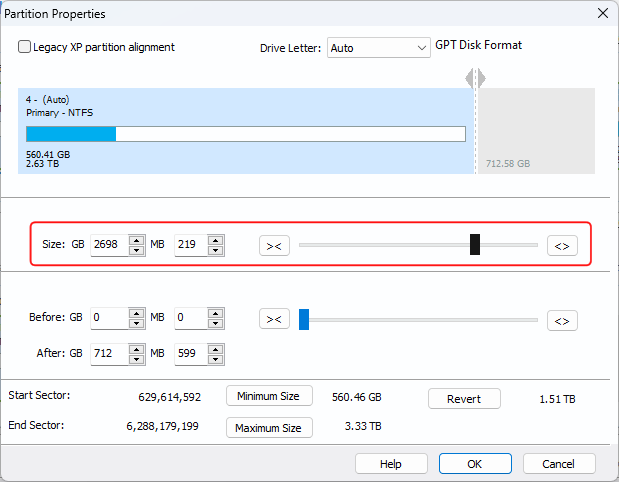 The properties screen for the selected partition will open.
You can change the partition size by dragging the slider in the Size column left or right.
Once you've specified the size, click "OK".
The properties screen for the selected partition will open.
You can change the partition size by dragging the slider in the Size column left or right.
Once you've specified the size, click "OK".
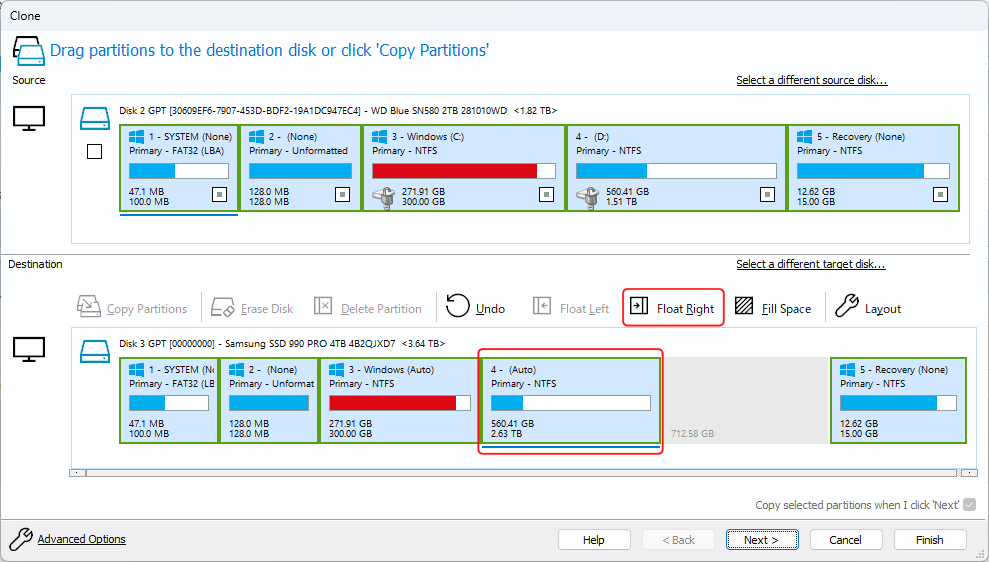 The size of partition No.4 has been increased.
Next, click "Float Right" from the icon at the top.
The size of partition No.4 has been increased.
Next, click "Float Right" from the icon at the top.
 Partition No.4 has been moved.
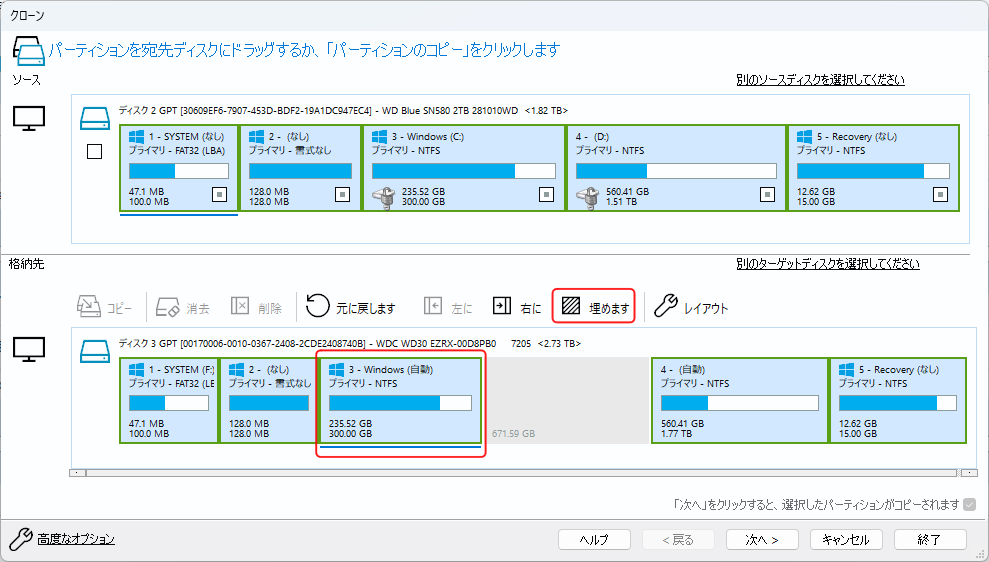
Finally, Enlarge the No.3:C drive partition. Click the C drive partition to select it and click "Fill Space" from the icon above.
"Fill Space" will expand the selected partition to fill the entire free space.
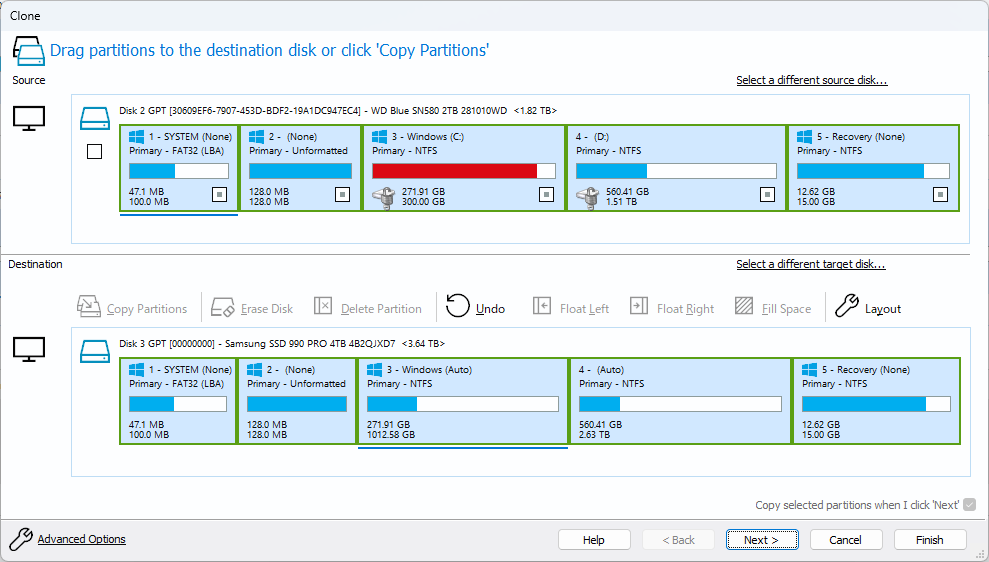 Partitioning of the new disk has been completed.
Click "Next" at the bottom right of the screen.
Partitioning of the new disk has been completed.
Click "Next" at the bottom right of the screen.
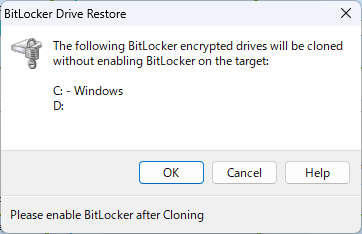 The message on the right will be displayed.
It seems to mean that if you want to specify BitLocker (encryption), you will have to specify it yourself after copying.
The message on the right will be displayed.
It seems to mean that if you want to specify BitLocker (encryption), you will have to specify it yourself after copying.
This message appears even if the source disk does not contain a partition encrypted with BitLocker.
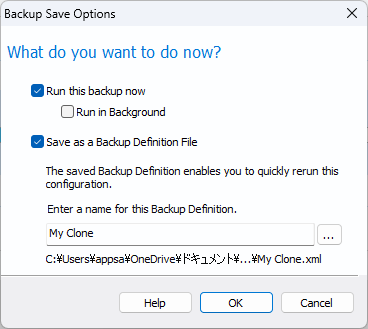
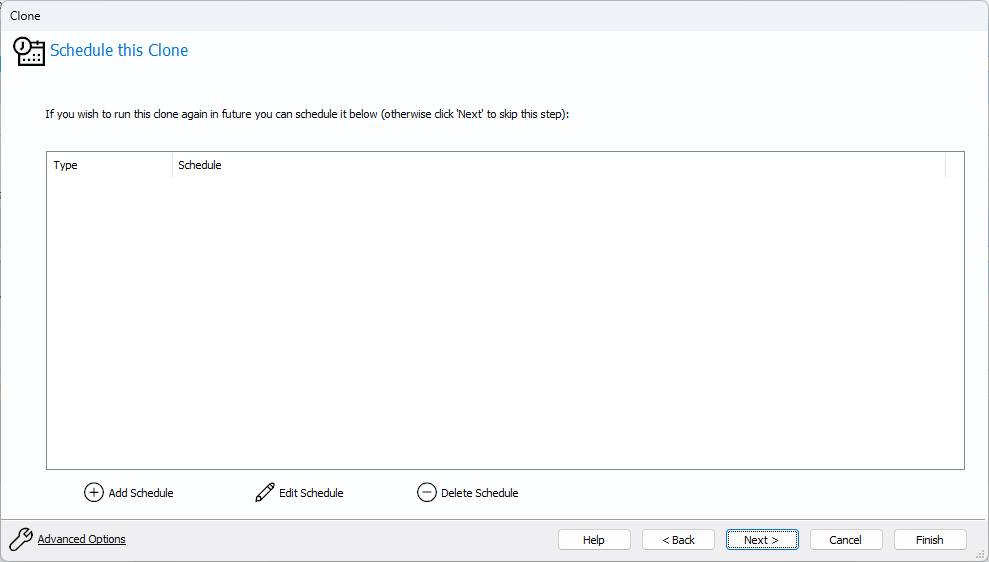 Next, you'll see a screen like this.
If you want to repeat the cloning task you just set up on a regular basis, you can set up a schedule on this screen.
Next, you'll see a screen like this.
If you want to repeat the cloning task you just set up on a regular basis, you can set up a schedule on this screen.
Since we will not set a schedule, click "Next" at the bottom right of the screen.
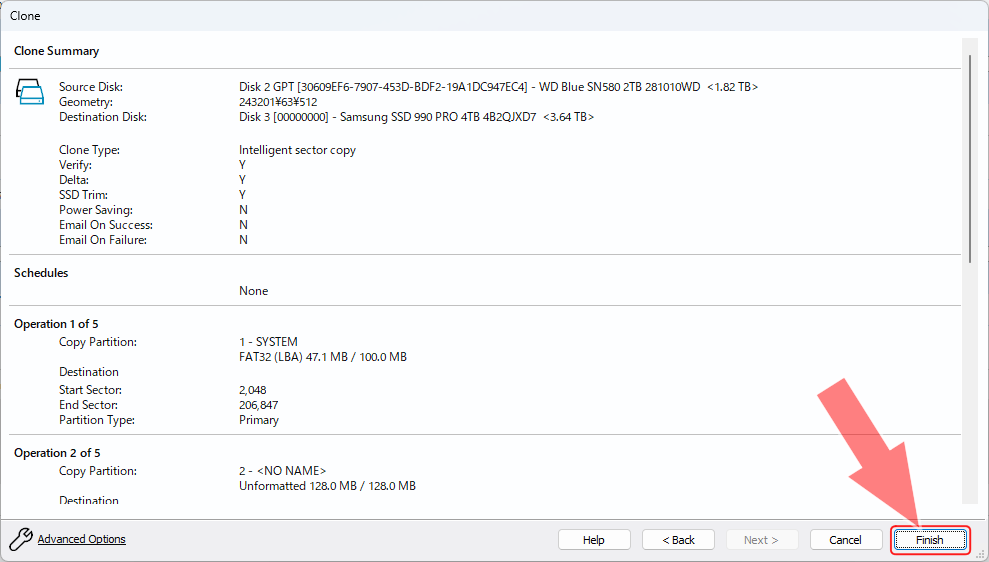 Details of the cloning operation you just set up will be displayed.
Check the details, and if there are no problems, click "Finish" at the bottom right of the screen.
Details of the cloning operation you just set up will be displayed.
Check the details, and if there are no problems, click "Finish" at the bottom right of the screen.
 Next, you will see a screen like this.
Click "OK".
Next, you will see a screen like this.
Click "OK".
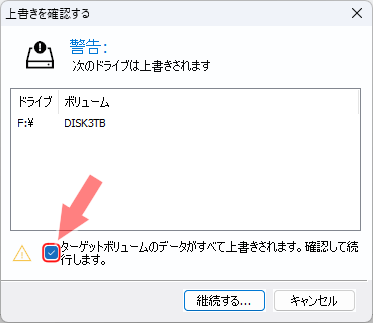 If the destination disk is not empty, you will see a warning message like this.
Check "All data on the target volume will be overwritten..." and click "Continue".
If the destination disk is not empty, you will see a warning message like this.
Check "All data on the target volume will be overwritten..." and click "Continue".
This message will appear even if the destination disk contains empty partitions. It will not appear if the destination disk is a brand new, unallocated disk.
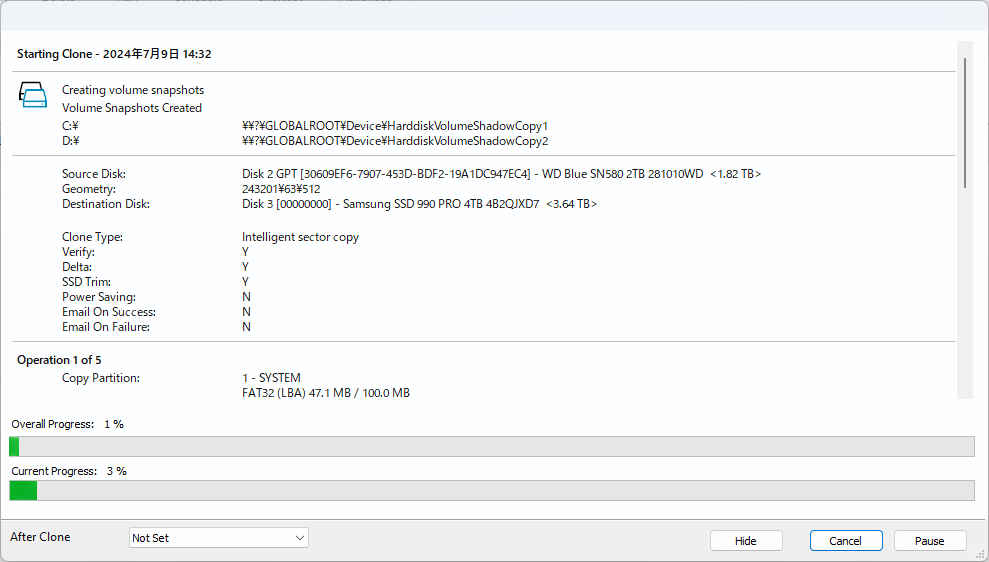 Once you get to this stage, the disk copying will finally begin.
The date and time when the copying process began will be displayed at the top of the screen.
Once you get to this stage, the disk copying will finally begin.
The date and time when the copying process began will be displayed at the top of the screen.
The disc will become very hot during copying. To prevent deterioration of the disc, use a small fan or similar to cool your computer and the destination disc.
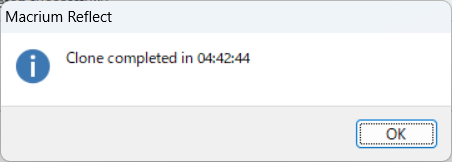 Once the copy is complete, you will see a message like this.
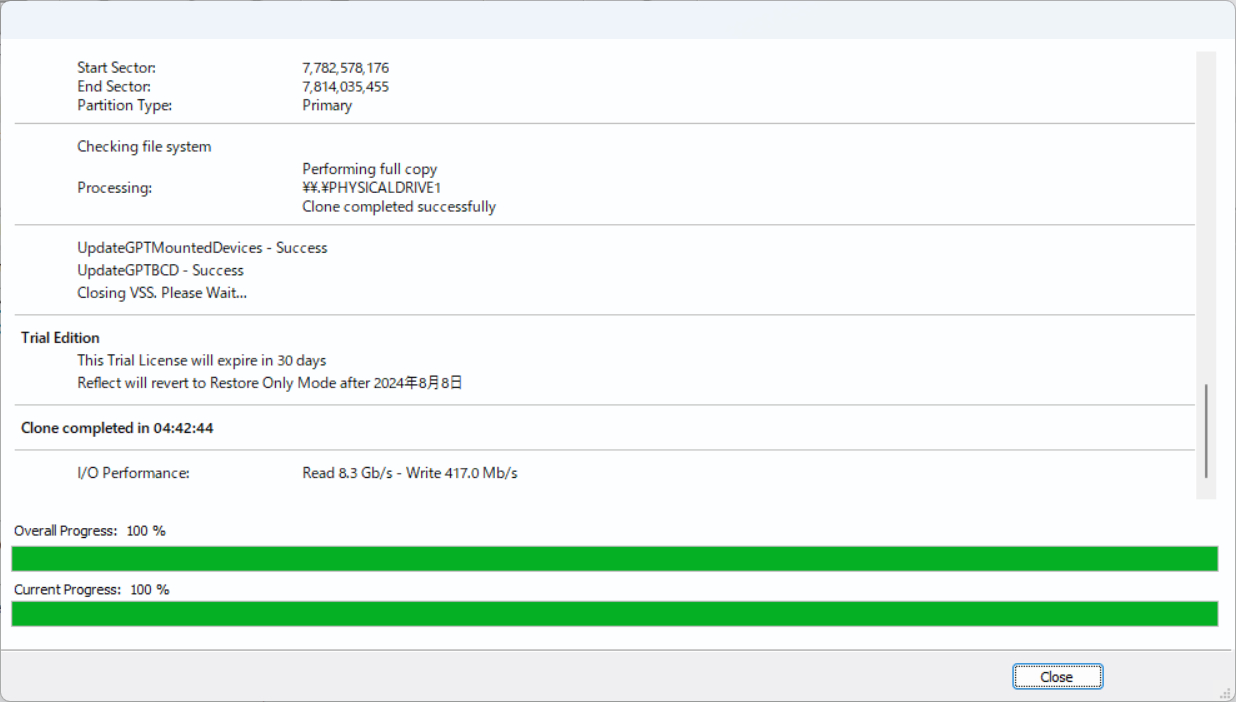 Click "Close" at the bottom right of the screen.
Copying is now complete. Turn off the computer and replace the source disk with the destination disk.

Switching the display language
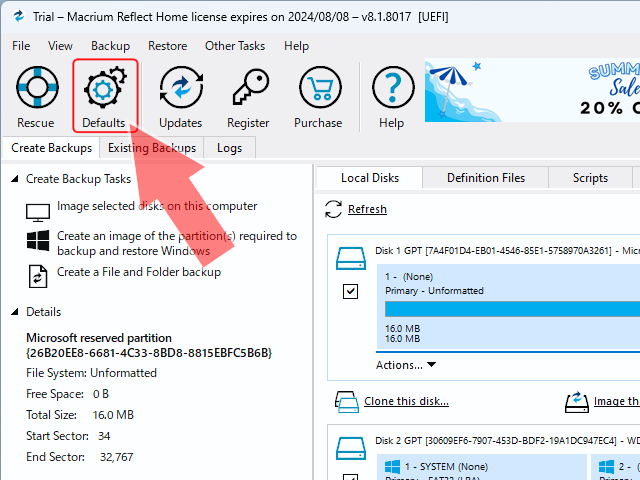 Click on the "Defaults" icon in the top left of the screen.
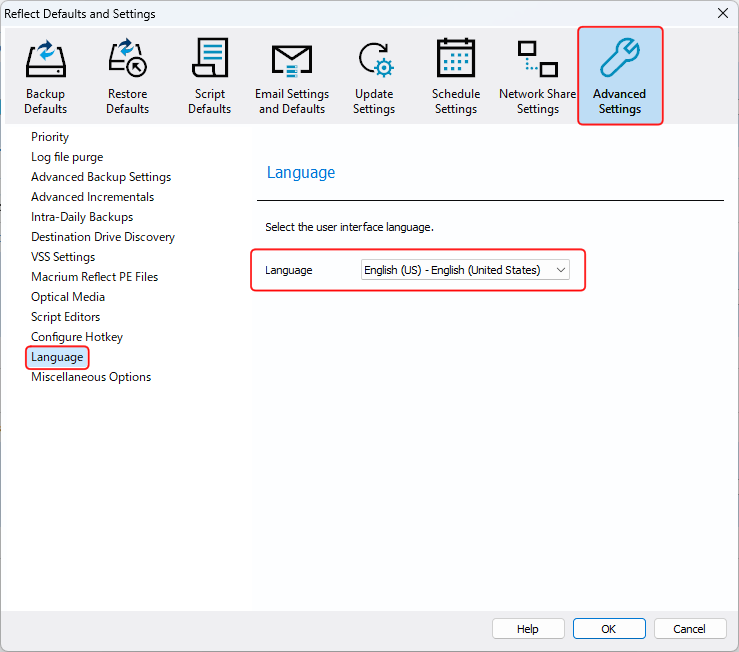 You will then see a screen like this.
You can change the display language in the [Advanced Settings] - [Language] - [Language] section.
You will then see a screen like this.
You can change the display language in the [Advanced Settings] - [Language] - [Language] section.
Useful related pages for Macrium Reflect Home
Windows 11 setup
How to set up a Windows
How to set up a Windows 11 computer / Setting up with a local account instead of a Microsoft account
Read more
How to add an SSD or hard disk

How to add an SSD or hard disk to a Windows 11 computer/How to change the drive name
Read more
How to expand C drive/Copy SSD

How to expand C drive on Windows 11 PC. Copy SSD to enlarge and reassign partition / How to use Macrium Reflect Home
Read more
How to add, change, or delete a password
How to add, change, or delete a password to a local account on a Windows 11 computer
Read more
How to share folders and map network drives
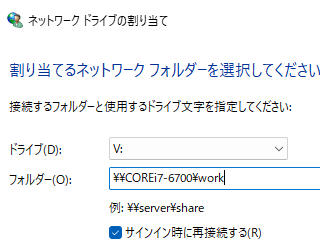
How to share folders and map network drives on Windows 11 computers
Read more
How to calibrate game controllers

How to calibrate game controllers on Windows 11
Read more