


How to install Liberica JDK / Creating a JavaFX development environment with OpenJDK and OpenFX
このページを日本語で見る
Contents
- To solve 'Error: Module not found: javafx.controls'
- Preparing for JDK installation
- Download Liberica JDK
- Installing Liberica JDK
- Check JDK installation results
- Compile and run JavaFX sample program
- To solve runtime error 'JavaScript script engine is disabled'
- How to check and change Windows system environment variables
To solve 'Error: Module not found: javafx.controls'
It's been a few years since Java left Oracle's hands and JavaFX spun off. The development environment for Java and JavaFX has completely changed. In building the latest JavaFX development environment, We first took the direct approach (?) and built the environment by downloading OpenJDK and OpenFX separately, but somehow the errorError: Module not found: javafx.controlsWhile investigating various things, we learned the existence of Liberica JDK provided by BellSoft as a JDK with OpenFX built in, and tried this. This error was immediately resolved.
On this page, we will explain how to compile and run the JavaFX sample code "HelloFX.java" using this Liberica JDK.
OpenJDK official site
OpenFX official site
BellSoft official site
Liberica JDK official site
Preparing for JDK installation
If there is a JDK name on the [Start]-[Settings]-[Apps] screen, [Uninstall] from here. If you install manually, organize the Windows system environment variables "Path", "JAVA_HOME", and "PATH_TO_FX".
If the path to another Java JDK remains in the environment variable "Path", delete only that part.
If the environment variables "JAVA_HOME" and "PATH_TO_FX" are defined, delete them.
If other environment variables related to JDK and JavaFX were defined, delete them.
If you want to use multiple JDKs, leave the installation folder of each JDK and switch by editing the above system environment variables.
How to check and change Windows system environment variables
Download Liberica JDK
 Open BellSoft's
Liberica JDK download page
.
Open BellSoft's
Liberica JDK download page
.
Liberica JDK download page
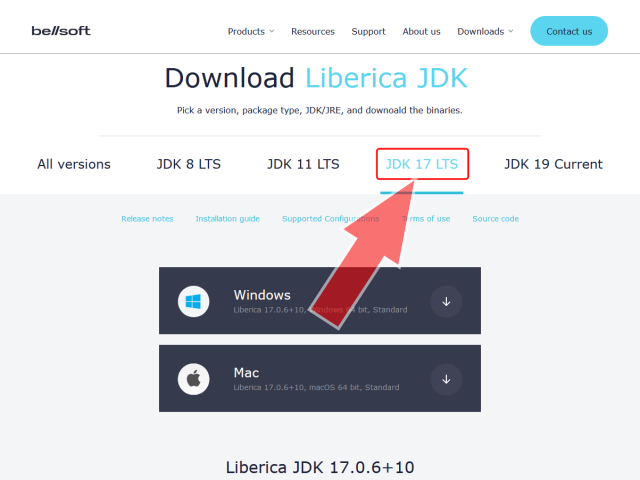 Scroll the screen and select the JDK version you want to download.
This time I chose the LTS version Ver.17.
Scroll the screen and select the JDK version you want to download.
This time I chose the LTS version Ver.17.
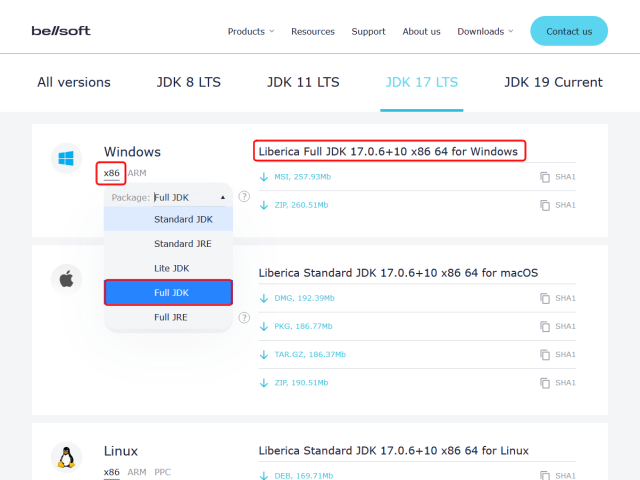 Further scroll the screen and select the target OS and JDK type.
For Windows, select "x86" in the Windows column.
Then select "Full JDK" from the drop-down list in the "Package" column.
Further scroll the screen and select the target OS and JDK type.
For Windows, select "x86" in the Windows column.
Then select "Full JDK" from the drop-down list in the "Package" column.
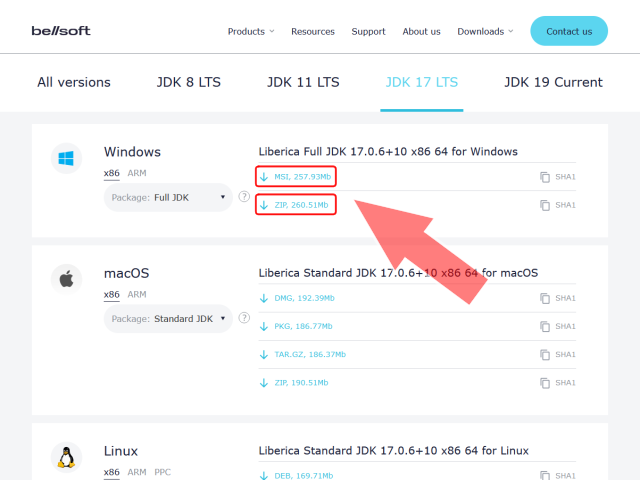 Then click "MSI" or "ZIP" on the screen to download the JDK.
"MSI" is a module with an installer. The installation folder will be automatically selected and environment variables will be set. You can download a file named "bellsoft-jdk17.0.6+10-windows-amd64-full.msi".
"ZIP" is the zipped JDK installation folder. This is also useful if you want to extract the JDK to any folder. However, setting environment variables must be done manually. You can download a file named "bellsoft-jdk17.0.6+10-windows-amd64-full.zip".
How to check and change Windows system environment variables
Installing Liberica JDK
 Here we use "MSI" format file to install.
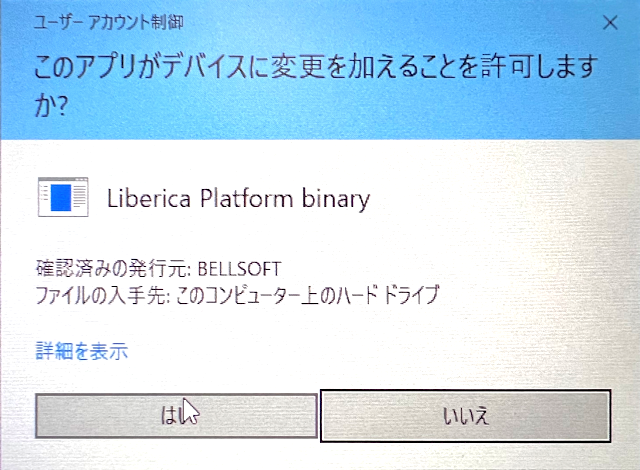
If you see a screen like this while proceeding with the steps below, click "Yes".
Here we use "MSI" format file to install.
If you see a screen like this while proceeding with the steps below, click "Yes".
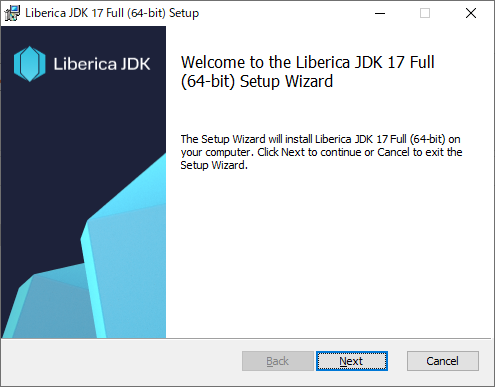 Double-click the downloaded "bellsoft-jdk17.0.6+10-windows-amd64-full.msi" to start the installer.
Click "Next".
Double-click the downloaded "bellsoft-jdk17.0.6+10-windows-amd64-full.msi" to start the installer.
Click "Next".
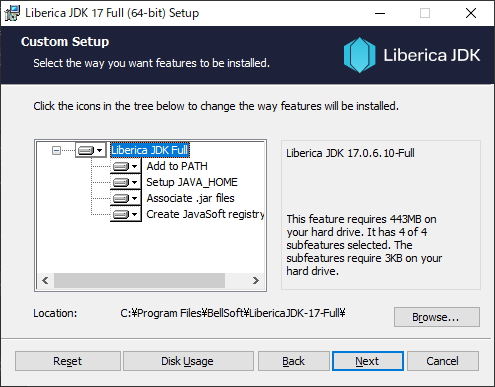 Select the installation module (item) and the installation destination.
You probably don't need to change anything.
Click "Next".
Select the installation module (item) and the installation destination.
You probably don't need to change anything.
Click "Next".
Default install location is "C:\Program Files\BellSoft\LibericaJDK-17-Full".
If you want to change the installation destination, click the "Browse" button and specify a new installation destination.
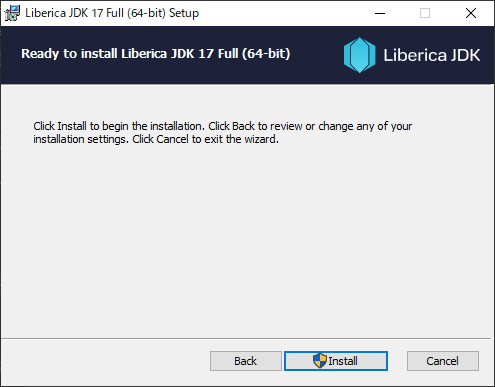 When you click "Next" on the screen above, you will see a screen like this.
Click "Install" to start the installation.
When you click "Next" on the screen above, you will see a screen like this.
Click "Install" to start the installation.
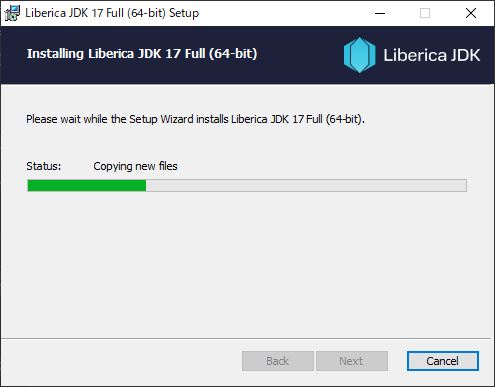 The time required for installation is several tens of seconds to several minutes.
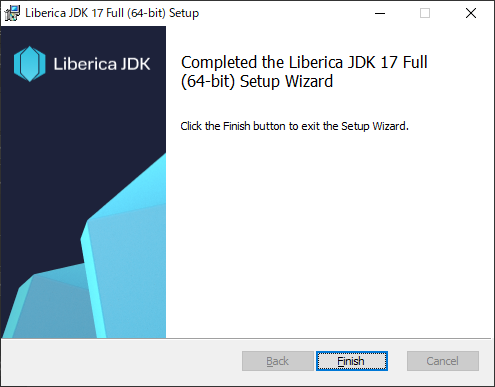 When you see this screen, the installation is complete.
Click "Finish" to exit the installer.
When you see this screen, the installation is complete.
Click "Finish" to exit the installer.
Check JDK installation results
 Make sure JDK is installed correctly.
Open a console and type
Make sure JDK is installed correctly.
Open a console and type
java -version
. If the Java version is displayed as shown, it is installed correctly.
You should now be able to compile java programs using javac command.
By the way, the Windows console program I'm using here is ConEmu .
ConEmu official site
Make sure
environment variables
are set as shown.
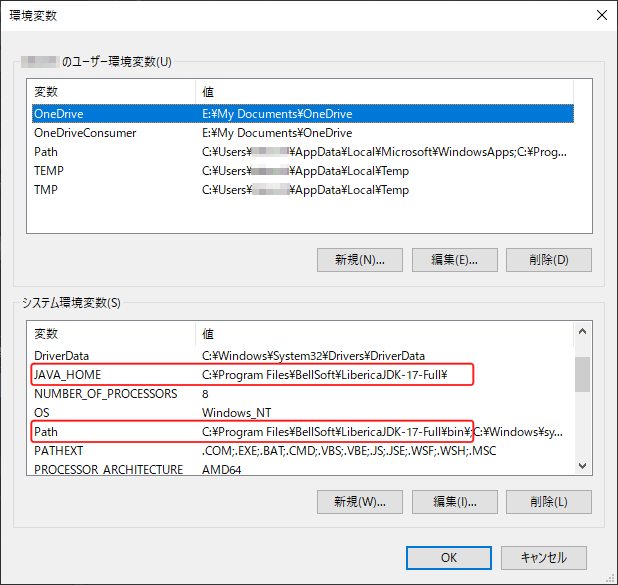
There are two environment variables required to use JDK, "JAVA_HOME" and "Path".
Make sure that "JAVA_HOME" points to the JDK installation folder and the path to "bin" under the installation folder is appended to top of "Path".
If you manually installed the "ZIP" format modules, set these environment variables manually as well.
Since the Liberica JDK includes JavaFX, there is no need to set the environment variable "PATH_TO_FX" as was required when installing OpenFX separately.
How to check and change Windows system environment variables
Compile and run JavaFX sample program
 Finally, let's compile and run JavaFX sample program.
The sample program to be used is "HelloFX.java" distributed on
OpenFX official site
.
Finally, let's compile and run JavaFX sample program.
The sample program to be used is "HelloFX.java" distributed on
OpenFX official site
.
Open the OpenFX official site, select "Documentation" from the top menu, and click "Getting Started with JavaFX" from the center left of the screen.
OpenFX official site
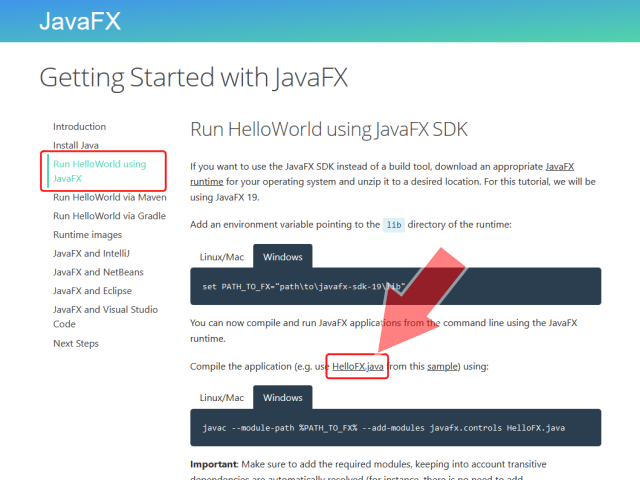 If you select "Run HelloWorld using JavaFX SDK" from the menu on the left side of the screen, you will see a screen like this.
You can get the source code by clicking "HelloFX.java" in the center of the screen.
Save this in any folder.
If you select "Run HelloWorld using JavaFX SDK" from the menu on the left side of the screen, you will see a screen like this.
You can get the source code by clicking "HelloFX.java" in the center of the screen.
Save this in any folder.
Distribution site of "HelloFX.java" (github)
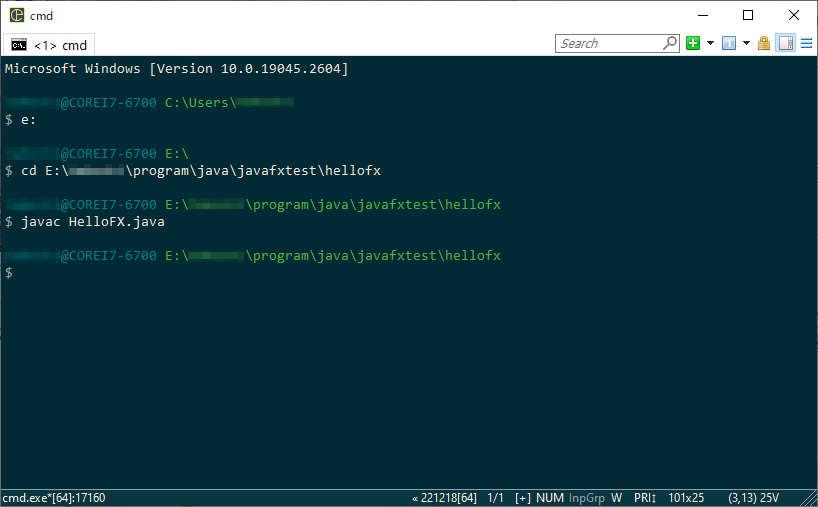 Open a console, go to the folder where you saved the source code, and type
javac HelloFX.java
.
Compilation is complete if no error messages are displayed, as shown in this figure.
A class file "HelloFX.class" should have been created in the folder where the source code was saved.
Liberica JDK includes JavaFX, so you don't need to specify
--module-path %PATH_TO_FX% --add-modules javafx.controls
on the command line like you would when installing OpenFX separately.
 Type
Type
java HelloFX
from the console to launch the sample program.
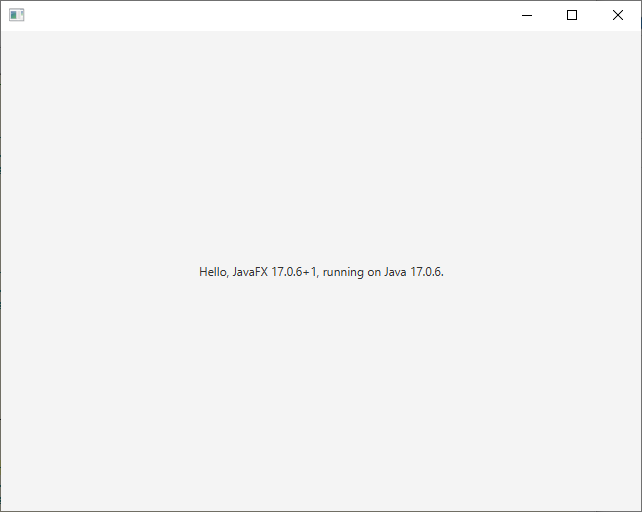
A window like this one will open, with the Java and JavaFX versions displayed in the center of the screen.
To solve runtime error 'JavaScript script engine is disabled'
JavaFX allows Java scripts to be written inside FXML files. But since Java version 15, script engine "Nashorn" has been removed. As a result, when you run a Java program that has Java Script inside an FXML file, you will see an error similar to the following:javafx.fxml.LoadException: JavaScript script engine is disabled.How to check and change Windows system environment variables
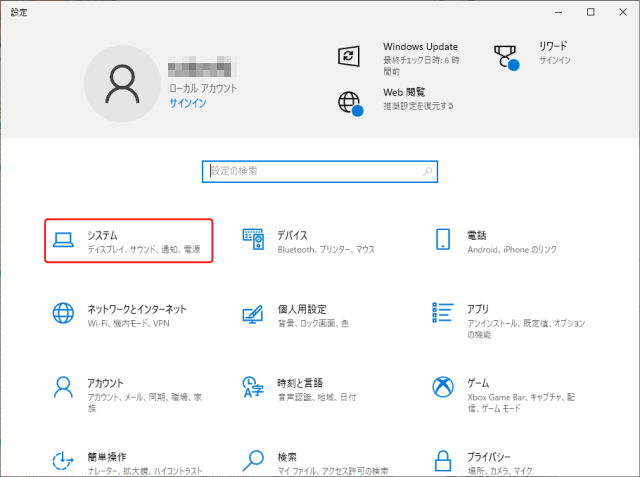 Open [Start]-[Settings] screen and click [System].
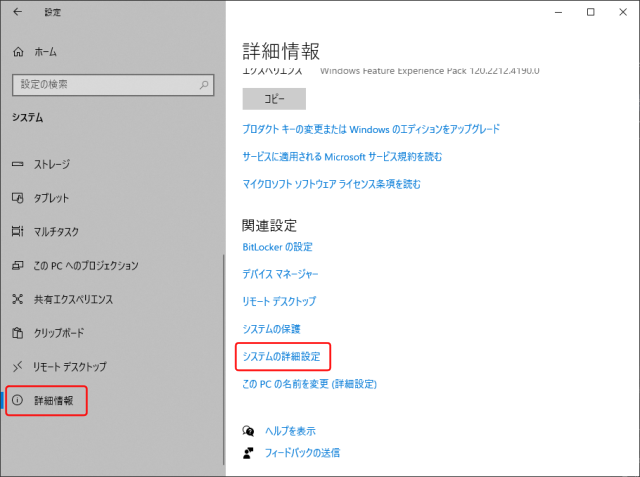 Click "Detailed information" at the bottom of the menu on the left side of the screen.
Then click "Advanced system settings" on the right side of the screen.
Click "Detailed information" at the bottom of the menu on the left side of the screen.
Then click "Advanced system settings" on the right side of the screen.
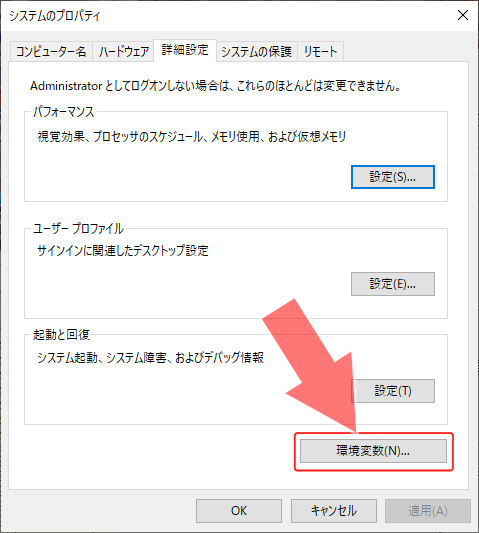 The “System Properties” screen opens.
Click "Environment Variables" at the bottom right of the screen.
The screen will look like this.
You can check and change the Windows system environment variables in the "System environment variables" column.
Click "New" to add a new environment variable.
Select any environment variable and click "Edit" to edit the environment variable.
You can also click "Delete" to delete the environment variable.
The “System Properties” screen opens.
Click "Environment Variables" at the bottom right of the screen.
The screen will look like this.
You can check and change the Windows system environment variables in the "System environment variables" column.
Click "New" to add a new environment variable.
Select any environment variable and click "Edit" to edit the environment variable.
You can also click "Delete" to delete the environment variable.
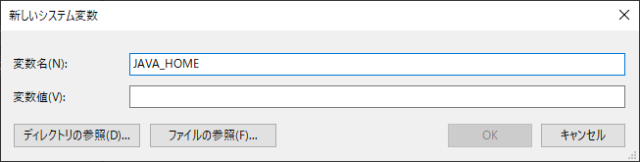 Click "New" and you will see a screen like this.
Enter the name of the new system environment variable in the "Variable name" field, and enter the value you want to set for that system environment variable in the "Variable value" field.
Click "OK" to register.
Click "New" and you will see a screen like this.
Enter the name of the new system environment variable in the "Variable name" field, and enter the value you want to set for that system environment variable in the "Variable value" field.
Click "OK" to register.
 For example, if you select the environment variable "Path" and click "Edit", the screen will look like this.
When specifying multiple paths, separate them with ";", but on this screen each item can be edited line by line.
For example, if you select the environment variable "Path" and click "Edit", the screen will look like this.
When specifying multiple paths, separate them with ";", but on this screen each item can be edited line by line.
Select any line and click "Edit" to edit that line. Click "Up" or "Down" to change the position of the line. You can change the priority of items.
If you click "Edit Text", the display will be similar to the "New" screen above. All items can be edited with ";" connected.